When reporting a Defect during test execution, the Defect details are automatically populated along with the relevant screenshot.
You can edit, replace, or delete the screenshot if needed.
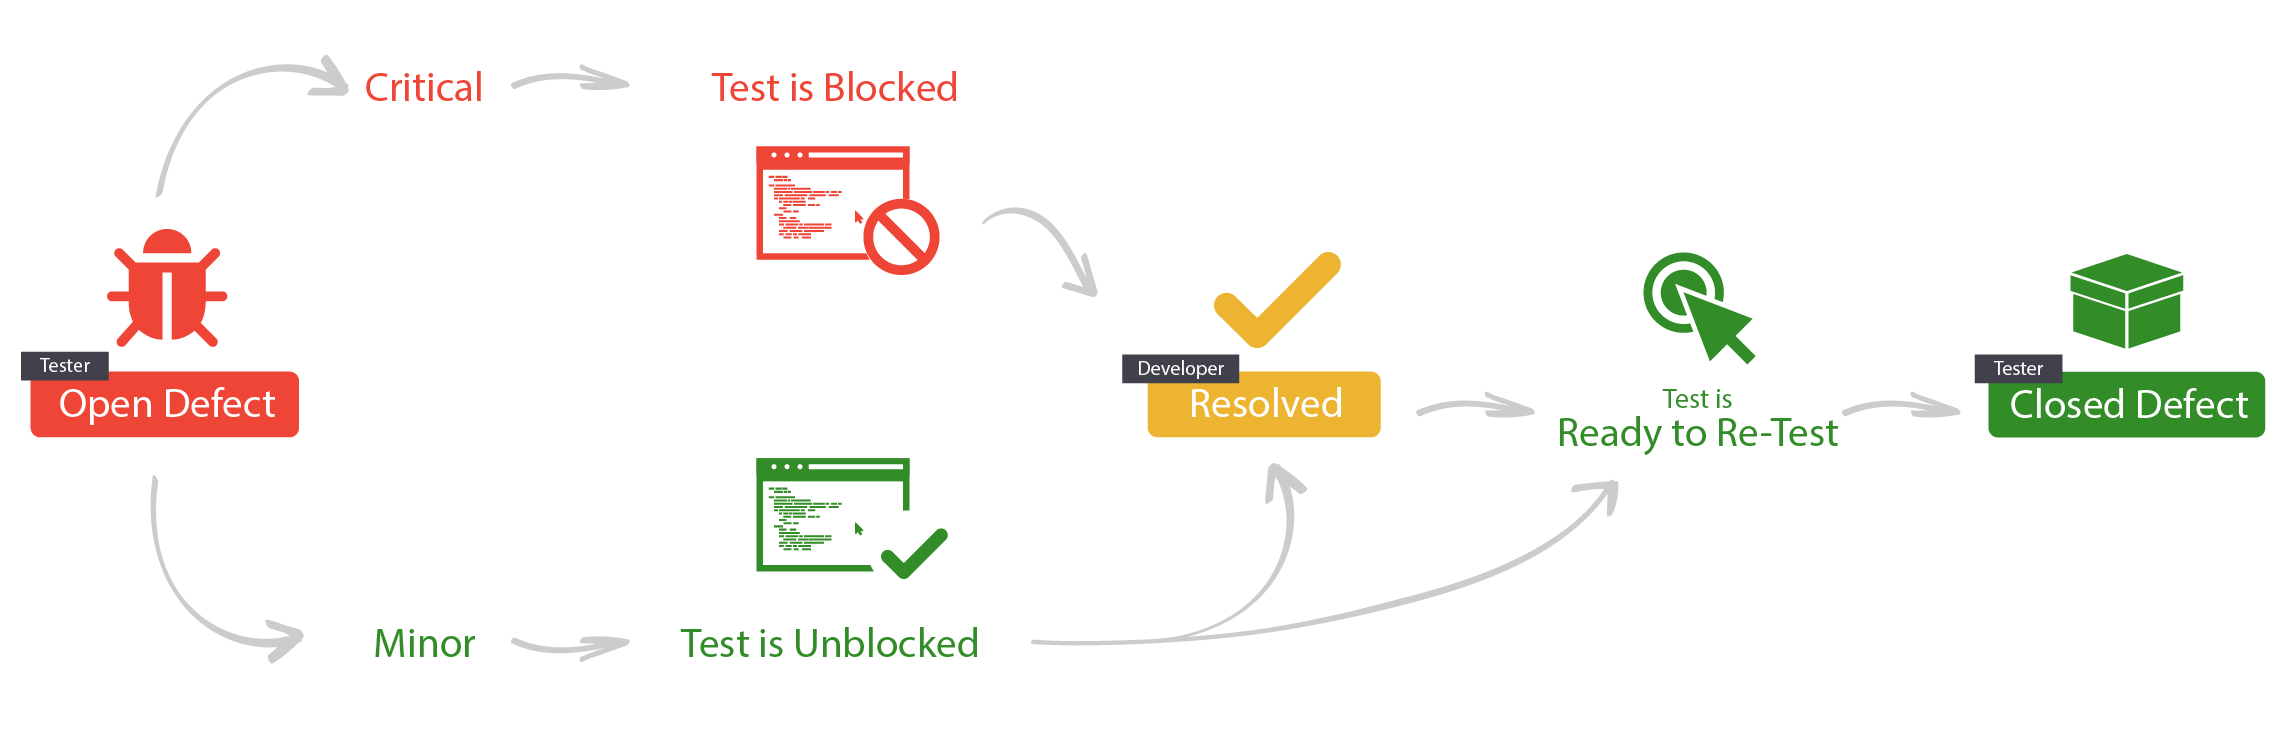
Defect Lifecycle
Defects are in Open status by default and are usually reported by testers. The developer can then resolve them and, finally, the tester can close them after retesting.
Reporting Defects from the Panaya Recorder
If you come across a defect during your test, you can report it immediately.
At any point during the recording, hover over the flashing red circle and click on the arrows to expand the Panaya Recorder. Then click the Defect button
The Defect details page opens.
Fill in the defect details, screenshot, etc., and click Save.
The new defect is automatically assigned with a defect ID, name, priority (High by default), and a reporter (Created by).
Reporting Defects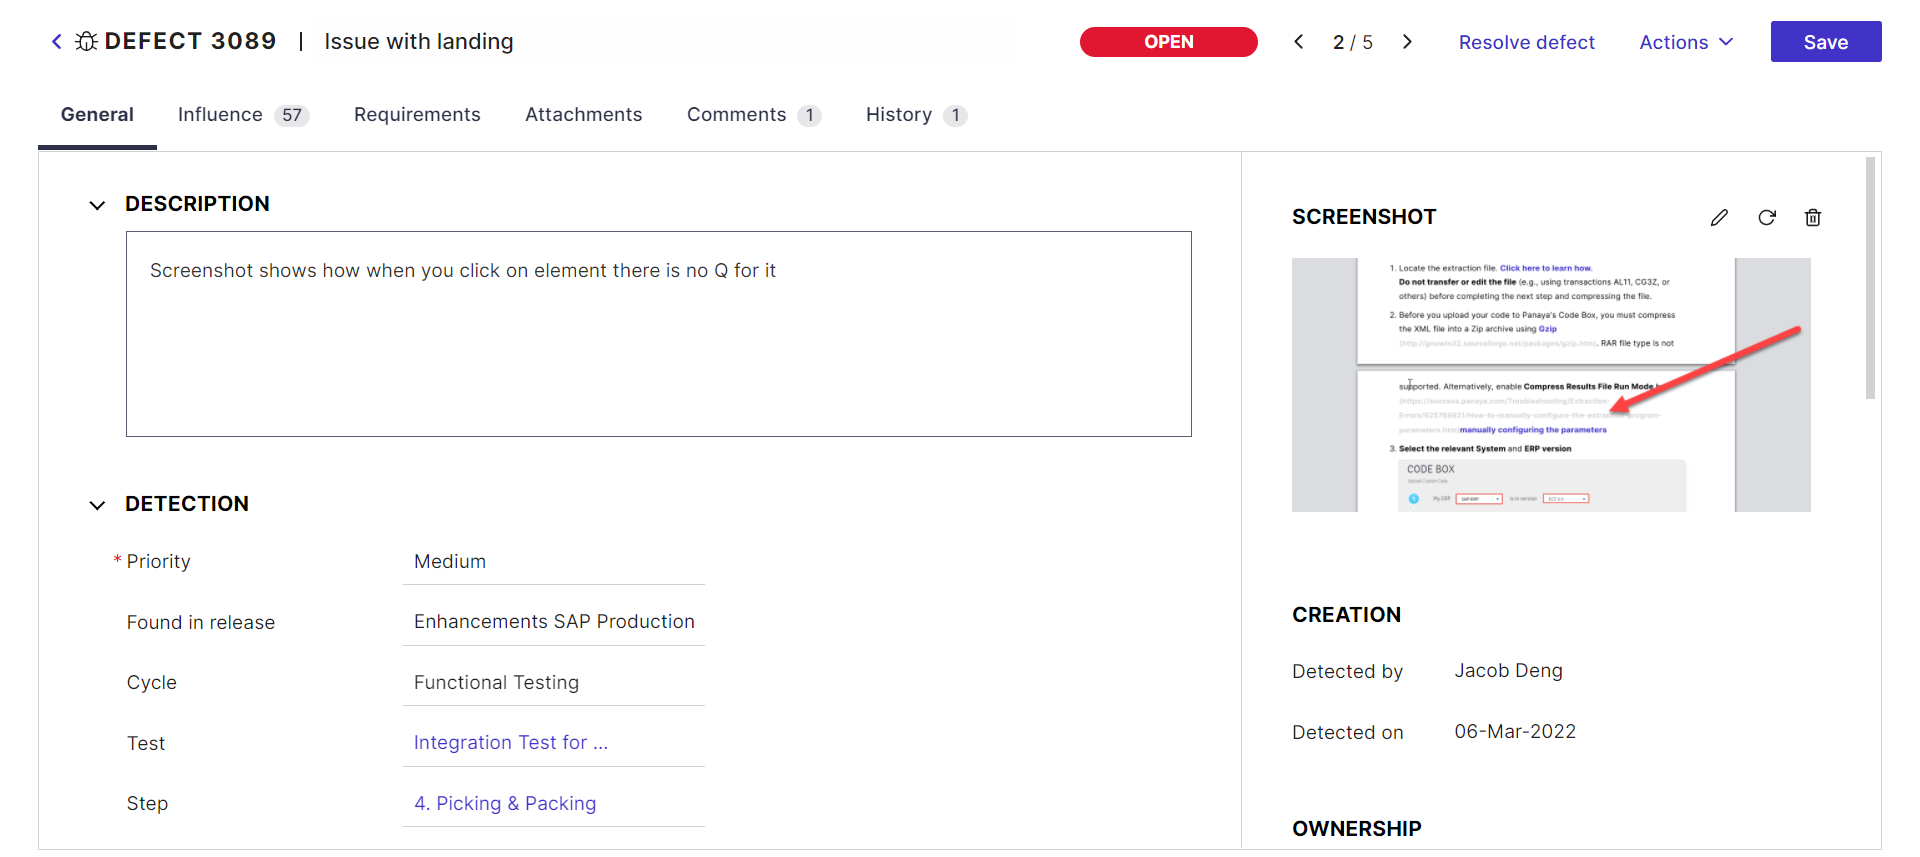
Tip!
To allow testers to continue to the next step of the test, despite the new Defect, select No for Blocking next step.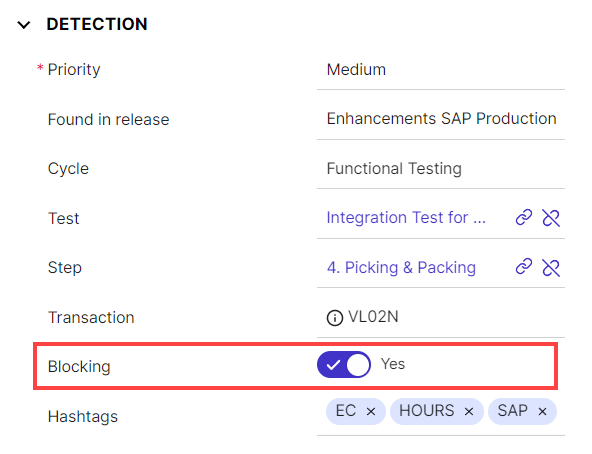
See also