This article is about Quick Tests
Click here to learn how to record automation scripts using ScriptBuilder
Deprecation Notice
This feature has been deprecated as of the September 2025 release. It will remain fully supported for existing customers but will no longer receive enhancements or updates. We recommend transitioning to our Test Automation solution, which offers advanced capabilities for faster, smarter, and more scalable testing.
With Panaya’s Quick Test feature, you can create a well-planned testing catalog with detailed scripts that include input and output values, expected results, and activity screenshots.
Creating a new Quick Test
Hover over the Tests tab and select Test Tree.

Highlight a Cycle, Folder, or Business Process. Right-click on it and select Add Quick Test.
No Cycles? Click here to learn how to add a new Cycle.

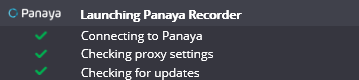
Launching the Recorder
Click on the Quick Test activity created in the previous step and select the Script tab.
Quick Tests appear in the tree view with this icon .
.
Click the Record button to launch the Panaya Recorder.

Recording Options
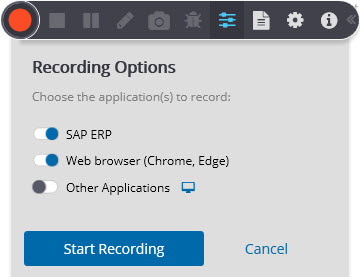
Select Recording Options  to determine what applications should be captured -
SAP ERP
Select this option to record your SAP ERP session. Your test evidence will pick up the fields used, input data, etc.
Browser (Chrome, Edge)
Select this option to record business processes performed on a web browser such as Fiori, SAP Portal, WebDynPro, 3rd party web application, etc.
This option supports Google Chrome and Microsoft Edge browsers only and requires the installation of browser extensions.
Other Application
Use this option to capture other applications such as Microsoft Outlook, Microsoft Excel, Windows Folders, or any other screen activity not performed in your web browser or SAP ECC6.Use Other Applications if you need to capture Adobe Flash applications or screens.
Can I select more than one option simultaneously?
Yes. If you select SAP ERP & Browser (Chrome, Edge), your Test Evidence will include activities performed on SAP and your browser. Activities will be grouped by application/transaction.
During the recording, you can add the Other Applications option.
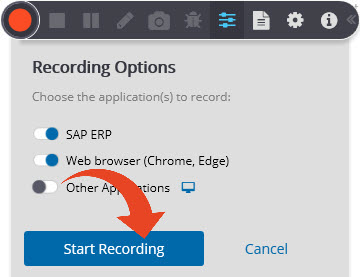
Begin Capturing
When you are ready to begin capturing, select the application to record and then click Start Recording
Important!
Panaya allows a maximum idle time of 30 minutes while recording.
Any idle time of 30 minutes or more will cause the recording to abort.
Using the Recorder
At any point during the recording, hover over the flashing red circle and click on the arrows to expand the Panaya Recorder


| Pause Recording | |
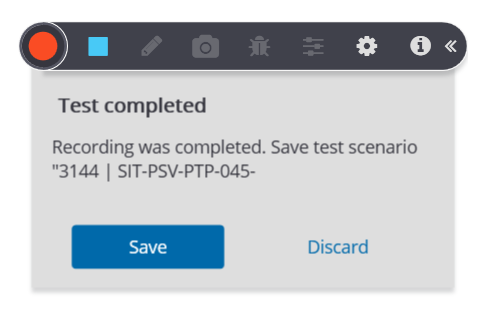
| Stop Recording
If you saved the recording, you would be able to view the Quick Test script under the Script tab | |
| Suspend Recording
| |
| Add Manual Instruction | |
| Capture a Manual Step You can also edit the screenshot by highlighting areas using text and arrows. | |
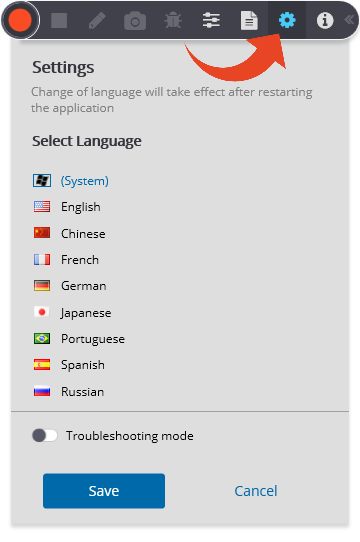
| Change Language
| |
| Troubleshooting Mode
| |
|
|


 .
.

.jpg)

 . The Description you use here will be added to your recorded script.


Quick Test Options
Planned Runs allow you to allocate test runs to multiple testers.
You can also use Data Sets to seamlessly define test variants to be executed by different teams in various locations with other input data etc.

The Script Tab
The Script tab provides all steps combined in one script, broken into the different steps of the business process. This script can be exported to Word, Excel, or PDF, and depending on the need, can be edited using the functions within the steps.
Use the Edit Step button to change a value or disable an instruction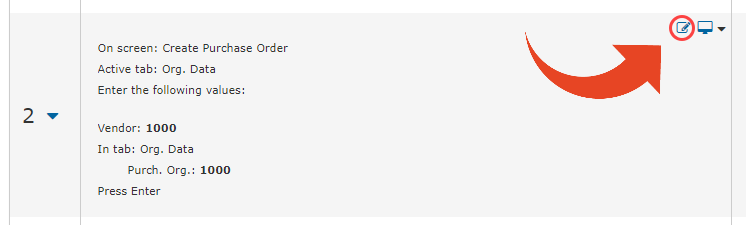
Edit your script by changing values, disabling instructions, and more
To view a screenshot of the recorded step, click the Screen icon
 .
.
Click the little arrow next to the screenshot to Edit, Replace or add a screenshot .
.
The Planned Runs Tab
The Planned Runs tab will automatically include an execution activity for the entire test, based on the converted combined steps. Here is where you can execute a Quick Run.
The Data Sets Tab
Data Sets enable you to define a range of data to be used when executing the test. Click here to learn more about Data Sets.