Fill out missing data instantly, with AI!
To view the Test Details page -
Hover over the Tests tab and select Test List or Test Tree.
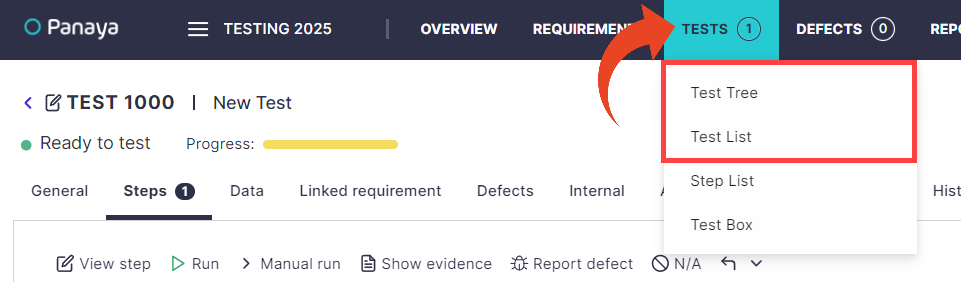
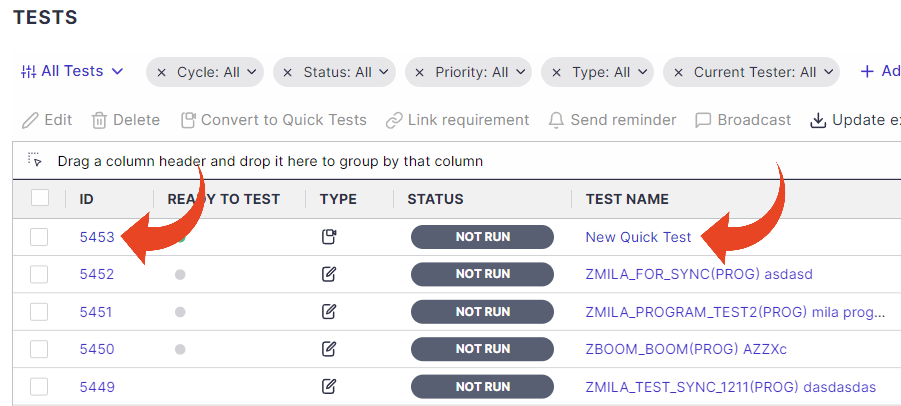
In List view - Click on the test ID or Name.
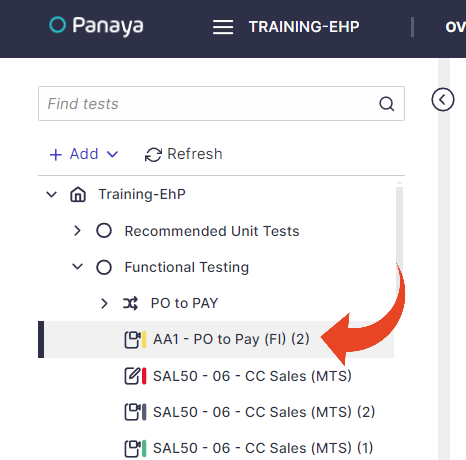
In Tree view - Click on the test name in the tree.
Tip!
The project search allows you to browse through all the tests in the project and display the recently viewed items.
Test Tabs
This allows teams to improve their test assets quickly while minimizing manual effort.Test Tabs
The Test Details page consists of a test header and several tabs -
Steps / Planned Runs
Script (for Automated Tests)
Defects
These are in addition to any custom tabs configured for your project.
Looking for the Script, Planned Runs, or Data Sets tabs?
This article is about the information and instructions for a Standard Test.
To learn how to create and record a Quick Test script, click here
Test Header

Test ID – automatically generated test ID.
Test Name - Click on the Test Name to change it. Do not include special characters (such as !@!$#^&*("") within the Test Name field.
Ready to Test Indicator
Learn more about when Tests are Ready to Test
General Tab
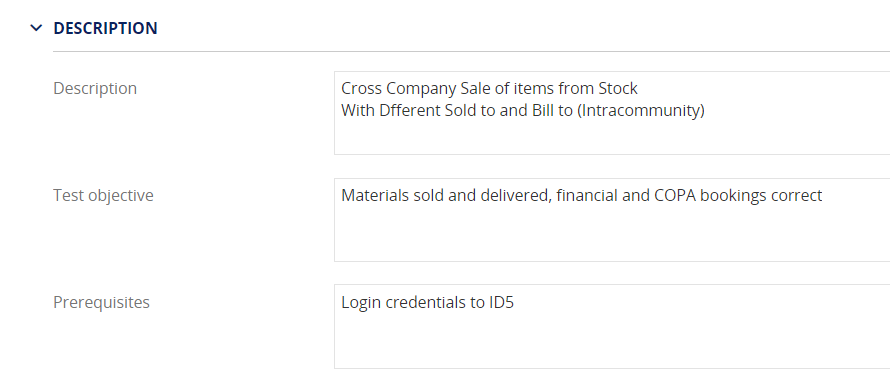
Description Section
Description, Test Objective, Prerequisites – Information that can assist the tester in performing the test according to specific guidelines
AI-Powered Test Completion
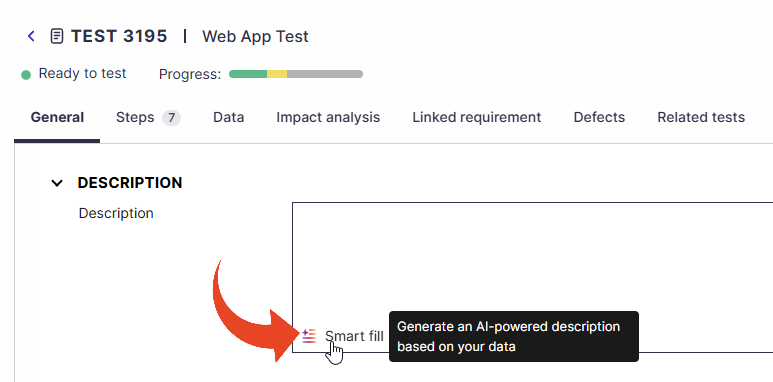
Generate Test Description with AI
Use generative AI to auto-populate the description field for your tests using the Smart Fill button. The description is based on test steps and the provided metadata, enabling the creation of clear, consistent test documentation with minimal effort. The Smart fill button appears when your test description is empty and AI features are enabled for your Panaya system.
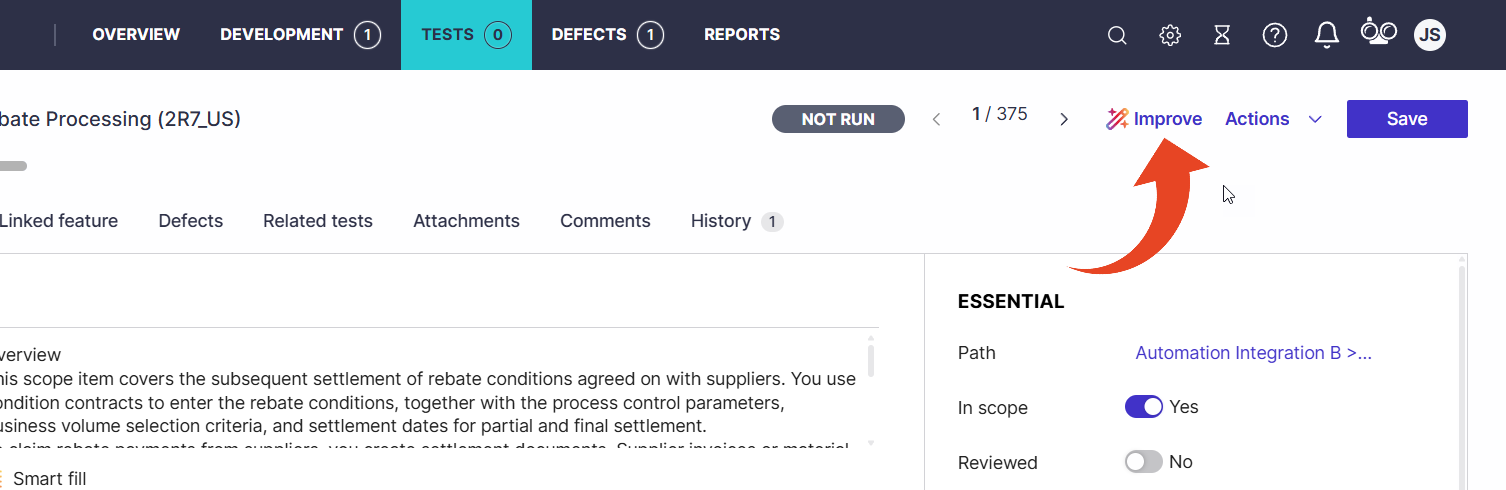
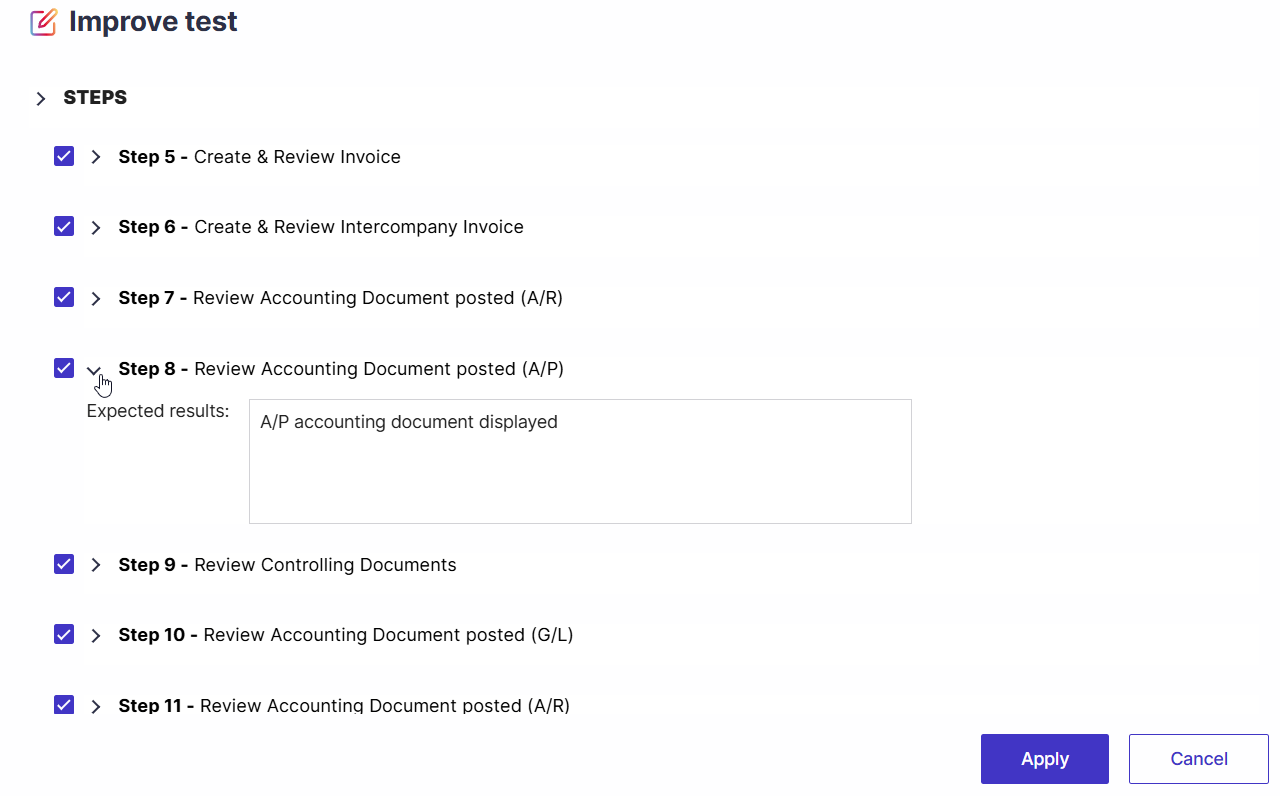
Complete Test and Steps with AI
The Improve button helps standardize and enhance test cases by automatically generating content for empty fields. It is designed for customers with incomplete or low-quality test cases who want to improve the consistency and completeness of their test repository.
The feature analyzes the existing test content and suggests relevant information only for empty fields. Existing data is never overwritten.
Use the Improve button when tests or steps are missing important information, and you want to quickly enrich them with suggested content.
Typical use cases include -
Standardizing test documentation across teams
Completing partially defined test cases
Preparing tests for automation readiness
Improving overall test quality with minimal manual effort
Essential Section
Path - This is the location in the Tests Tree, where the current test is located (i.e., the name of the Cycle, Folder, and Business Process)
In Scope - A Manager can define whether the specific test is part of the scope of that Cycle (Reports mainly account for “In-Scope” tests).
Reviewed - An additional control for preparing the tests before execution. Learn more about how to mark tests as reviewed.
Creation
On the right-hand side of the screen, you will see the person who created the test and the date when the tests were initially created in Panaya.Ownership
This is where you can define the IT owner and Business Owner of the Test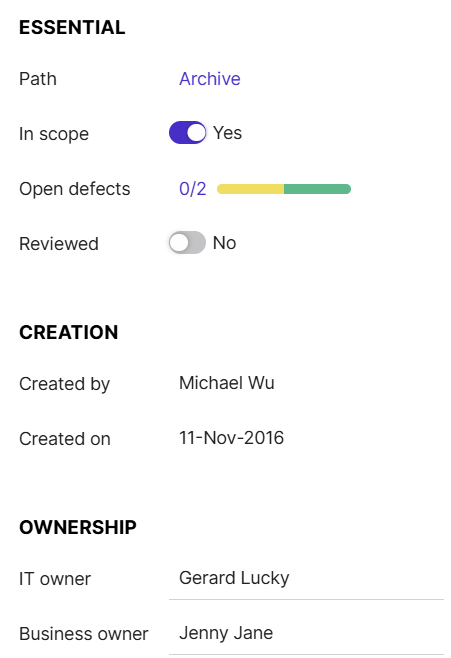
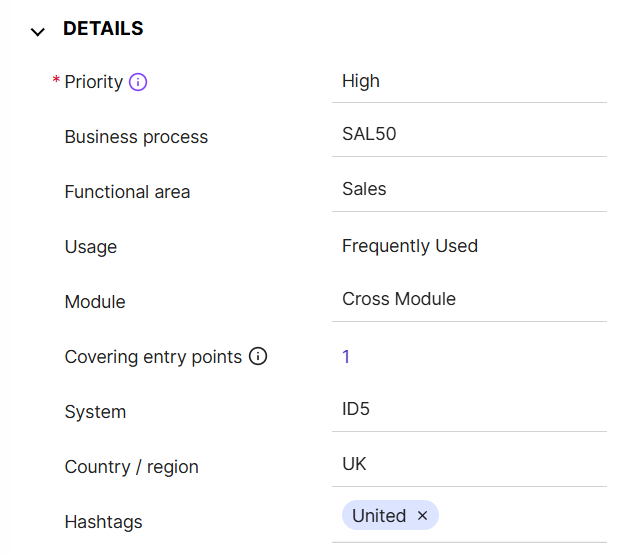
Details section
The More Details area provides additional information reflected in various reports such as the Priority of the test, the Functional Area, Usage, etc.
Work Plan Section
This includes the defined Due Date and Work Effort, which is an aggregation of all Steps' efforts combined.
Additional Info Section
This section includes any custom fields defined.
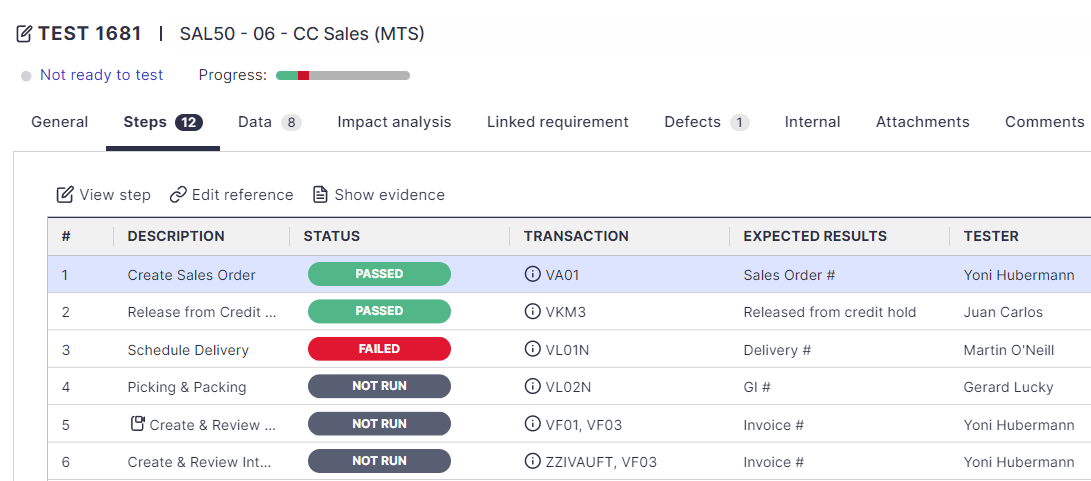
Steps Tab
The Steps tab displays the defined list of activities expected to be performed by the testers. Each step should be assigned to a tester and be reported with a current Status. For every Test, different Steps can be defined for different Objects/Transactions or Applications. Click here to learn how to create the Test Steps.
Highlight any step and click the View Step button to view the Step details.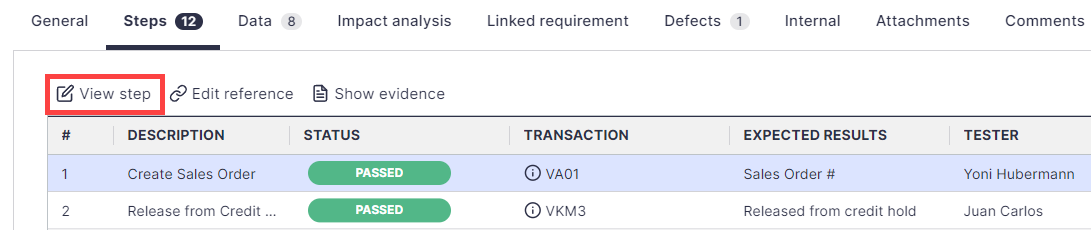
Tip!
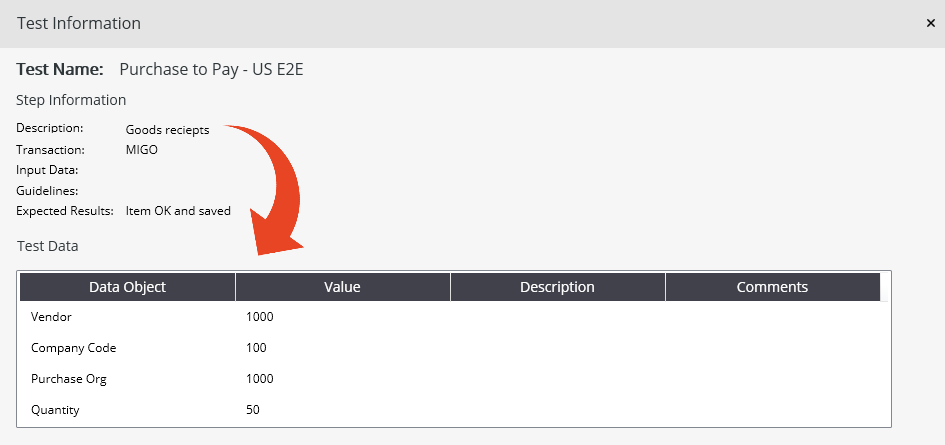
Data Tab
The Data tab provides shared data that is relevant for all the steps in the test.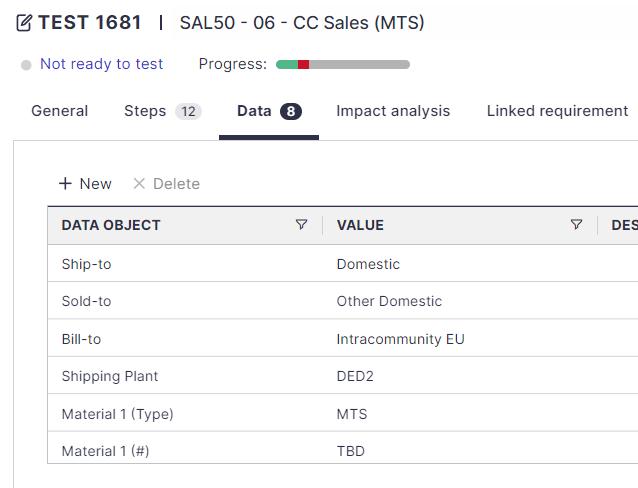
During test execution, this data will be available to the tester from the View Test Information button.
Learn more about the Panaya Testing Tool for SAP | Oracle | Web
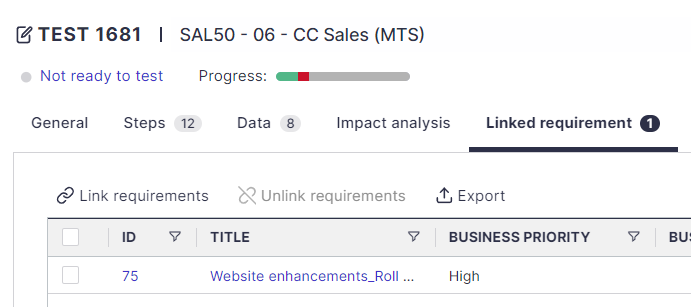
Linked Features / Requirements tab
If the test is linked to one or more requirements, these will appear in the test's Linked Requirements tab.
This is also where you can link Requirements to the Test activity.
Learn more about Requirements Traceability.
Attachments Tab
The Attachments tab allows the user to attach any relevant artifacts.
The maximum attachment size is 10 MB per file.
To attach video or EXE files, archive them as ZIP and attach them to the test activity.
Comments Tab
This tab displays free-hand comments added by users.
You can collaborate with other project users regarding a specific Test; click here to learn more.