To define Custom Tabs -
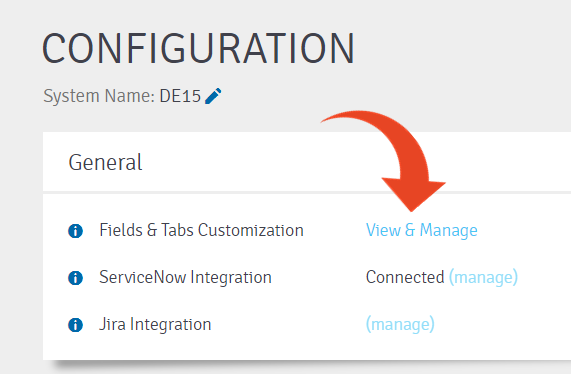
- Click on the Settings button
 to open up the Settings panel
 - Custom Fields & Tabs are defined per System, so select the relevant System from the drop-down list

- Select to View & Manage Fields & Tabs Customization
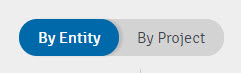
- Select the By Entity view
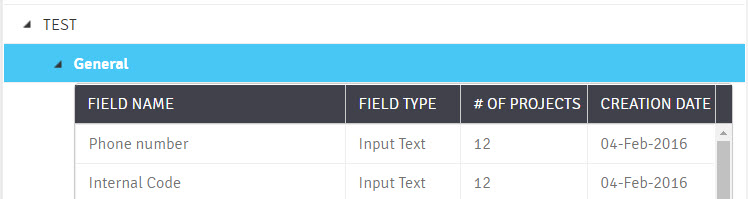
You will be able to see - the list of Entities (Correction, Defect, Requirement, Step/Planned Run, Test, Users)
For each Entity, the default tab for Custom Fields is shown, in addition to any Custom Tabs previously created.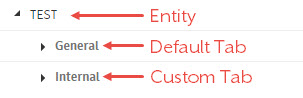
In the example below, the Default Tabs appear for each Entity.
The Internal tab for Tests is a Custom Tab.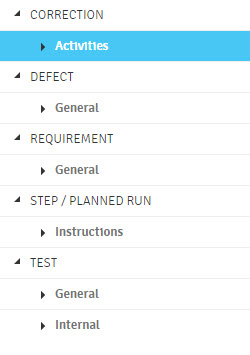
- To add a new Tab, highlight an existing tab of the relevant Entity and click the New Tab button
In the example below, the new Tab will be added for the Test Entity
- Define the Tab Name
Below the Name - verify that this tab is being added to the desired Entity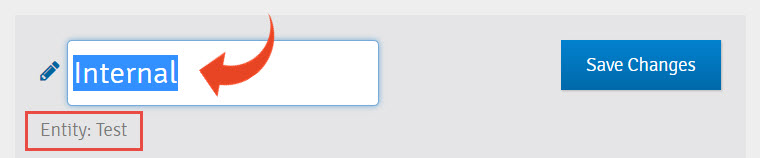
- Save Changes
- You will be able to see the new tab highlighted, below the Entity
- Now proceed to add new fields to your newly created tab
Click here to learn how