Input parameters allow you to set parameters that can be populated through pre-defined data sets for each script execution. Each Planned Run can then be associated with a data set. When executed, the script will use the associated data set values for each pre-defined input parameter.

Define Input Parameters
Before you can associate data sets for each planned run, you need to pre-define the input parameters for your script in ScriptBuilder.
Converting Recorded Values to Input Parameters
The easiest way to create input parameters is by converting pre-recorded values to input parameters. This method creates an input parameter and replaces the static value in the instruction with a dynamic input parameter that can later be used in data sets.
Click the Actions button for an existing instruction and select Convert to input parameter.

Set the name for the input parameter and keep or change its initial value. Then click Add.

Converting Multiple Recorded Values
Instruction parameters allow you to replace input values in an instruction with dynamic parameters, so the same instruction can be reused with different data. Only the entered value can be parameterized. The action itself and the target UI element is kept unchanged.
Supported examples -
“Enter 1000 in the Amount field” → parameterize 1000
“Set delivery date to 01.01.2026” → parameterize the date
“Enter Customer A in the Customer field” → parameterize Customer A
Note
Whether a value can be parameterized depends on the ability to reliably identify the underlying UI element at runtime. When the element or its structure is dynamic, parameterization may not be available.
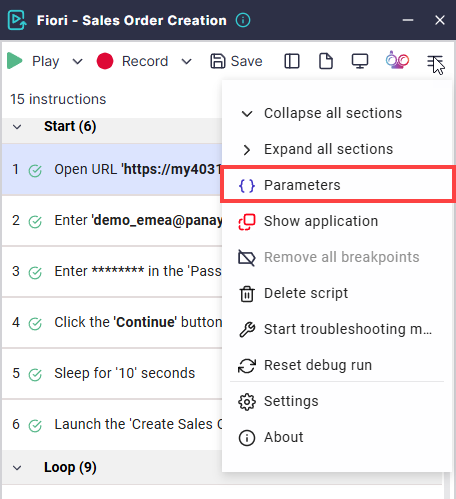
Click on the Menu button and then select Parameters.

Select the parameterize all the values option.
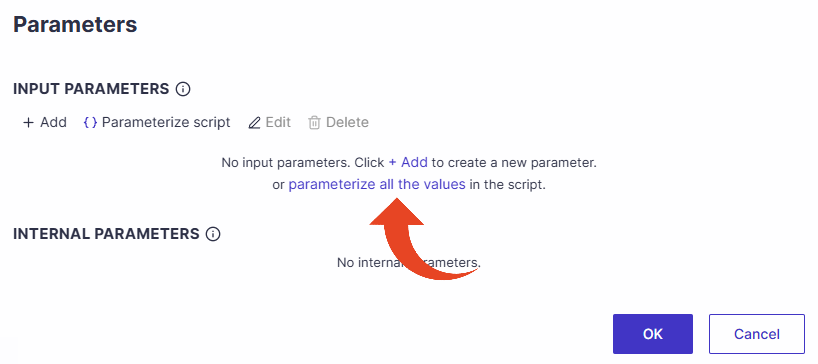
If your script already includes input parameters, use the Parameterize script button.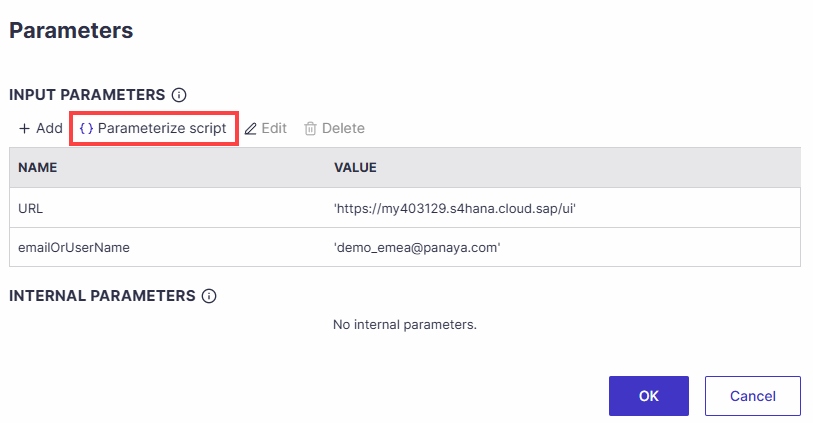
Select the values you wish to convert to input parameters and click on Parameterize selected. You can edit the parameter names later. Some values are automatically recognized as sensitive and are encrypted.

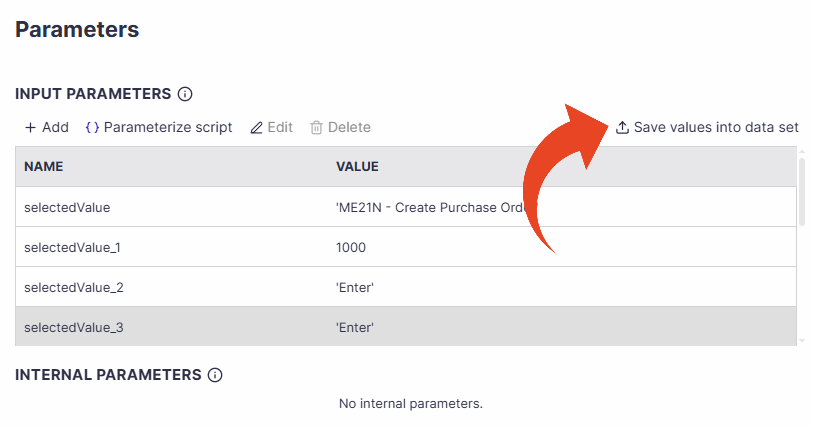
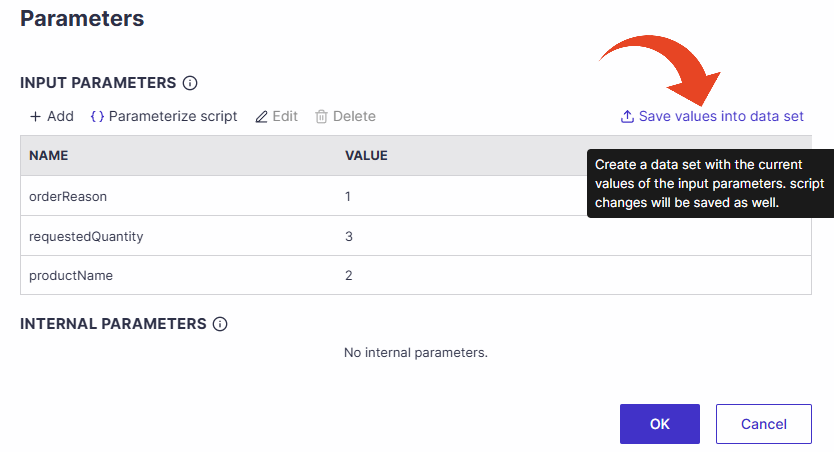
You can save the recorded input values as a data set, ensuring they remain available beyond this ScriptBuilder session.
You will be able to set the name for a new data set, or overwrite an existing.Note
Using this option will save any recent changes to the script.
Creating Input Parameters from Scratch
You can also pre-define input parameters from scratch. Once configured, the new parameter will appear in the Data Set tab for the automated test.
Click on the Menu button and then select Parameters.
In the Input Parameters section, click the Add button and give the parameter a name.
You can assign a temporary value to your ad-hoc debug run for debugging purposes. Saving the script will not save the temporary value.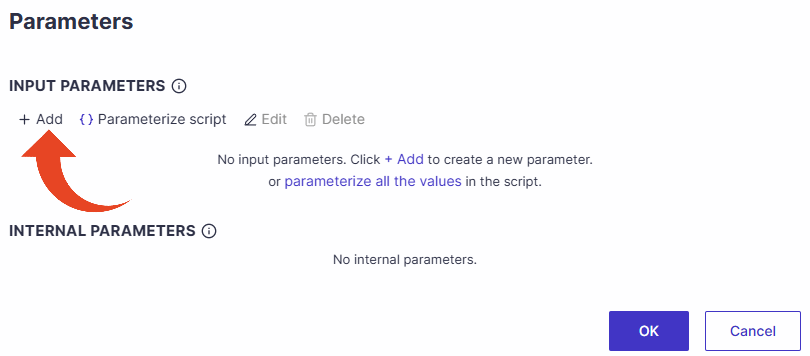
Set the parameter name and temporary value, then click Add and then OK.
You can set the parameter as sensitive.
Save your script. The newly created parameter will appear in the data set tab for your automated test.
Adding from Global Parameters
Global parameters can be searched and reused across the tree hierarchy levels when adding input parameters in ScriptBuilder. Search results include parameters at the Project, Cycle, and Folder levels, enabling quick discovery through free-text search.
Learn how to search and add Global Parameters in ScriptBuilder
Create Data Sets
You can define data sets with different parameter values that will be used for agent execution, based on the Planned Runs.
In Panaya, select the Data Sets tab of your Automated Test.

Click Add to add a new data set.
In the Data Set Name column, type the name of the first data set and double-click on Enter Value to set the value for each input parameter column.
To add more data sets, click on the Add button. Give the Data Set a name and type in the value for each input parameter column by double-clicking on Enter Value.

When you add all data sets, click Save and then Return to the automated test. Continue by adding Planned Runs.
Good to Know!
You can save recorded input values into data sets directly from ScriptBuilder’s parameters dialog, following the conversion of recorded values into input parameters.
Adding Planned Runs
Once input parameters and data sets have been defined, you can add Planned Runs and associate them with data sets.
Select the Planned Runs tab of your Automated Test. For each planned run, double-click in the data set column and select a data set from the drop-down list.
When selecting the All option, Panaya will create multiple separated runs for each of the existing data sets. Each run will execute the script with a different data set. You will be able to review which data set was executed for each run, in the automation executions view.
To add Planned Runs, click the Add button in the actions panel. Use the actions panel to delete, copy, paste, reorder, or import planned runs using an Excel spreadsheet template.

You can run each planned run by clicking on the Run Automation button. Alternatively, you can add your test to a test set and set the execution schedule.

Good to know!
To delete the Data Set parameters from the automated test, you will need to delete the input parameters that you created using the ScriptBuilder and save your changes.