Automated Tests can be executed on demand or added to a Test Set for scheduled execution. This article explains how to create and attach an automation schedule to a test set.
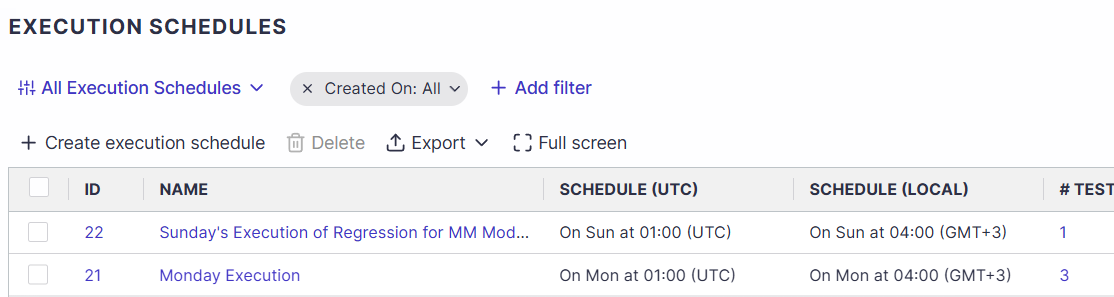
To view all execution schedules, hover over the Tests tab and select Automation > Schedules.

Schedules in UTC and Local time
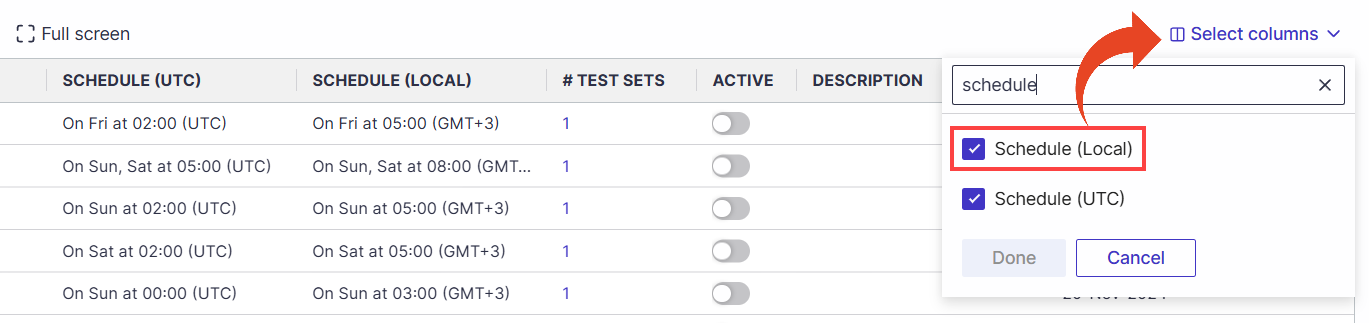
Schedules appear in the Execution Schedules list in the UTC timezone. If you wish to display the schedule time in your local timezone, add the Schedule (local) column to the list. Panaya will convert the UTC timezone set in the schedule to the operating system local time (of the user viewing the list).
Creating a new execution schedule
To create a new execution schedule, click the Create execution schedule button.

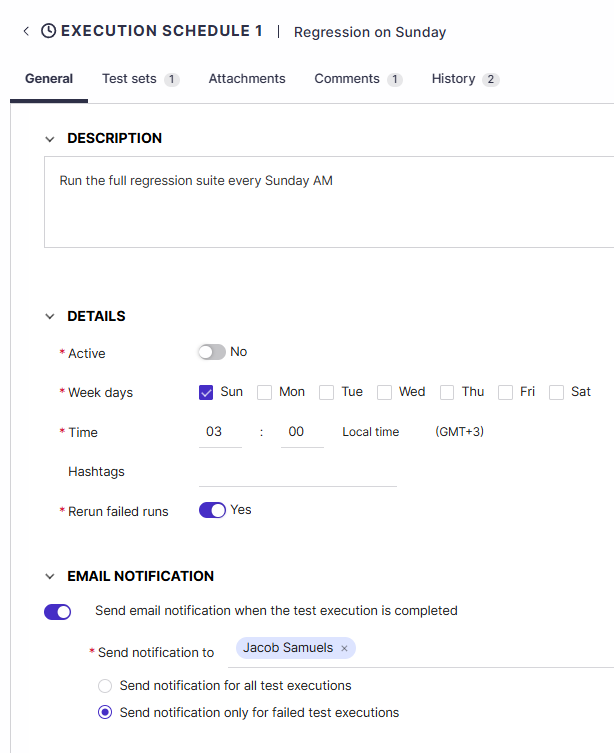
Set the name for your execution schedule, an optional description, and hashtags.
You can set the execution schedule as active or inactive. Inactive schedules will not trigger the test set execution on a virtual machine.
Specify the day(s) of the week on which the schedule should run, and select the desired time.
The Rerun failed runs option will automatically rerun failed scheduled runs, improving reliability for unstable or environment-sensitive executions. Set your schedule to “Rerun failed runs” to retry one additional run after an initial failure.
Scheduled Execution Email Notifications
Set up email notifications for users to review test execution results of scheduled runs.
Good to Know!
Emails are sent immediately after an execution is completed. However, notifications may take up to 24 hours if an execution is queued and fails to execute.

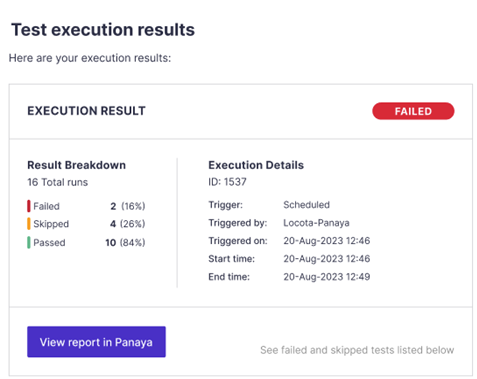
The email includes the final results, valuable metadata, and a link to the execution details in Panaya. It is also possible to set up the email only for failed executions.
Adding Test Sets
You can create a new Test Set or add existing ones to your execution schedule.
To add existing test sets, click on the Click here button.

Use the search box to locate an existing test set, or click on the magnifier ![]() button to view all tests sets.
button to view all tests sets.
Tip!
You can also click on the search box and hit the Enter key to view all existing tests sets.
Select the test set from the list and click on Add.
Attachments Tab
The Attachments tab allows the user to attach any relevant artifacts.
The maximum attachment size is 10 MB per file.
To attach video or EXE files, archive them as a ZIP file and attach them to the execution schedule.
Comments Tab
This tab displays freehand comments added by users.
You can collaborate with other project users regarding a specific execution schedule; click here to learn more.
History Tab
The history tab logs all changes to the execution schedule activity item.