With Panaya’s Quick Test feature, you can create a well-planned testing catalog with detailed scripts that include input and output values, expected results as well as activity screenshots.
Click here to learn how to manually compile your script without using the Panaya Testing Tool.
Create a new Quick Test
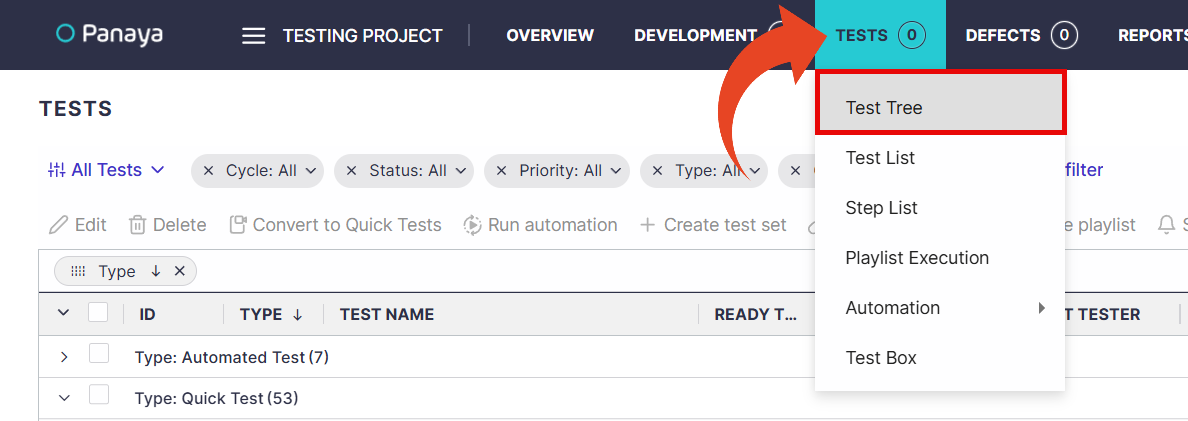
Hover over the Tests tab and select Test Tree
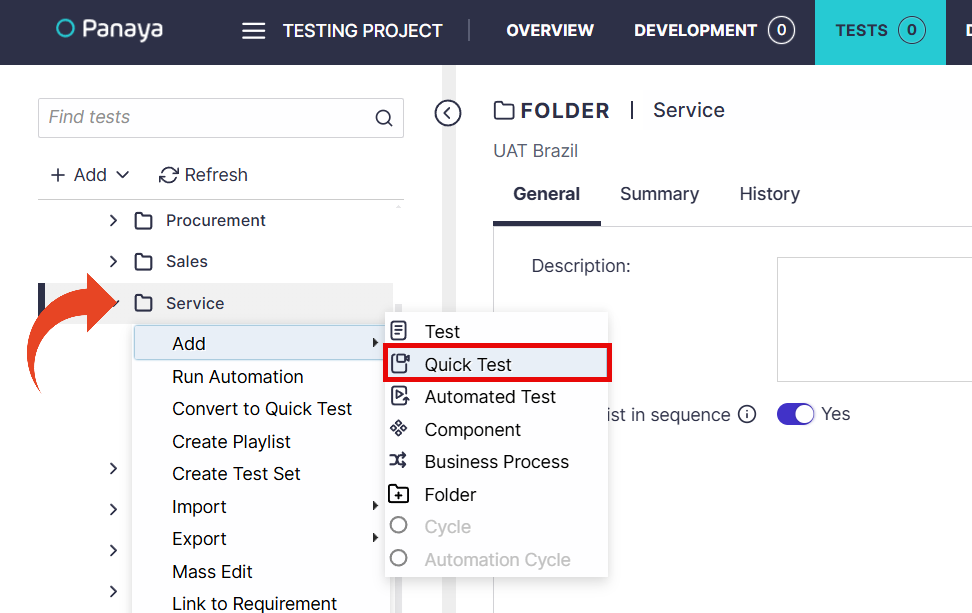
Select a Cycle, Folder, or Business Process. Right-click on it and select Add Quick Test.
Launch the Recorder
Click on the Quick Test activity created in the previous step and select the Script tab.
Quick Tests appear in the tree view with this icon .
.Click Record
 to launch the Panaya Recorder.
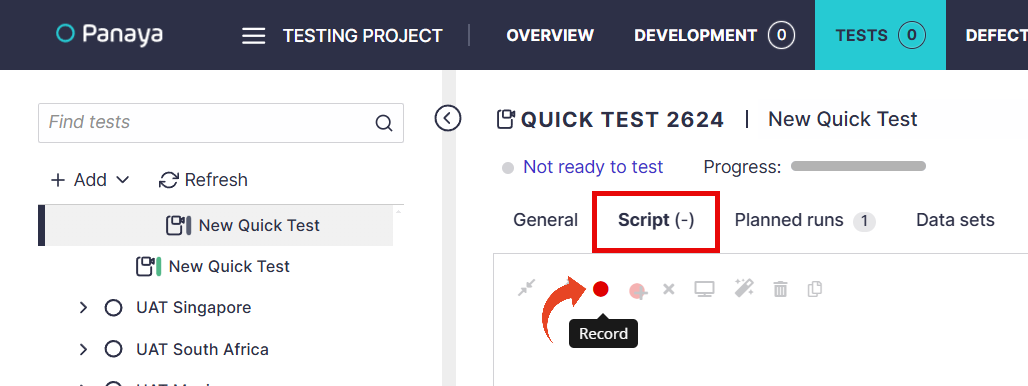
Define Recorded Applications
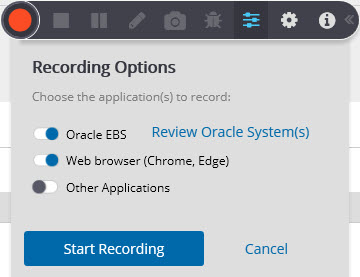
Select Recording Options  , to determine what applications should be captured -
Oracle EBS
Select this option to record your Oracle session. Your test evidence will pick up the fields used, input data, etc.
Browser (Chrome, Edge)
Select this option to record business processes that can be performed on a web browser
This option supports Google Chrome and Microsoft Edge browsers only and requires the installation of browser extensions.Other Applications
Use this option to capture other applications such as Microsoft Outlook, Microsoft Excel, Windows Folders, or any other screen activity not performed in your web browser or Oracle Applications.
Use this if you need to capture Adobe Flash applications or screens.
Can I select more than one option simultaneously?
Yes.
You can select both Oracle EBS & Other Web (IE, Chrome). Your Test Evidence will include activities performed on Oracle EBS and your browser. Activities will be grouped by application/form.
You can select both Other Web (IE, Chrome) & Other Applications. Your Test Evidence will include activities performed both on your browser and with any other application such as Microsoft Outlook, Microsoft Excel, etc.
Begin Capturing
Select the application to record and then click Start Recording when you are ready to begin capturing.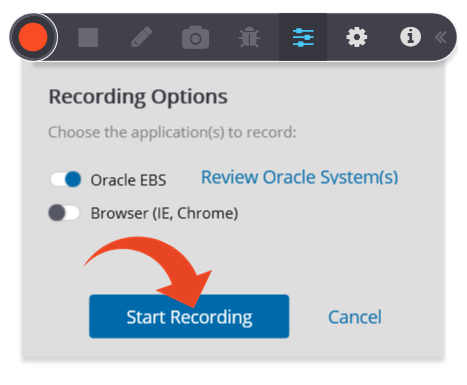
The recorder will appear in its minimized view.
You can now go ahead and perform the business process. Panaya will capture your actions according to the selected applications.
Note
If you selected the Oracle EBS option, open up Internet Explorer (only), log in to your EBS system and begin performing the business process.
Important!
Panaya allows a maximum idle time of 30 minutes while recording.
Any idle time of 30 minutes or more will cause the recording to abort.
More Options
During the recording, hover over the flashing red circle and click on the arrows to expand the Panaya Recorder.

 Pause Recording
You can pause the recording when capturing using the Browser (IE, Chrome) or Other Applications options.
The idle time when using pause is 2 hours. If you need to pause for longer, use the suspend option below.
 Suspend Recording
At any point during the recording, you can suspend Browser (IE, Chrome) or Other Applications from being recorded.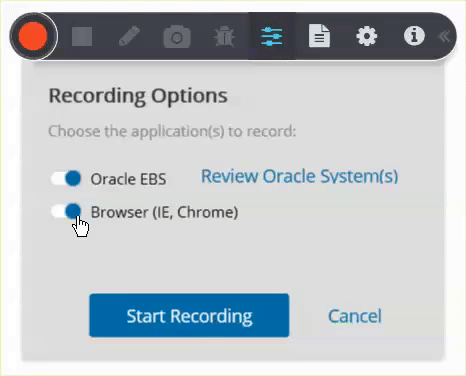
 Stop Recording
When you have completed performing all activities, use the Stop Recording button  .
.
You can then Save your recorded script or Discard it.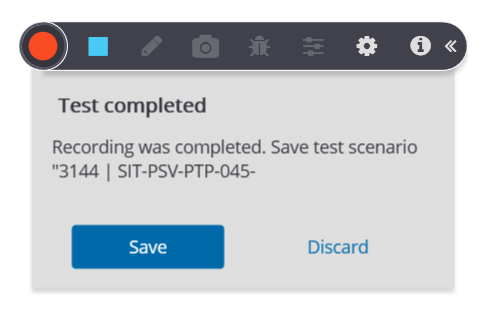
You can view the Quick Test script in the Script tab when saving the recording.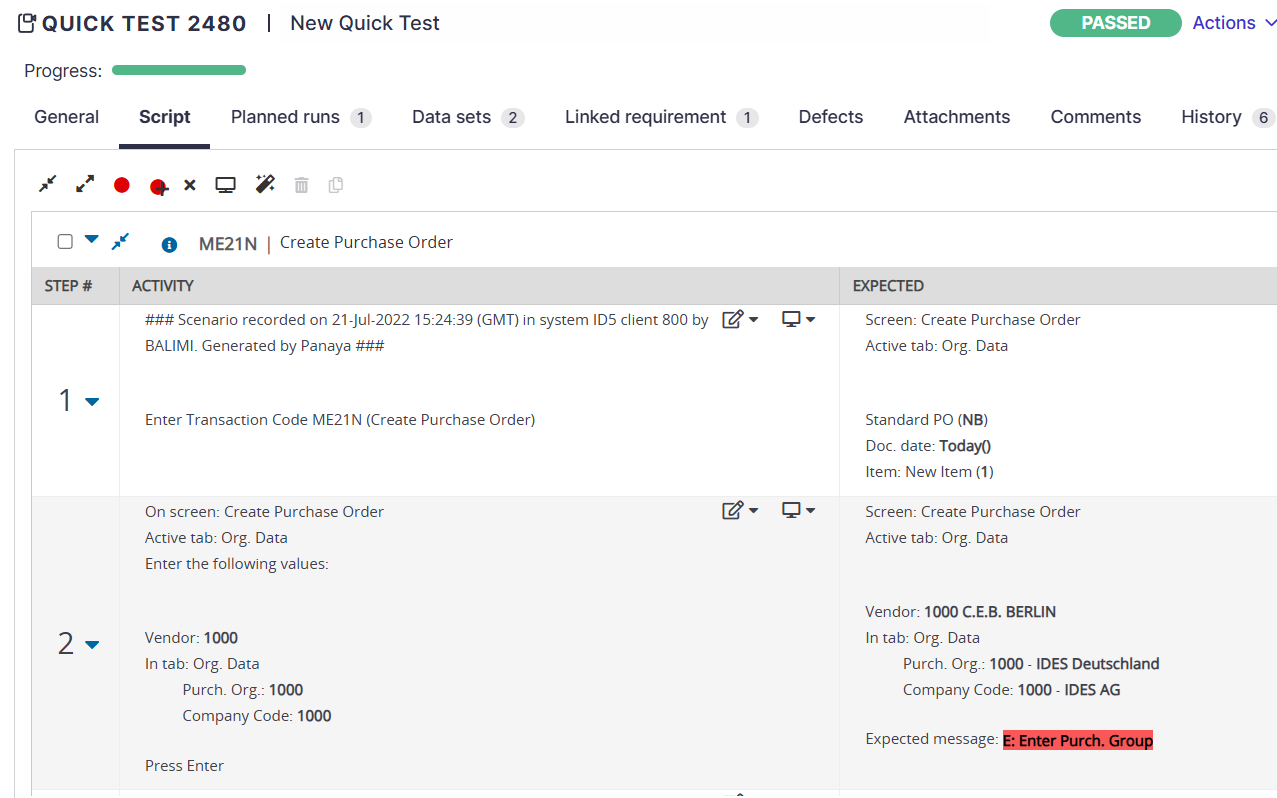
 Add Manual Instruction
If you would like to add test evidence notes during the process, click on the Manual Instruction button  . The Description you use here will be added to your recorded script.
 Capture a Manual Step
Use this button If you would like to add a step from any other application. You can select the application from the list, and Panaya will capture a screenshot.
Then add a short Description for the step captured and click Save.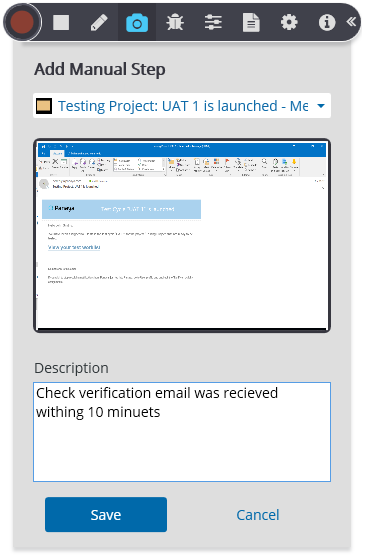
You can also edit the screenshot by highlighting areas using text and arrows.
Click here to learn more.
 Recording Options
This is where you can define which applications to record.
 Change Language
Use the Settings button to change the interface language.
Then restart the Panaya Recorder.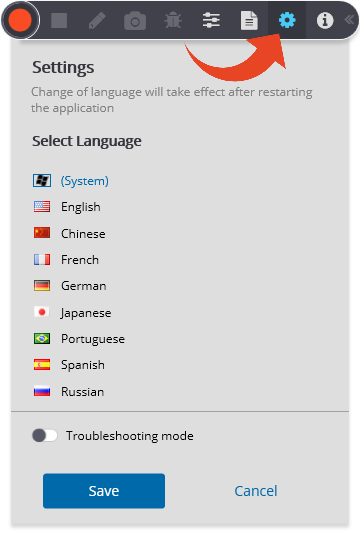
 Troubleshooting Mode
The Settings section is also where you can turn on Troubleshooting Mode if requested by Panaya Support.
Quick Test Features
In addition to the Script tab, the Quick Test activity includes the Planned Runs tab.
The Script Tab
The Script tab provides all steps combined in one script, broken into the different steps of the business process. This script can be exported to Word, Excel, or PDF, and depending on the need, can be edited using the functions within the steps.
To view a screenshot of the recorded step, click the Screen icon .
.
To add a comment to a step, click the pencil icon within the comment.
To edit a step Comment, click the arrow next to the screenshot icon and select Add comment. Click here to learn more.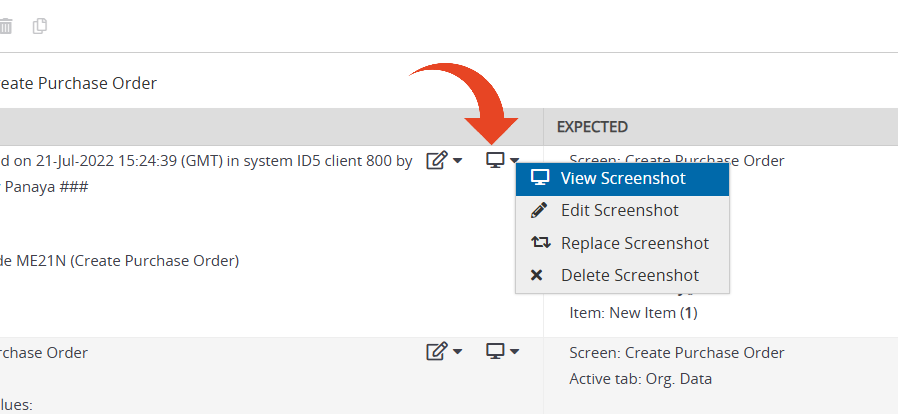
This is also where you can Edit, Replace, or add a screenshot.
The Planned Runs Tab
The Planned Runs tab will automatically include an execution activity for the entire test based on the converted combined steps.
Recommended Display Resolution & Scale
The minimum supported resolution is 1366×768, while the recommended resolution is 1920×1080 or 1920x1200. To avoid playback issues, set the scaling to 100%.
Click here for more information on recommended display settings.