Complex operations are made easy—capture and validate on-screen values to add assertions in a click. Build a reusable flow by leveraging parameters combined with advanced expressions and all date, string, and numerical functions. Panaya provides many instruction types for interacting with your application and even the option to add JavaScript code for extended capabilities.
This article describes the available ScriptBuilder instructions and how to use them in your script.
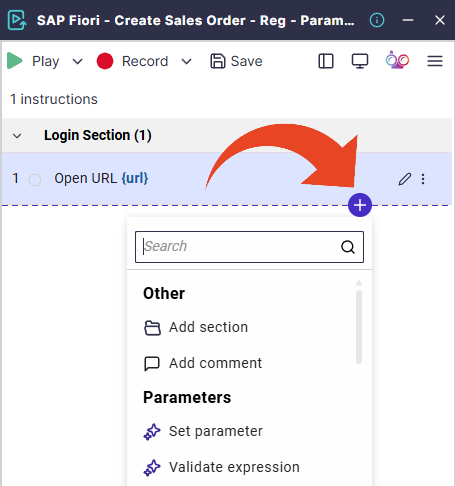
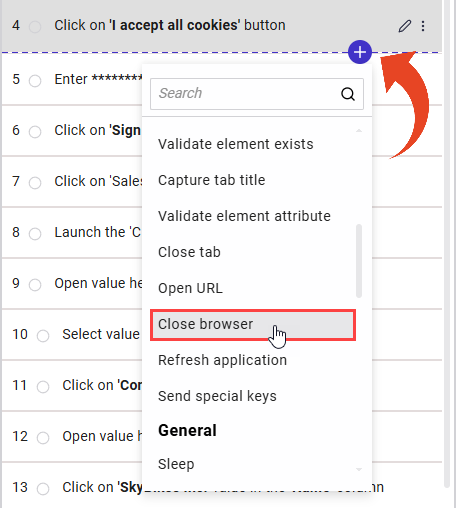
Click on the Add button  to view available instructions.
Parameters
Click here to learn more about ScriptBuilder's internal parameters and parameter instructions.
For guidelines on multi-value parameters, click here.
Application Under Test
AI Prompt
The AI Prompt instruction is a game-changer for how you create automated instructions. With the AI Prompt, you can generate automation effortlessly using simple, plain English.
Click here to learn more about AI prompt
Capture screen element
This option captures the value of a screen element while running the script and uses it as a dynamic parameter for validations and other purposes.
To capture screen elements -
In the browser triggered by ScriptBuilder, navigate to the page where the relevant element appears.
You can open the browser by using the ScrtipBuilder record or play button.Navigate to the relevant location in the script and click on the Add button
 > Capture screen element.
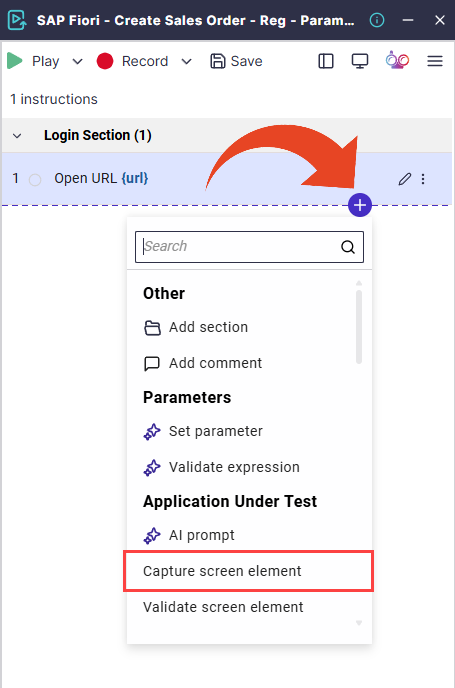

You can then define the parameter, and the captured value will populate it.
Use the Recapture button to reselect the element to capture in the application under test.

Strings vs. Numbers
Strings and numbers cannot be directly compared in expressions ('123' > 23 is invalid). Always compare numbers to numbers or strings to strings.
Use num_to_str or str_to_num to convert values when necessary.
Digits captured from the screen (e.g., 123) are treated as numbers.
Functions like Left(123,1) return a string ('1'), which cannot be compared with numbers.
Snipping Options
Snipping options allow you to parse the recorded value. For example, a specific date can be collected from a long, detailed warning notification.
Use snipping options -
Take the first number
Take a word according to its order in the string
Take the word before or after a specific word

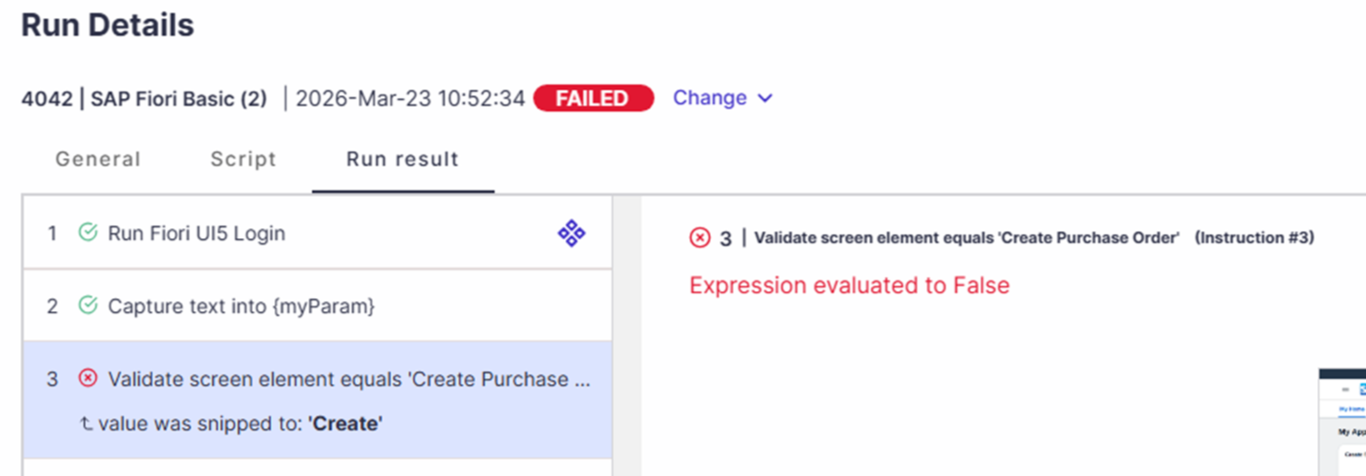
Snipped Value Visibility in Run Details
The automation run details display the value when a parameter is processed using a snip instruction.
Use AI
When the snipping option is enabled, you can choose to utilize AI and define a free text prompt, like the one below, that will specify the snipping action.

Tips for Writing Effective AI Prompts when snipping with AI
Focus on what you want to achieve — there's no need to include words like “capture”, “take”, or “remove” in the prompt.
No need to mention the parameter name in your prompt — saving the result to a parameter is handled automatically.
We recommend using AI for snipping, when other snipping options are not applicable.
Good to know!
You can use internal or input parameters in your AI prompts.
ScriptBuilder functions are not supported in AI prompts.
Create RegEx
AI allows you to seamlessly generate a supported RegEx by providing a plain English prompt like the one in the example below. 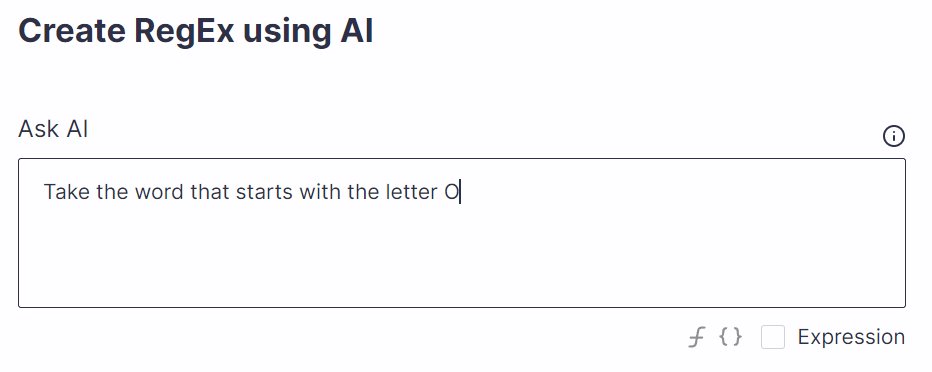


Good to know!
You can use internal or input parameters in your AI prompts.
ScriptBuilder functions are not supported in AI prompts.
Explain RegEx
If a RegEx option is used and a RegEx syntax is provided, you can use the Explain button to view an AI-generated explanation of what the RegEx syntax does.


Validate screen element
The validate screen element instruction captures the current element value in the application under test and compares it to a given value, function output, or parameter.
Click the Add button > Validate screen element.

Click on Equals to change to other available validations such as Not equals, Contains, Starts with, or Ends with.

Validate Element Exist
This instruction allows you to validate that an element appears on the screen without validating its specific text. The instruction will return True or False and this result can be kept as an internal parameter for further use in the script.

Capture tab title
The capture tab title instruction records the browser title text during a run and inputs it to a parameter value. This instruction is available for web application scripts only.

Validate Element Attribute
Use this instruction to validate HTML and CSS element attributes within web applications, allowing for better business rule enforcement.
Element attribute validation supports value operators - Instead of comparing exact attribute values, validations can target a specific value in a string, allowing greater precision when attributes affect behavior or appearance. Supported operators are Equal, Not equal, Contains, and Does not contain.
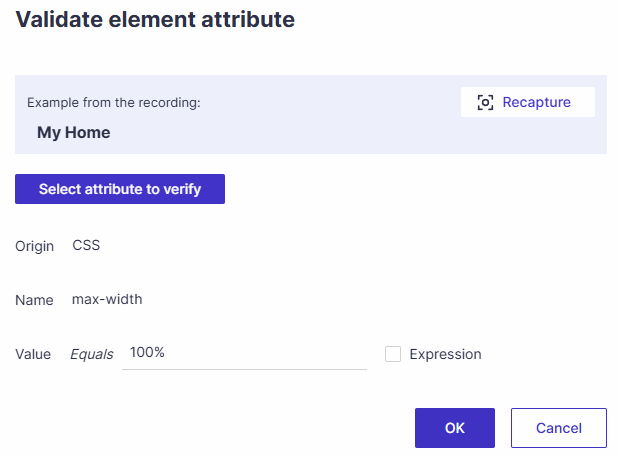
You can assign the validation results to a parameter (true/false).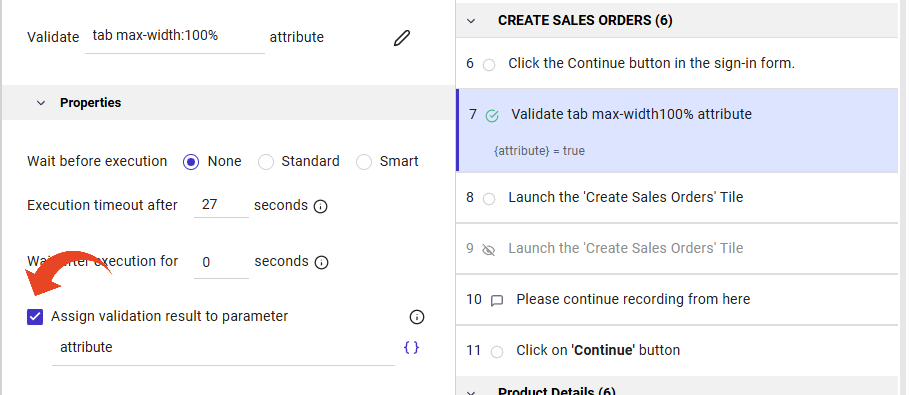
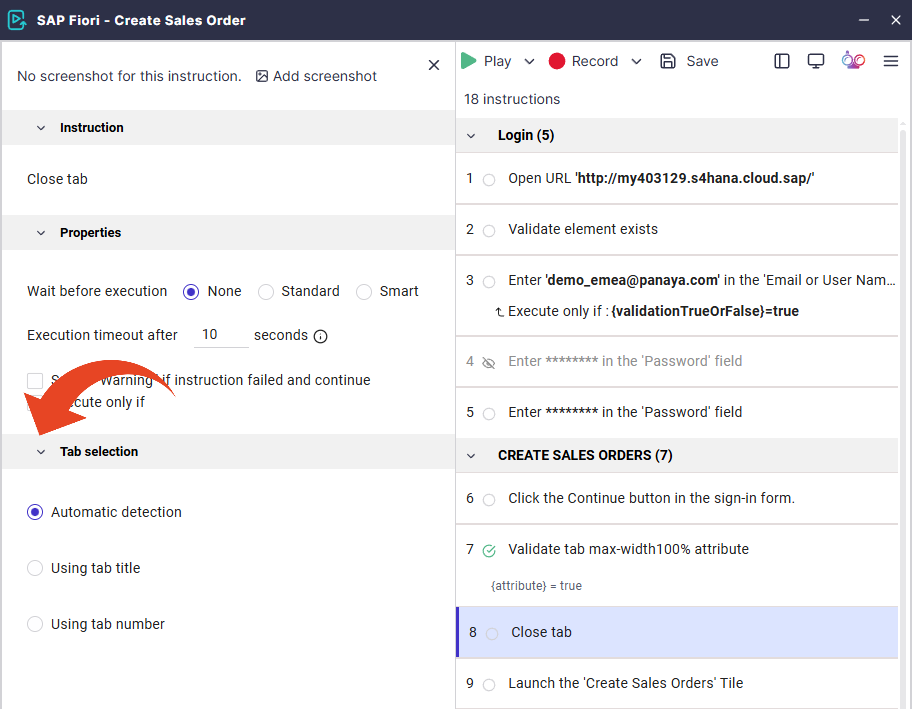
Close tab
Use this instruction to close a browser tab. By default, the current tab will be closed. You can change this in the Tab selection options of the instruction.
Open URL
Use the Open URL instruction to open a browser with a given URL. The URL can also be created using a function or a parameter.
You can select to open the URL in a new tab or maximize the browser to full-screen mode when opened.
This instruction is available for web application scripts only.

Close Browser / Close SAP Session
Use the Close Browser instructions to close the browser or the SAP session as part of the script.
Connect to SAP
Use the Connect to SAP instruction to connect to an SAP environment during script execution.
Select from the defined connections list or use a dynamic value to determine the SID.
Select the Maximize SAP GUI window option to open the SAP GUI environment in full-screen mode.
The instruction has three options -
Connect - This option will connect to the SAP environment without adding the Connect to SAP instruction to your script.
Connect and add instruction -This option will connect to the SAP environment and add the Connect to SAP instruction to the script.
Add instruction - This option will only add the Connect to SAP instruction to the script, without connecting to the SAP environment.

Refresh application
When adding the Refresh application instruction to a script, the browser windows of the application under test will be refreshed.
This instruction is available for web application scripts only.
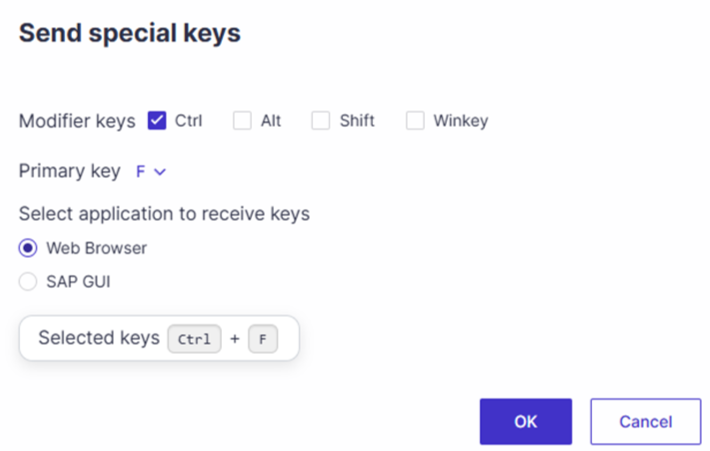
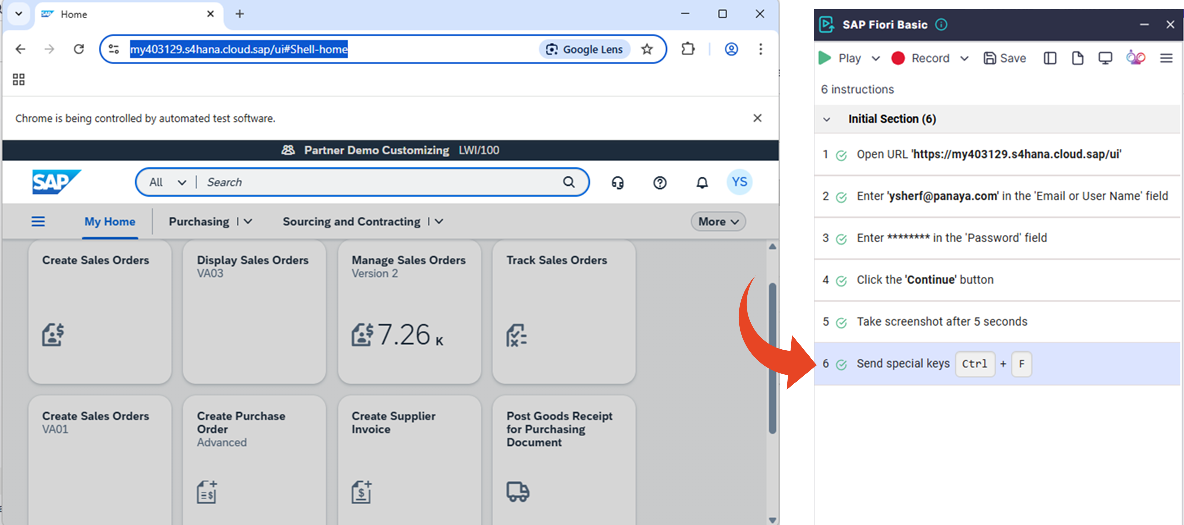
Send special keys
Use the Send special keys instruction to simulate keyboard shortcuts such as Alt+Tab and Ctrl+O.
You can select from the following modifier keys - Ctrl, Alt, Shift, or the Winkey.
Click here for the Supported special keys shortcuts for SAP GUI
See also - Send keys to Windows app
General
Sleep
Use this instruction to pause the script run for a specific period in seconds. A function or a parameter can also determine the period.
Take a Screenshot
In addition to automatic screenshots, you can capture specific moments in the script, for example, to document disappearing elements or screen changes that might otherwise be missed. This helps secure test evidence, with enforced screenshots when needed for compliance or audits. You can also add a short delay to ensure the screen is ready before capturing.
When the 'Supported Applications' field in ScriptBuilder settings is set to 'Web Browser + SAP GUI', the user must choose which application to capture the screenshot from. By default, ScriptBuilder selects the application it deems most likely to be relevant.

Execute code
Click here to learn more about executing code by the scriptBuilder or agents.
This instruction is available for web application scripts only.
Run Program
This instruction allows the execution of a program by providing a file location and optional arguments.
Arguments pass parameters to the program when it is executed. They allow users to customize the program's behavior without modifying its source code.
If running a local program, when executed via the agent, the agent will attempt to locate the program locally on the agent machine. When executed for debugging purposes via the ScriptBuilder play option, the ScriptBuilder will attempt to run the program locally on the machine where the ScriptBuilder is being run.

Tip!
You can incorperate string values, parameters and functions such as in the example below -
'--Client Name ' + {client_name} + ' --Account Name ' + {account_name}Check the “Expression” option for Panaya to be able to resolve the argument.
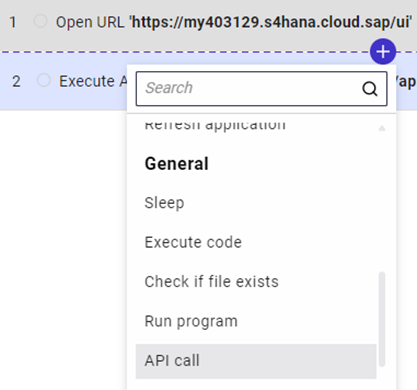
API Call
By combining UI and APIs, you can include API calls during script execution to create robust and comprehensive test scenarios.
While UI testing verifies the front end, API testing is crucial for validating backend services, retrieving dynamic data needed for scripts, and ensuring data consistency across applications.
Use the API Call instruction in your automation scripts to -
Validate Services
Check that backend services are operational and performing as expected.Data Retrieval
Obtain specific data, such as an ID or status, directly from your database or backend systems.Dynamic Parameterization
Capture values from the API response and use them as parameters in your script, enhancing the flexibility and power of your automated tests.
Integrating API calls into your test scripts gives you a more comprehensive view of your application's performance and behavior, ensuring the UI and backend services function seamlessly.

Click here to learn about API Call instructions
Files
Analyze File with AI
Use AI to scan through files, capture data, and validate it as part of your automated script. ScriptBuilder can read document files such as PDF and image files.
You can select to validate the file content or to capture the file content into an internal parameter.
The supported files are 'gif', 'jpg', 'jpeg', 'pdf', 'png', and 'txt'.


Check if the file exists
You can specify a file path location, and the instruction fails when the specified file does not exist.
When checking for a local file, the agent will attempt to locate the file locally on the agent machine when executed via the agent. When executed for debugging purposes via the ScriptBuilder play option, the ScriptBuilder will attempt to locate the file locally on the machine where the ScriptBuilder is being run.
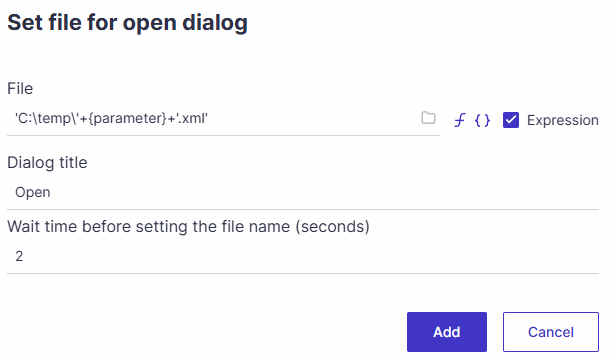
Set file for Open Dialog
ScriptBuilder can automate browsing and uploading a local file from your machine into your application under test.
To utilize this instruction -
Record a script, including clicking the element that opens the file explorer, then stop the recording.
In ScriptBuilder, add the “Set file for open dialog” instruction.
Type or paste the full path of the file, including the file name.
Alternatively, use the Browse file button to navigate to the relevant path and select the file.Type the Windows dialog Title and click on Add. In the example below, the title is “Open.”

In the AUT, manually select the file in the “Open” dialog.
Continue the recording
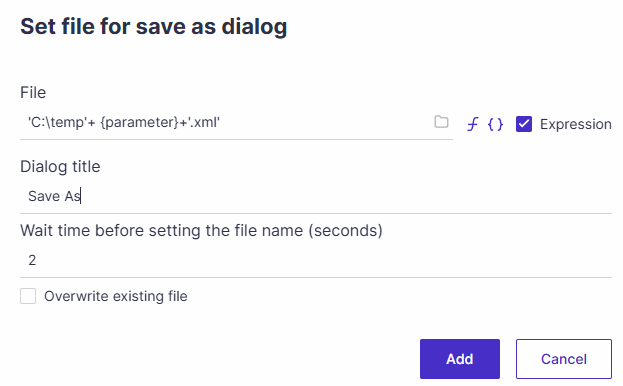
Set file for Save As dialog
Use this instruction to simulate a user clicking on the "Save As" option in the tested application.
The path specified defines the full path and filename to be saved.
If you leave the dialog title blank, Panaya will search for a generic “Save As” dialog to operate.
If the dialog title is populated, Panaya will look for a Save dialog that matches the specified title.
Check the “Overwrite if file exists” option to overwrite an existing file with the same name.
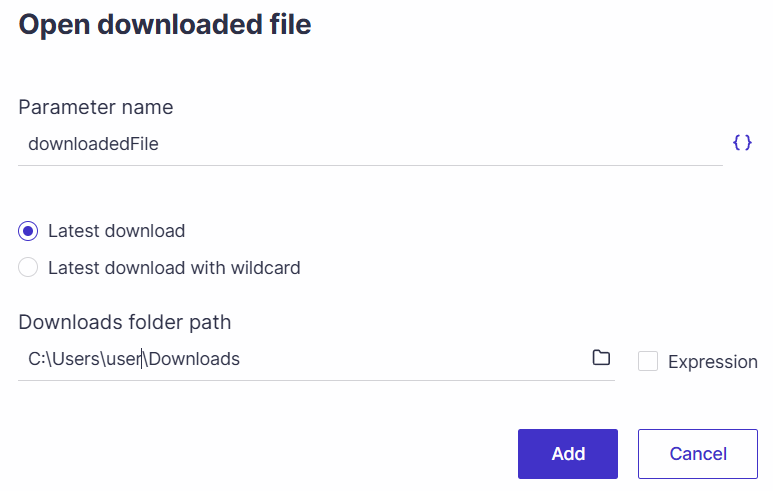
Open Downloaded File
The “Open Download File” instruction enables opening the most recently downloaded file for use in subsequent test steps. Selection options include opening the most recently downloaded file by default, or the most recent file matching a defined wildcard pattern, such as filename*.ext. An output parameter returns the full file name and path.
Use the Open Downloaded File instruction to support automation scenarios such as validating exported reports, processing generated files, verifying file content, or triggering follow-up actions based on downloaded output, reducing manual intervention in end-to-end test flows.
Flow
Run Component
Components can be run in an automated test, allowing their reuse in multiple areas of your automation repository. Instead of writing repetitive actions from scratch, you can reference the pre-existing components and create new automated scripts by combining them.
Click here to learn how to create and run components
Go to section
You can jump to another location in the script according to specific conditions using functions and parameters.
When setting up this instruction, you can define if and else conditions and jump to different sections accordingly.
Click on Add condition to add Else if conditions. You can combine up to 10 conditions.

Pass / Fail test
The Pass and Fail test instructions allow you to determine the execution results as they appear in the Automated Executions view.
Shared execution variables
click here to learn more about shared execution data between tests in the same test set.
Environment Variables
Automation scripts can set or get variables from the operating system where the script is being executed.
Set environment variable
You can use the script to inject variables that will reflect in the operating system’s user variables.
Click on the Add button > Set environment variable.

Type the name and the value for the variable and click OK.

After playing the instruction you can see the newly created variable in the User variables section for your operating system’s environment variables.

Get environment variable
Use this instruction to use a variable value from an operating system’s user environment variable and inject it into a parameter in your script.
Delete environment variable
Use this instruction to delete a user environment variable from the operating system.
Cookies
Available instructions for cookies are -
Create cookie
Get cookie
Update cookie
Validate cookie (The validation result can be stored in a parameter)
Verify cookie exists
Delete cookie
These instructions are available for web application scripts only.


Good to know
When setting Cookies to a String value we must use single quotes. The same for validating cookies.
Generate MFA code
This instruction allows uploading the QR code generated when setting up the MFA in the application under test and storing the generated one-time password at runtime as a parameter. During execution, the parameterized code can be input in the relevant field for seamless authentication.
Click here to learn more about Multi-Factor Authentication Code Handling via ScriptBuilder.

Attended
Attended instructions allow the local execution of scripts that require manual interactions during playback.
Click here to learn how to add attended instructions
Templates
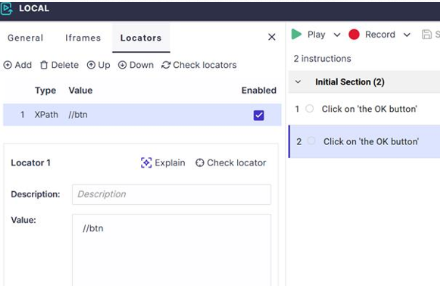
Use templates as a starting point for manually building instructions.
These instructions are only applicable to scripts running on web applications and can help you build the skeleton of the script or overcome challenges when recording.
The Add Click instruction adds clicks to your script.
The Add field Input adds inputs only to fields.
Select the instruction from the menu

When adding the instruction, use meaningful text to describe the element with which the instruction should interact (e.g., Click on the continue button, Enter create sales order in the Search field, etc.)

Click OK to add the instruction to the script.

You can either add the locators manually to direct the instruction to a specific element, or play the instruction and use the AI self-healing algorithm to locate the element on the relevant page.
Windows Automation
Use Windows Automation instructions when your recorded test needs to briefly interact with a Windows-based application as part of a broader end-to-end flow. These instructions enable limited interaction with Windows desktop elements directly from the automation flow.
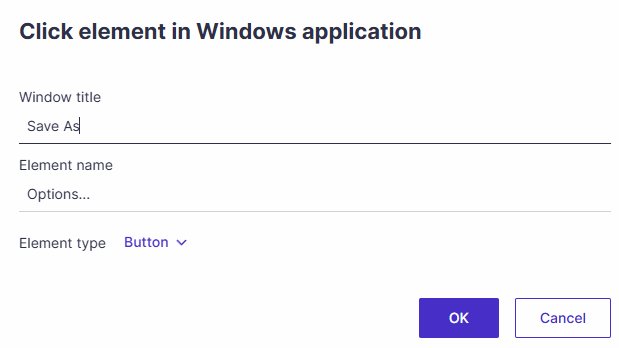
Click element on Windows application
Use this instruction to click a specific element in a Windows application during test execution.
Provide the following details -
Window title
Element name
Element type
During the run, ScriptBuilder identifies the element and performs the click action automatically.
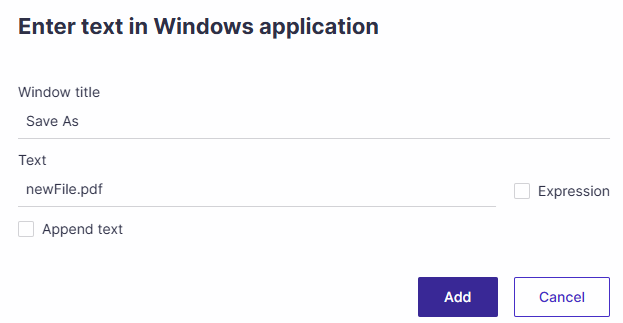
Enter text in Windows application
Use this instruction to enter text into a field within a Windows application.
Provide the following details -
Window title
Input text
Input mode -
Replace existing text
Append to existing text
During execution, ScriptBuilder enters the text according to the selected input mode.
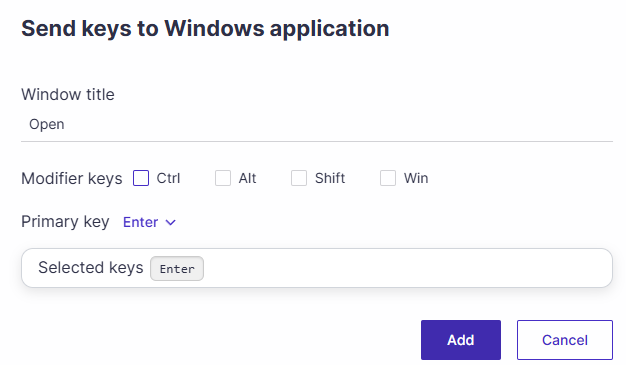
Send keys to windows app
Use this instruction to send keyboard keystrokes to a Windows application during automation.
This capability can help:
Navigate between input fields
Handle login dialogs
Trigger keyboard shortcuts
Access application search or internal functions
You can use standard keyboard keys and key combinations as part of the automation flow.