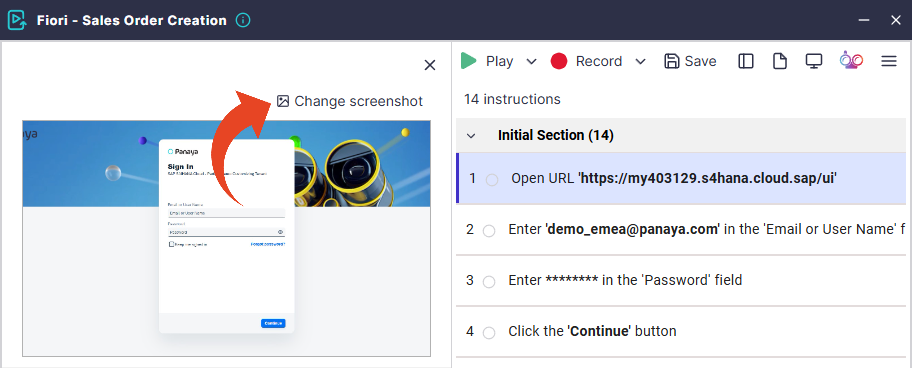
ScriptBuilder instructions can be recorded or configured manually.
Viewing and Editing Instructions
To edit an existing instruction, hover over the instruction in ScriptBuilder and click the Edit button.

You can then review the instruction screenshot (for recorded instructions), rules, and properties.
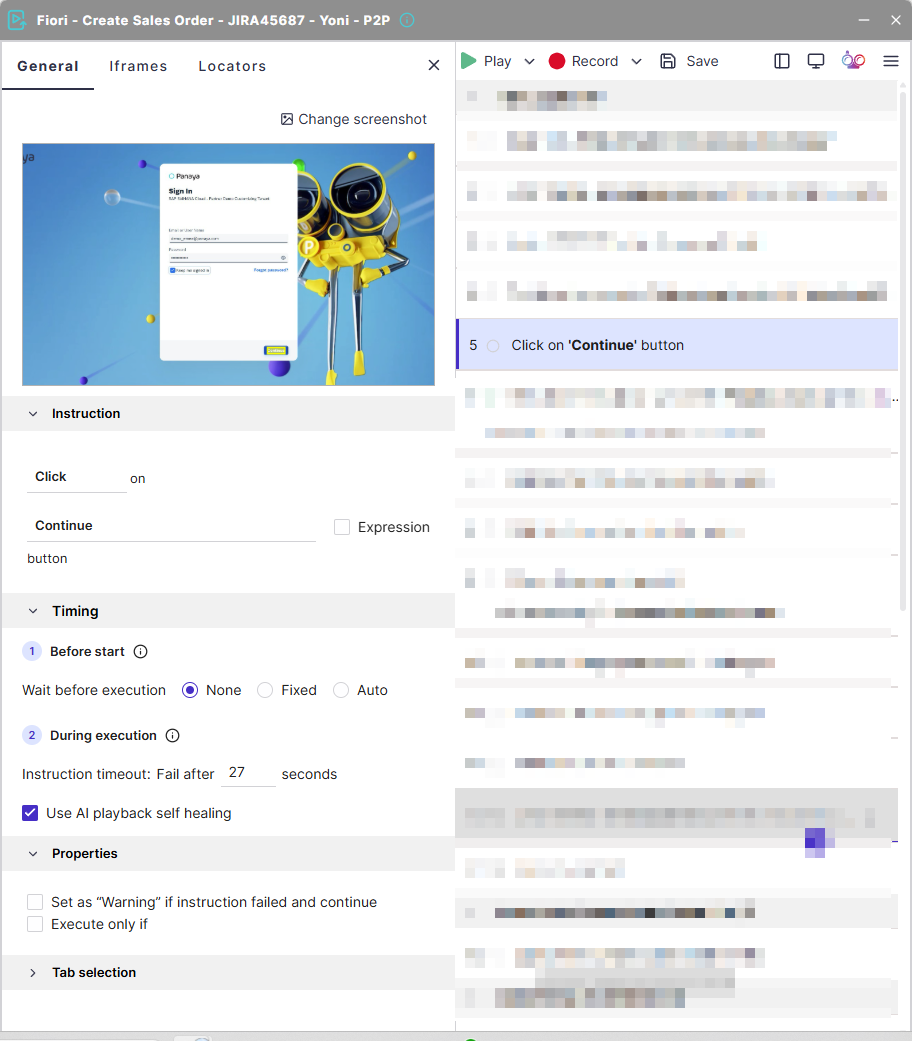
Instruction Details
You can change an originally captured input value with free text, functions, parameters, and expressions.
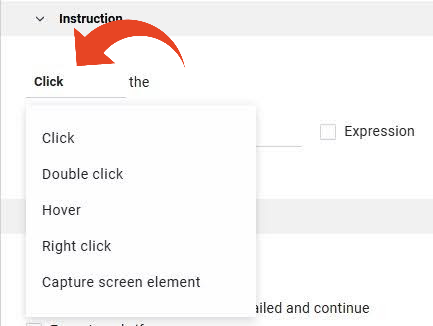
You can change the recorded mouse-click or keyboard-stroke event. For example, you can change a left mouse click to a double-click, hover, or right-click.
You can also convert any Click instruction into a Capture Screen Element instruction and keep the value as a parameter.
A keyboard Enter can be changed to a mouse left-click or double-click.

Timing
In this section, you can define the wait time before the execution and the timeout during the execution. This is also where you can turn AI playback self-healing on or off for specific instructions.
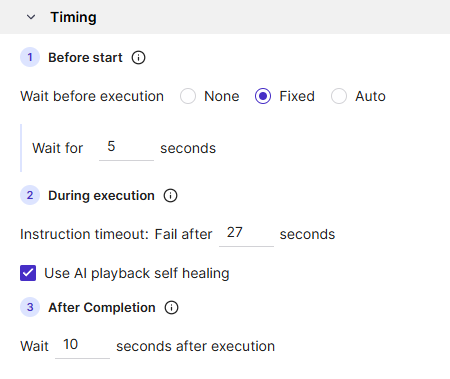
Before start: Wait before execution
The “Wait before execution” setting allows users to define a custom delay before an instruction runs, eliminating the need to manually insert “Sleep” commands, and can be adjusted to accommodate slower environments or specific timing needs.
Users can adjust the wait duration to accommodate slower machines, network latency, or application response times.
None
Executes the instruction immediately without any delay.
Fixed
Applies a predefined fixed wait time in seconds.
Auto
Dynamically determines the appropriate wait time based on execution context and system conditions.
You can set the timeout in seconds to allow Panaya to indicate that the loading traffic has finalized. If the timeout is exceeded, you can either fail the instruction or continue execution.
During execution: Instruction timeout
The Instruction timeout allows users to specify the maximum time the system waits for an instruction to complete after execution begins. If the timeout is reached, the execution is stopped and handled according to the defined error behavior.
After completion: Wait after execution
Available for some of the instructions types, and adds a delay after the instruction finishes executing. This is useful when the next step depends on background processes, UI updates, or system stabilization.
Use AI playback self-healing
You can turn AI playback self-healing on or off for specific instructions.
Properties
The properties section of an instruction allows setting it to a warning if it fails, or to execute only if certain conditions apply.
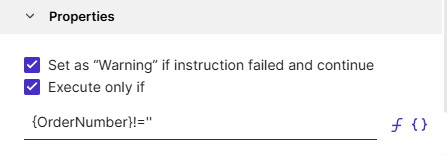
Set as Warning
The Set as Warning option enables you to mark a specific instruction, allowing it to continue running if it fails during execution instead of stopping the entire run. In other words, the failure will be logged as a warning rather than an error. This is useful for non-critical validations or optional steps that shouldn’t interrupt the overall test flow. For example, you might use it for verifying a banner or tooltip, where failure doesn’t impact business functionality. By setting an instruction as a warning, you maintain visibility of minor issues without blocking the rest of the test, keeping your results meaningful and your automation resilient.
Execute only if
The Execute Only If option in ScriptBuilder lets you define conditions that determine whether an instruction should run during playback. Instead of executing every step in sequence, you can set logical rules—such as run this step only if a parameter equals a certain value, or only if a previous validation passed. This makes your scripts dynamic and adaptable to different test paths or data variations. For example, you might skip an approval step if the user role is ‘Viewer’, or perform an upload only if a file exists. By combining Execute Only If with captured parameters and validations, you can create smart, context-aware scripts that mirror real business logic rather than rigid, linear flows.
Tab Selection
You can set the target tab for web instructions when simulating activities on multiple browser tabs. Specify the tab title or the tab number based on its position to fine-tune instruction targeting and improve playback reliability in multi-tab web applications.
Select between the three options - Automatic detection, Using tab title, or Using tab number (beginning from 0, for the first open tab in the browser).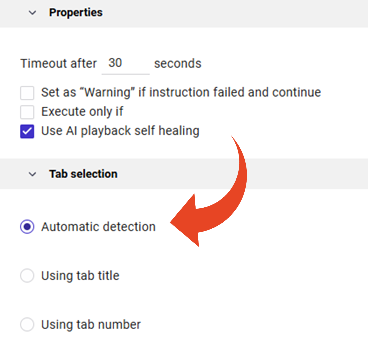
Change Screenshot
You can change screenshots for recorded instructions. This is useful in cases where the original screenshot is missing, incorrect, or outdated.