Note
The Token URL must be accessible from outside of your organizational secured servers
We will require an OpenID Scope Claim; please configure your IDP with the following authorized scopes:
OpenID and email
OpenID's official documentation contains more information about these standard scopes.
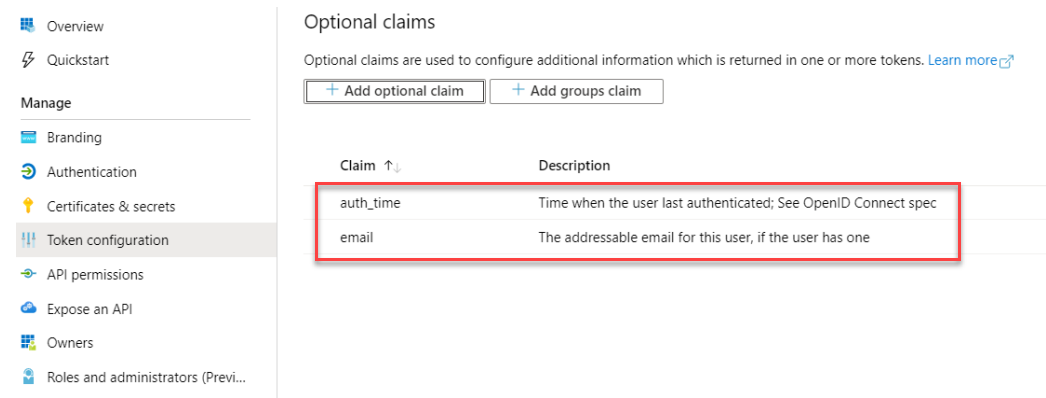
For Azure and other OAuth integrations, verify that you 'Add additional claims' in the 'Token Configuration' menu.
Select ID in Token type, choose 'email' and 'auth_time,’ and save both claims.
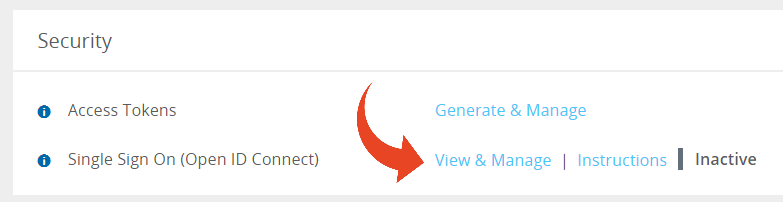
To allow users to seamlessly login to Panaya using their organizational credentials, follow the instructions below:
Click on the Settings button
 to open up the Settings panel.
In the Security section, select View & Manage Single Sign On (Open ID Connect).
Fill in the details, and click Save.

Multiple domains for SSO
To include multiple domains for SSO, select these domains from the dropdown selection of the Email Domain field.
Example: Users in other parts of the business in other countries may have different email addresses. All applicable email domains can be listed and will be included in the SSO configuration.

Note
To determine your Authentication and Token Urls (endpoints), invoke your IDP's OpenID Connect metadata URL, also known as the openid-configuration page, and look for the authorization/token endpoints. The metadata openid-configuration page url may look something like this -
https://idpname.my.idaptive.app/Panaya/.well-known/openid-configuration
https://econnect.yourcompany.com/.well-known/openid-configuration
Once you get the correct URLs, fill them in below, along with the Client ID and secret ID:
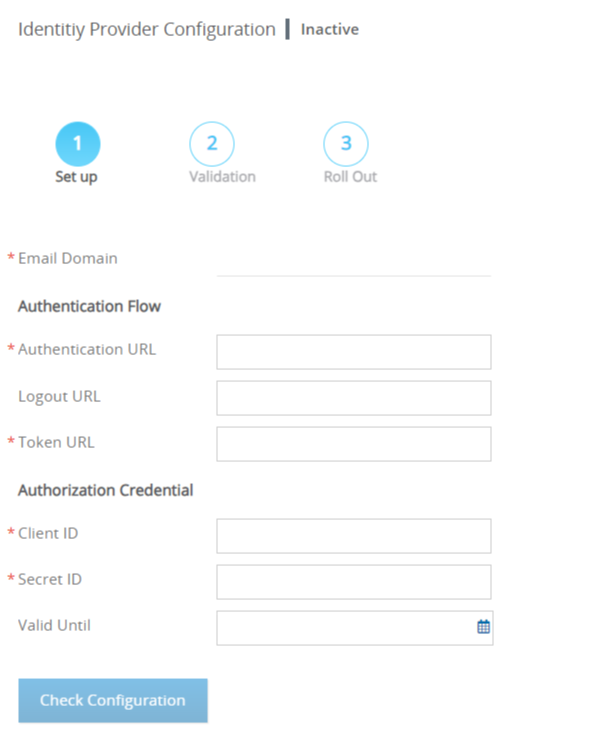
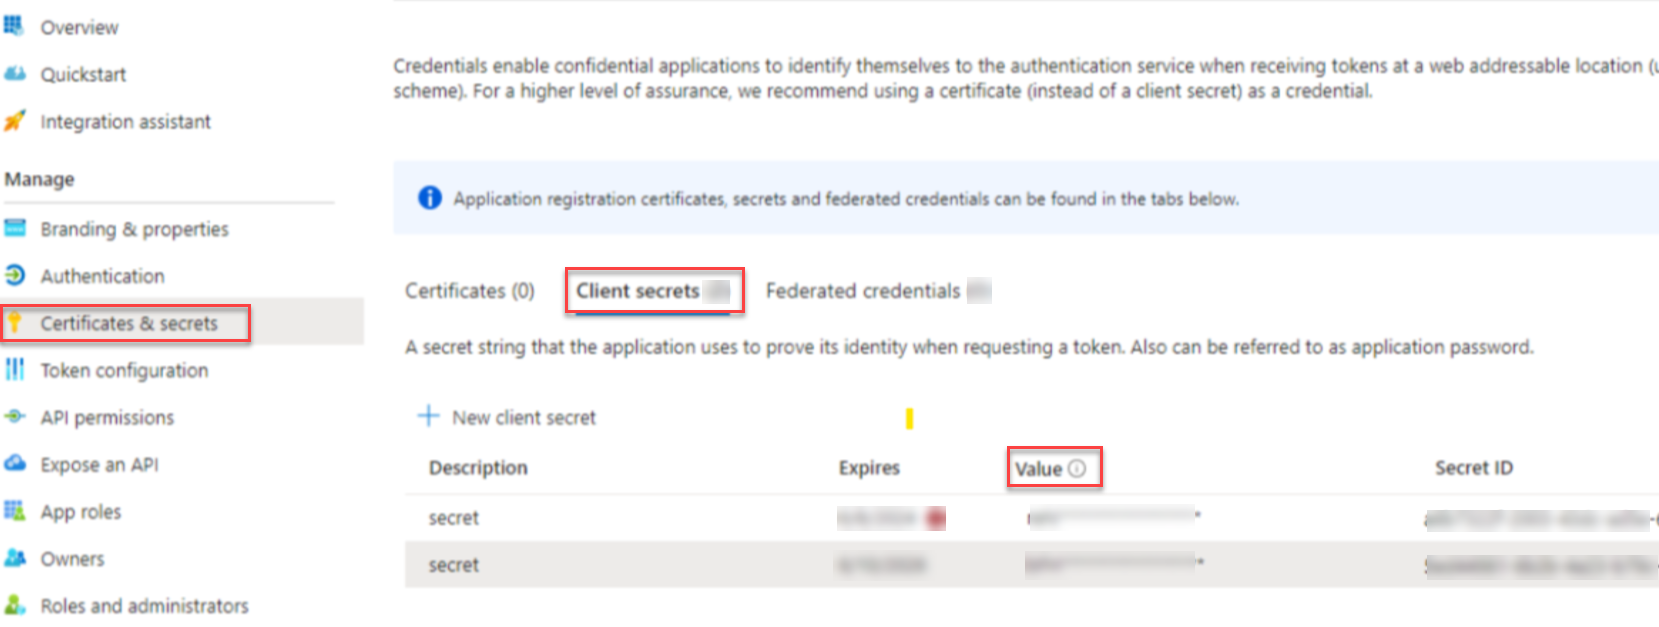
NOTE: Azure users need to set the 'Secret Value' instead of the 'Secret ID' .
The Valid Until field is optional and allows you to define the expiration date for the SSO configuration. Panaya Administrator users will receive an email notification 2 weeks before the expiry date defined here. We recommend adding an expiry date for your SSO.Click on Check Configuration.
On the right-hand side of the screen, use your organizational login credentials to log in.
This will verify the success of the configuration.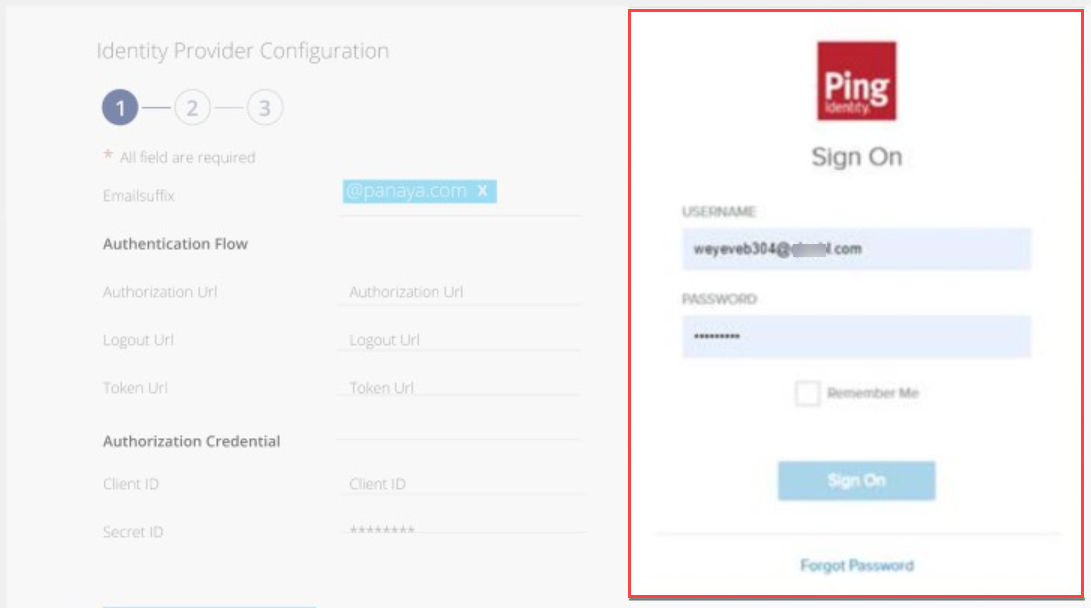
For Redirect URL on your IDP use - https://my.panaya.com/api/oauth/authenticate or https://emea.panaya.com/api/oauth/authenticate (depending on your specific Panaya site).
Useful Resources
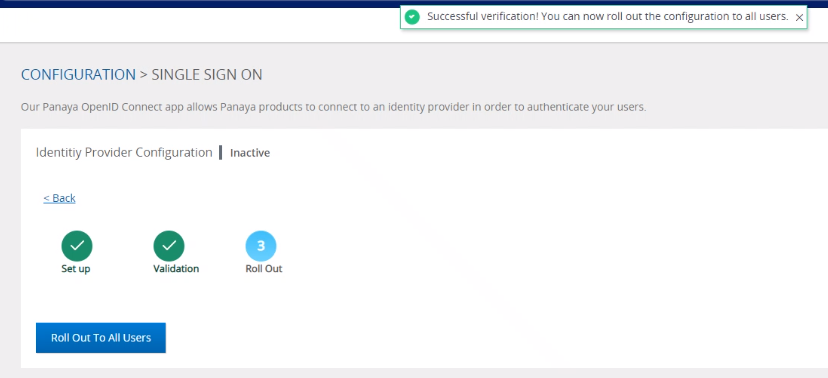
6. the following confirmation message will appear if the configuration is successful.

7. To roll out the configuration to all organizational users, click on Roll Out To All Users.
8. To deactivate SSO and roll back to Panaya login, click deactivate SSO Configuration.
See also
SSO Common Issues
Known Limitation
When setting the PING IDP OAuth connection, the Tests e-sign cannot be used in Panaya. This is due to the implementation of OIDC.
Multi-account users cannot use the SSO configuration.