You can add tags to components across the Org. The tag values will be available when the component appears in Impact Analysis results, both Ad-Hoc, and Requirements.
Defining a Custom Field
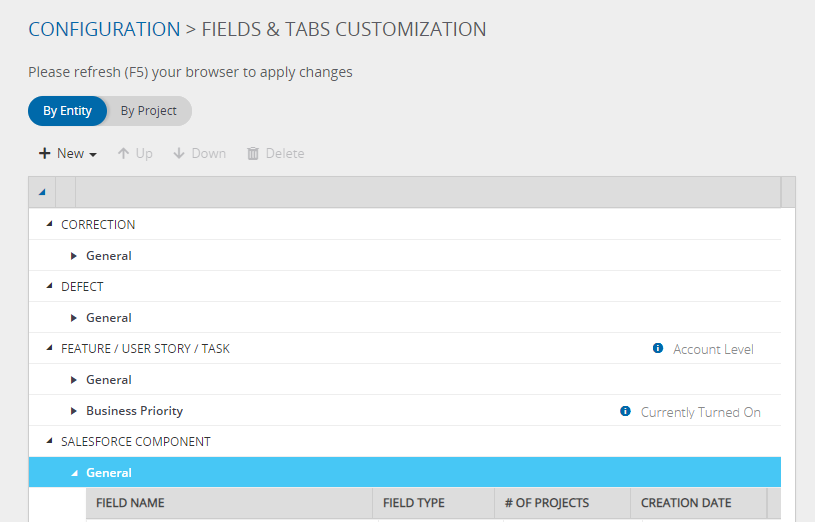
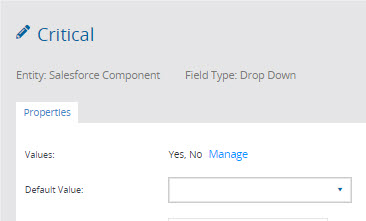
Create a custom field for the Salesforce Component Entity.
- First, highlight the General tab under the Salesforce Component Entity in the Fields & Tabs Customization.
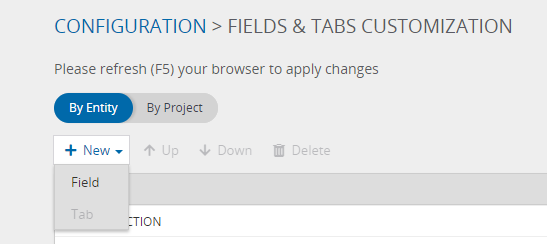
- Then, click on the New button and then Field and create the Custom field
Therefore, the fields are not assigned per project and cannot be set as mandatory.
Viewing, Filtering, Assigning, and Editing the Fields
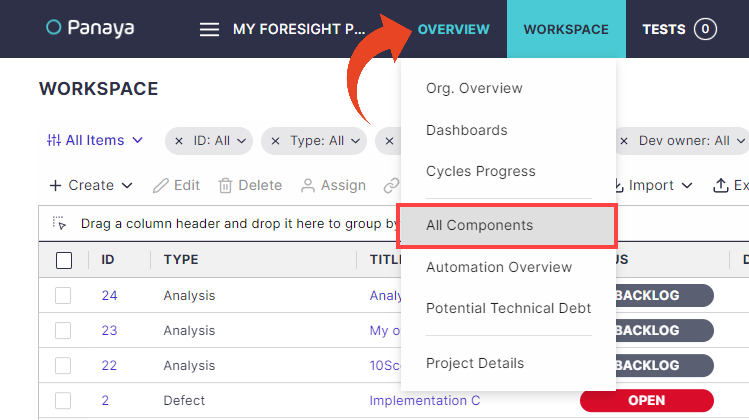
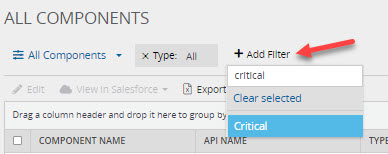
- Hover over the Overview tab and select All Components to display all components that have been mapped in your authenticated Salesforce Org.
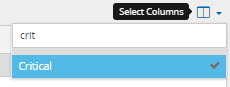
- Click on the Select Column button to display the Custom Fields as a column in the list.
- You can add the Custom Field as a filter to your list by clicking the Add Filter button.
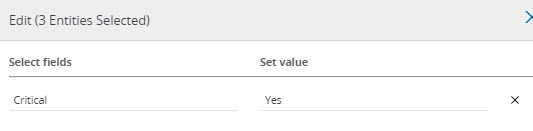
- Highlight one or more components in the list and click on the Edit button to assign, update or delete values for the custom field. The updated values will appear in the relevant columns in the view.

Components List View
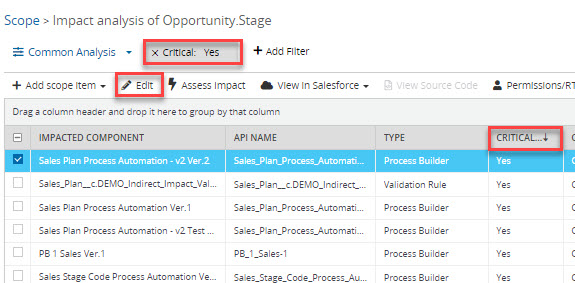
When the component appears in the Scope Item selection view or the Impact Analysis results view, the tags/attributes assigned to the Salesforce components can be displayed in the List view using the Select Columns button and adding the custom fields in the Filter. Select one or more components and click on the Edit button to assign, update or delete values for the custom fields.
The custom fields can also be added as filters in the Graph view, and the attribute values will appear in the impacted component description when hovering over the component node.

The tags/attribute values can be used to group and scope the impacted components during the Impact Analysis.