Release Dynamix allows you to define an Approval Workflow for all Requirements.
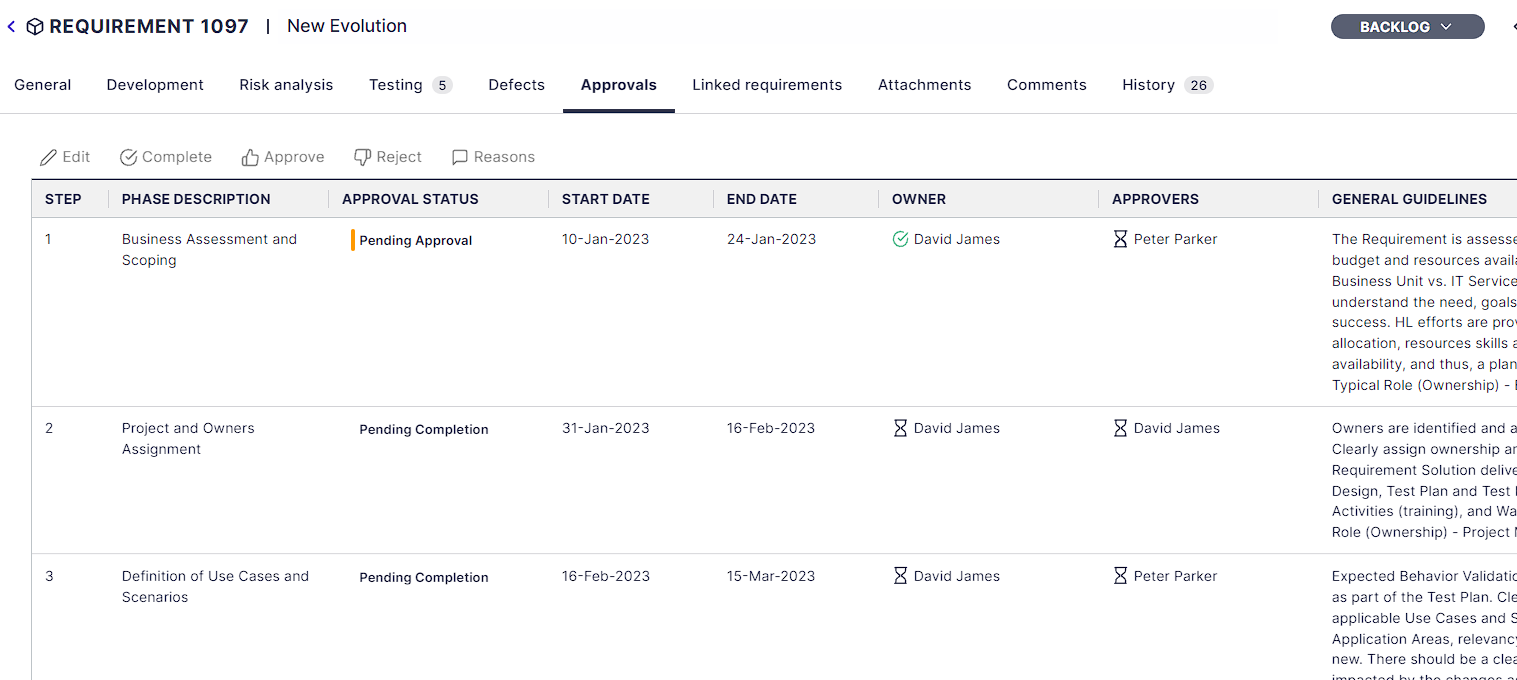
This Approval Workflow is a set of rules that can be utilized to better manage, track, approve and monitor your requirements progress. Owners and Approvers can then be defined for each step of the approval workflow per Requirement. The assigned users will be able to mark steps as Complete, Approved, or Rejected with correspondent Reasons for rejections.
The Approval Workflow can be defined for all Projects or specific Projects only.
Good to Know!
Applied changes will only affect newly created Requirements, but you can easily align existing Requirements to the new Approval Workflow definitions
Good to Know!
You can later change Owners and Approvers per project.
To manage the default approval workflow for all Projects -
- Click on the Settings button
 to open up the Settings panel.
 - In the Release Dynamix section, select Manage Approval Workflow.
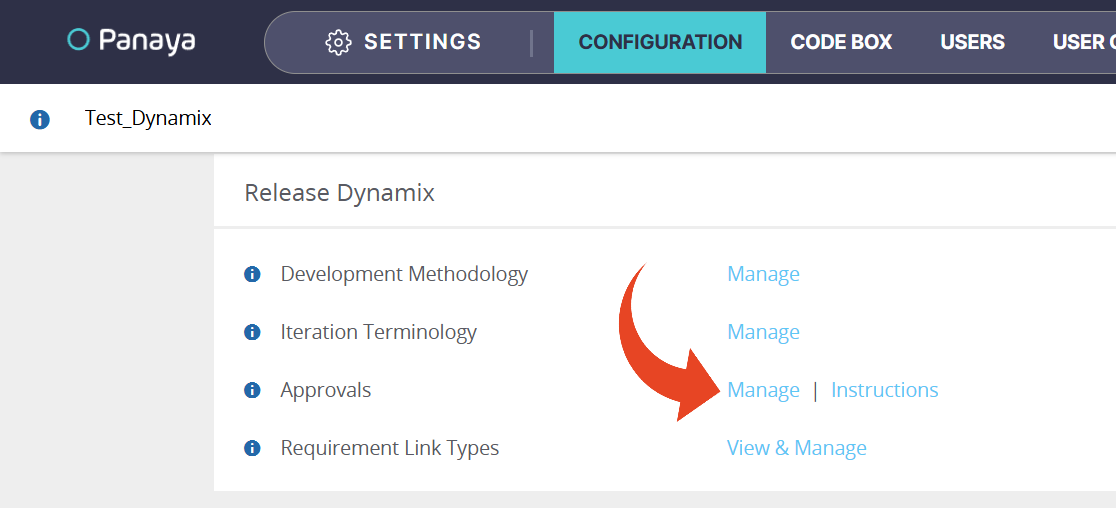

- You will be able to view all Approval Workflow currently available.
To create a new Approval Workflow, click on Create New Workflow. Then define the Approval Steps.
- To modify an existing Approval Workflow, highlight the Workflow in the left pane. Then make any necessary changes to existing steps by selecting the relevant steps. Once complete, click on Save Changes.
- You can Add or Remove steps as well as change the order of steps with the Move Step Up and Move Step Down buttons

- Define the Phase Description -
The text inserted here will appear under the Approvals tab for the Requirement - Define the Approval State Description -
The text inserted here will appear for the relevant step once marked as Approved.
In the example below, the Approval State Description for Step 1 is Approved for Development, and for step 2 - Pending Completion.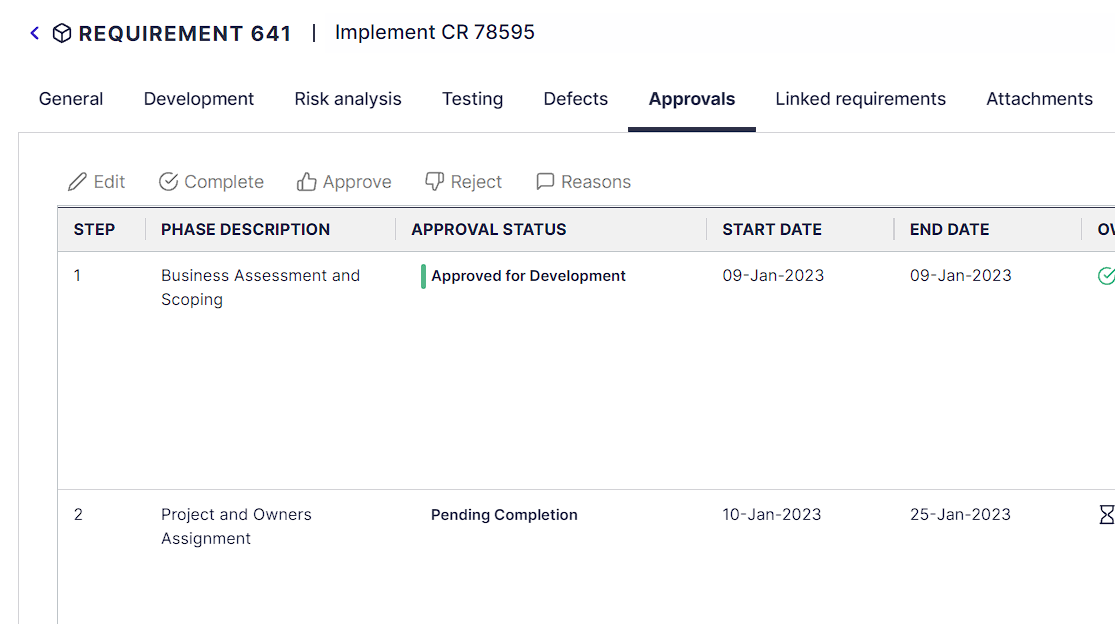
- Save Changes
Note
- Saved changes will only affect newly created Requirements. Click here to learn how to align existing Requirements to the new Approval Workflow definitions
- Panaya does not enforce workflow steps. You can skip workflow steps when necessary.