- Access to the relevant SAP Development
- User with Display, create, and execute ABAP programs permissions
- Panaya username and password
- .NET Framework, version 4.6.2 and above
- At least 100MB available in the Windows temp files directory
- SAP GUI for Windows: release 8.0 and later releases
Supported operating systems: Windows 2000, Windows XP, Windows Vista, Windows 7, Windows 10, Windows 11
Supported browsers: Click here for supported browsers information
Important!
Panaya requires that you upload your custom code at least every 14 days to keep using the Synchronizer.
Server Side Installation
Step 1 - Download the Source Code
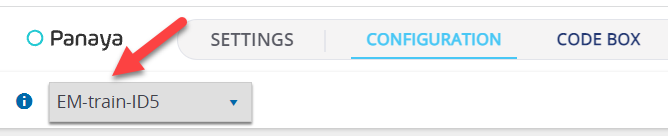
1. Click on the Settings button 
2. Verify that the relevant system is selected in the drop-down list
3. Under SAP Development, for Synchronization of Code Changes - ABAP Component, select to Download Code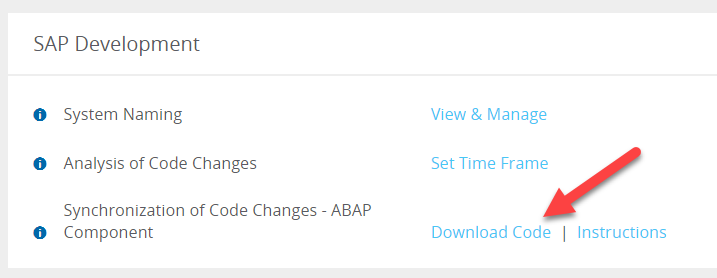
Step 2 - Create an Executable Program & Transaction
- Open the downloaded TXT file and copy the entire source code displayed
- Use the copied source code to create a new executable program in SAP
- Name the program ZPANAYA_GET_CRS_DATA
- Create a transaction for the program named ZPANAYA_EXPORT_CRS.
The transaction type should be Program and selection screen (report transaction) - Set permission to use the transaction ZPANAYA_EXPORT_CRS for all users required to sync changes to RDx.
For further instructions on how to create an executable program & transaction in SAP, click here.
Panaya synchronizer requires that a transaction with the exact hardcoded name ZPANAYA_EXPORT_CRS be present in the system.
Be sure to create such a transaction and keep the name unchanged.
Step 3 - Set Server Parameters
- Enable GUI Scripting
Panaya synchronizer requires SAP GUI scripting to be enabled.
Please set the system profile parameters as shown below -
- sapgui/user_scripting = TRUE
- sapgui/user_scripting_disable_recording = FALSE
- sapgui/user_scripting_set_readonly = FALSE
Step 4 - Enable Authorizations for Users
Client-Side Installation
Step 1 - Enable GUI Scripting & Deny Pop-Up Notifications
Panaya Test Management requires SAP GUI scripting to be enabled, as well as disabling SAP pop-up notifications for accelerated testing.
The process described here must be repeated for every client machine using the Synchronizer.
Step 2 - Set SAP Network Settings to High-Speed Connection
Follow the instructions described here.
Step 3 - Install .NET Framework
.NET Framework version 4.6.2 or above must be present on the local machine of each user running the Panaya Synchronizer.
We recommend using .NET Framework version 4.0. Most computers already have .NET Framework, so normally no installation is needed.
If you experience issues while installing Panaya's Synchronizer, please install the .NET Framework from Microsoft .NET Framework 4.0.
Step 4 - Configure Security Settings
Please ensure that proxy settings are not preventing Panaya's Synchronizer from working properly.
If you have an antivirus, VPN, Remote Machine, or Virtual Machine, you might need to add Panaya to the safe domains list. Sites on this list do not require a proxy or any other security permission.
Add *.Panaya.com to your white-list or your exceptions lists (e.g., proxy, anti-virus, etc.)
Step 5 - Browser Configuration
- Configuration required to use Google Chrome with the Panaya synchronizer.
- Configuration required to use Microsoft Edge with the Panaya synchronizer.