1. Failure to capture screens
Recording starts but fails to capture SAP GUI or another AUT using the capture window option.
The Panaya Video Recorder relies on the browser’s built-in WebRTC functionality to capture and record the screen properly.
If the video recording stops unexpectedly, follow the steps below to verify that WebRTC screen-capture functionality is working correctly in your browser.
Open a separate tab and navigate to this URL:
https://webrtc.github.io/samples/src/content/getusermedia/getdisplaymediaSelect the sharing option that you used when you encountered the issue.
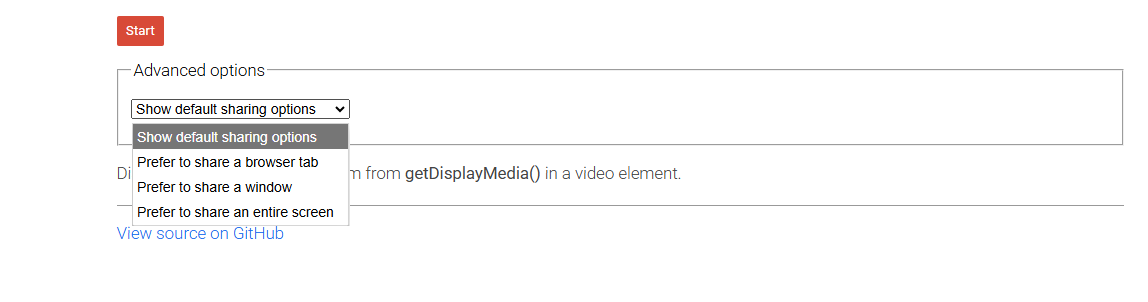
Click Start, then try to capture the AUT you are trying to record. Perform any required steps in the AUT.
Confirm that the screenshots are being captured properly.
If there is any problem capturing the screenshots, try using a different browser to see if it resolves the issue, or try using a different sharing option, for
example, share an entire screen instead of a window. If sharing the entire screen works, you can then maximize the application you are trying to record.If the issue persists, Contact Panaya Support.
2. Recording does not start
If the video recording does not start, follow the steps below to verify that WebRTC screen-capture functionality is working correctly in your browser.
Open a separate tab and navigate to this URL:
https://webrtc.github.io/samples/src/content/getusermedia/getdisplaymediaSelect the sharing option that you used when you encountered the issue, click on Start and see if you get a similar screen like below where you can choose a tab, window or entire screen
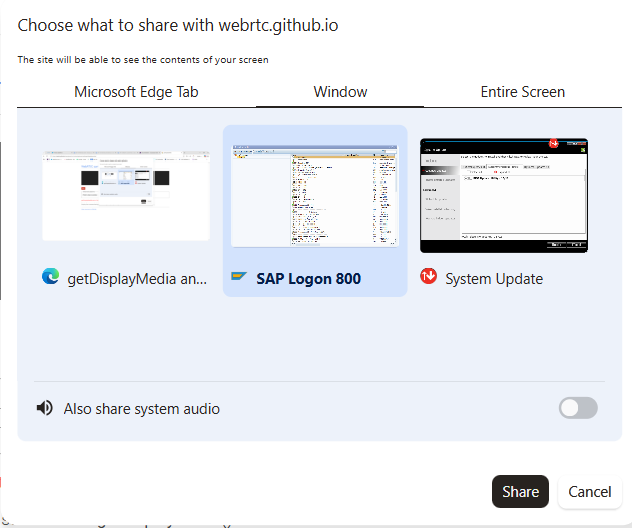
If you don’t see it, try to switch to another browser and check it once more, and if it works then, use that browser as a workaround until your IT can investigate further.
If you don’t see it using another browser, it could be that some security application, firewall or proxy is blocking your access to WebRTC so you will need to check it further with your local IT.
3. Fail to upload the video evidence
Your video evidence couldn’t be uploaded after you finished your recording.
After you complete your recording, you may encounter this error message, “Your video evidence couldn’t be uploaded”.
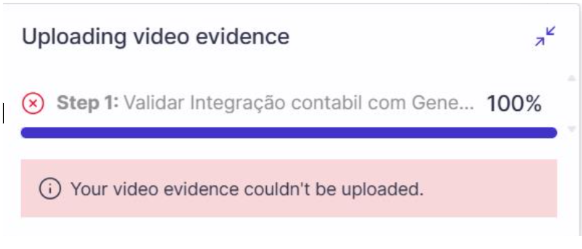
This may occur when Zscaler or another security application, web proxy, VPN, firewall, or endpoint-protection solution blocks or inspects the video-upload request, applies file-upload restrictions, or performs SSL/TLS inspection on the connection.
Confirm whether Zscaler (or another security application) is causing the issue
Ensure that your organization permits you to temporarily disable Zscaler.
Open Zscaler Client Connector from the Windows system tray.
Under Internet Security or Internet & SaaS, select Turn Off.
If this option is unavailable, open the Zscaler menu and select Exit or Disable.
Configure a Zscaler (or other security application) exception.
Ask your network or security administrator to review the failed upload in the Zscaler/firewall/proxy/web proxy logs and allow the video-upload destination.