Panaya offers a built-in Jira plugin that automatically syncs Jira Issues to Panaya Requirements and allows tracking of the Panaya testing progress from the Jira.
Use case
Assign tests to a Panaya Requirement and automatically see them in a related Jira issue
Download, install, and configure the plugin by following these instructions.
Create an issue in Jira using the Issue Type and Status you defined in the setup in Step 1.
.png)

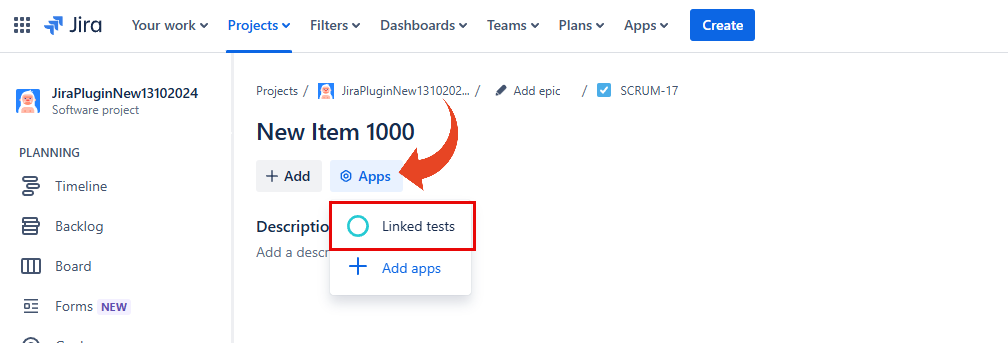
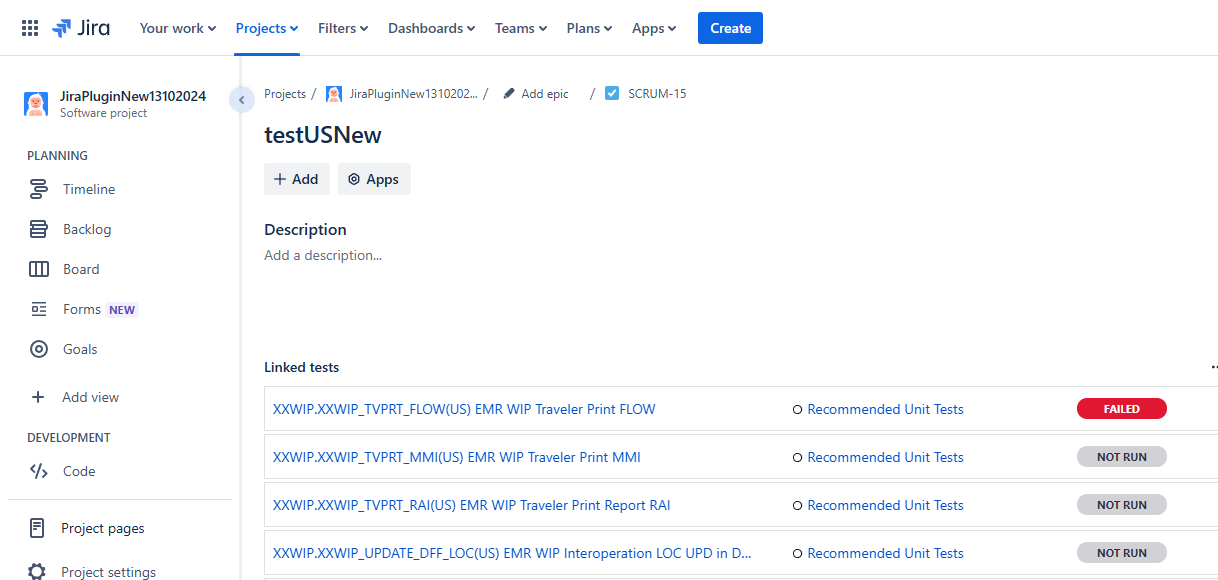
Click on Apps and select Linked tests to view the list of linked tests.
A parallel Requirement is automatically created in the designated Panaya project with a link back to the Jira issue in the Description under the General tab..png)
Link Tests
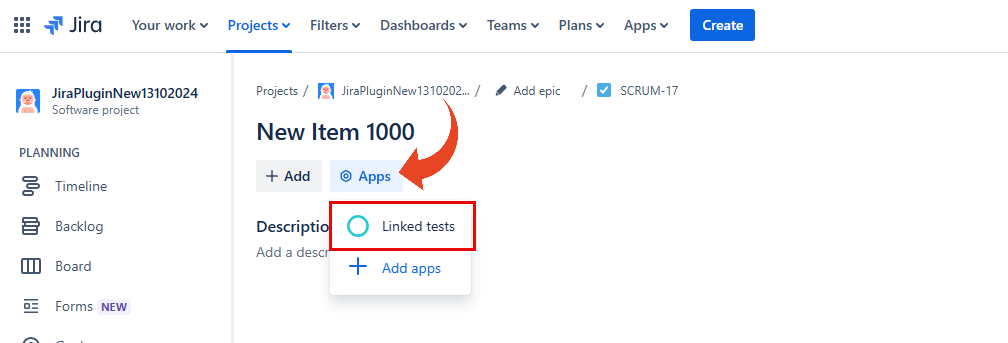
Click on Apps > Linked tests button in the Jira issue to expand the Panaya space in the Jira issue.
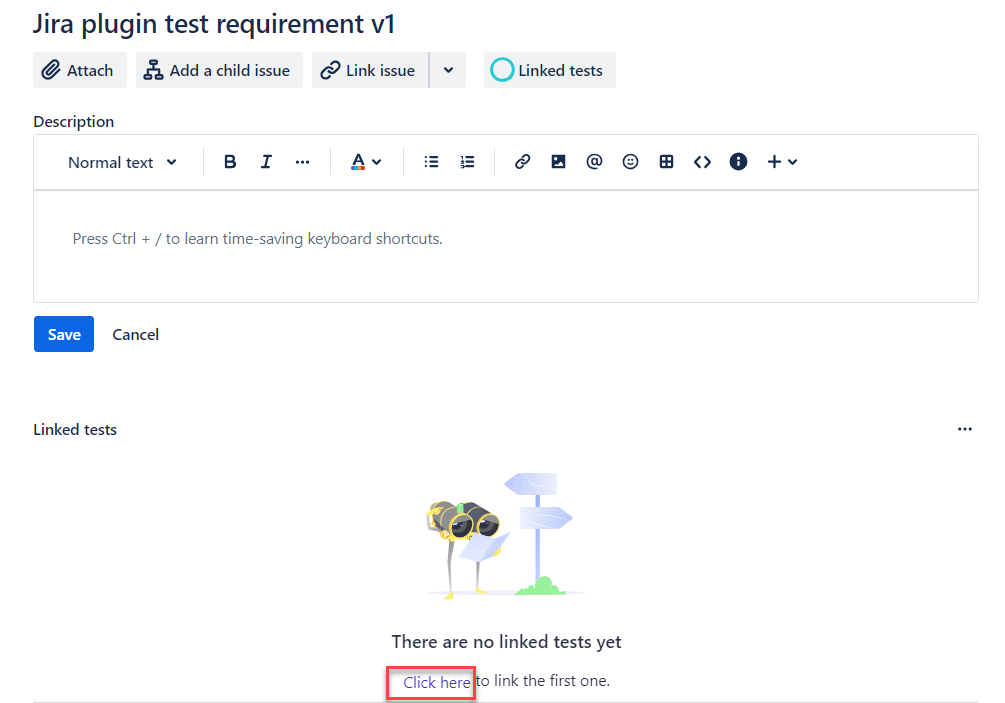
Click on the Click here link to view the Requirement in Panaya.
In the Panaya Requirement, go to the Testing tab and Create a new test or Add existing tests.

If you choose to Add existing tests, click on Click here at the bottom to continue.
.png)
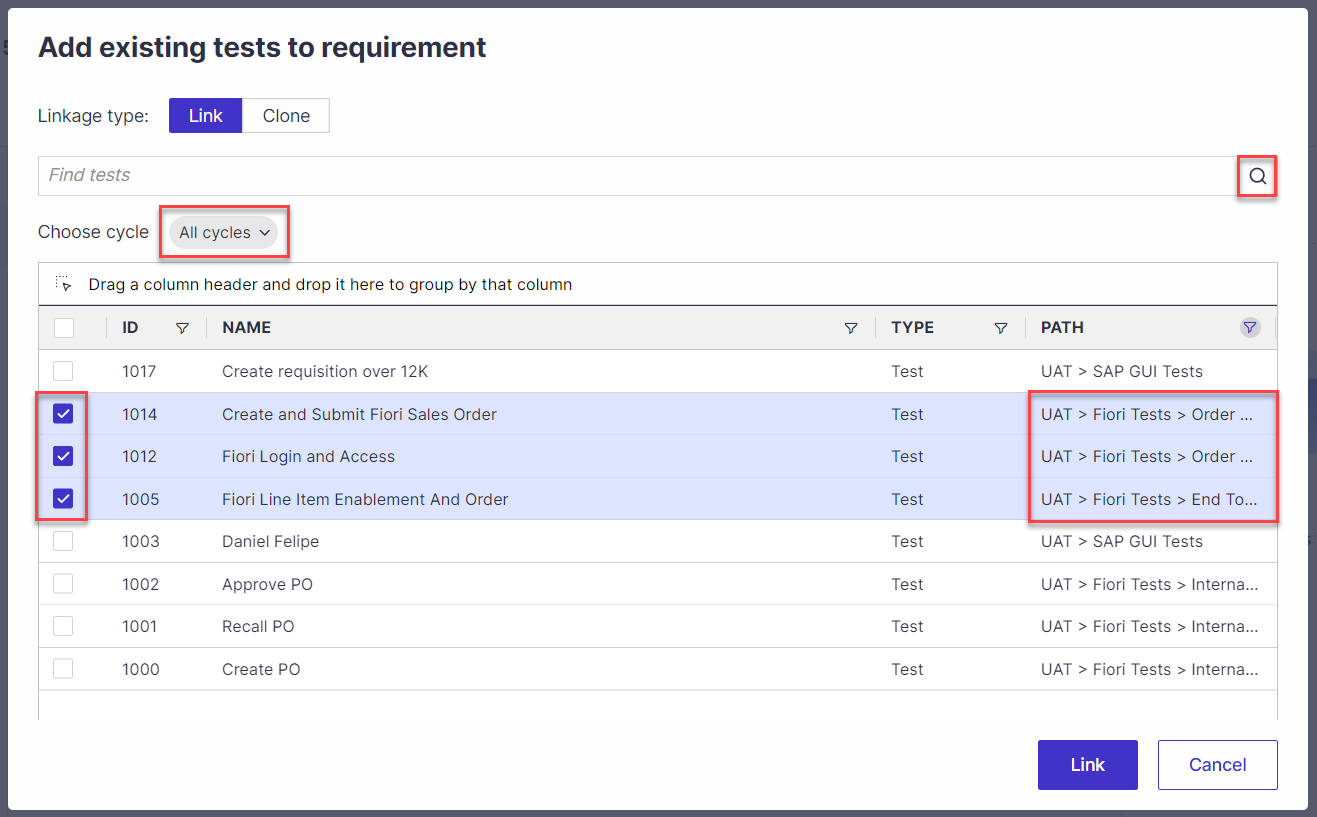
The Add existing tests dialog window allows the selection of a cycle to search in, and/or enter a Test Name in the search bar and click on the Search icon to find tests to link. Select the desired tests from the search results and click on Link.
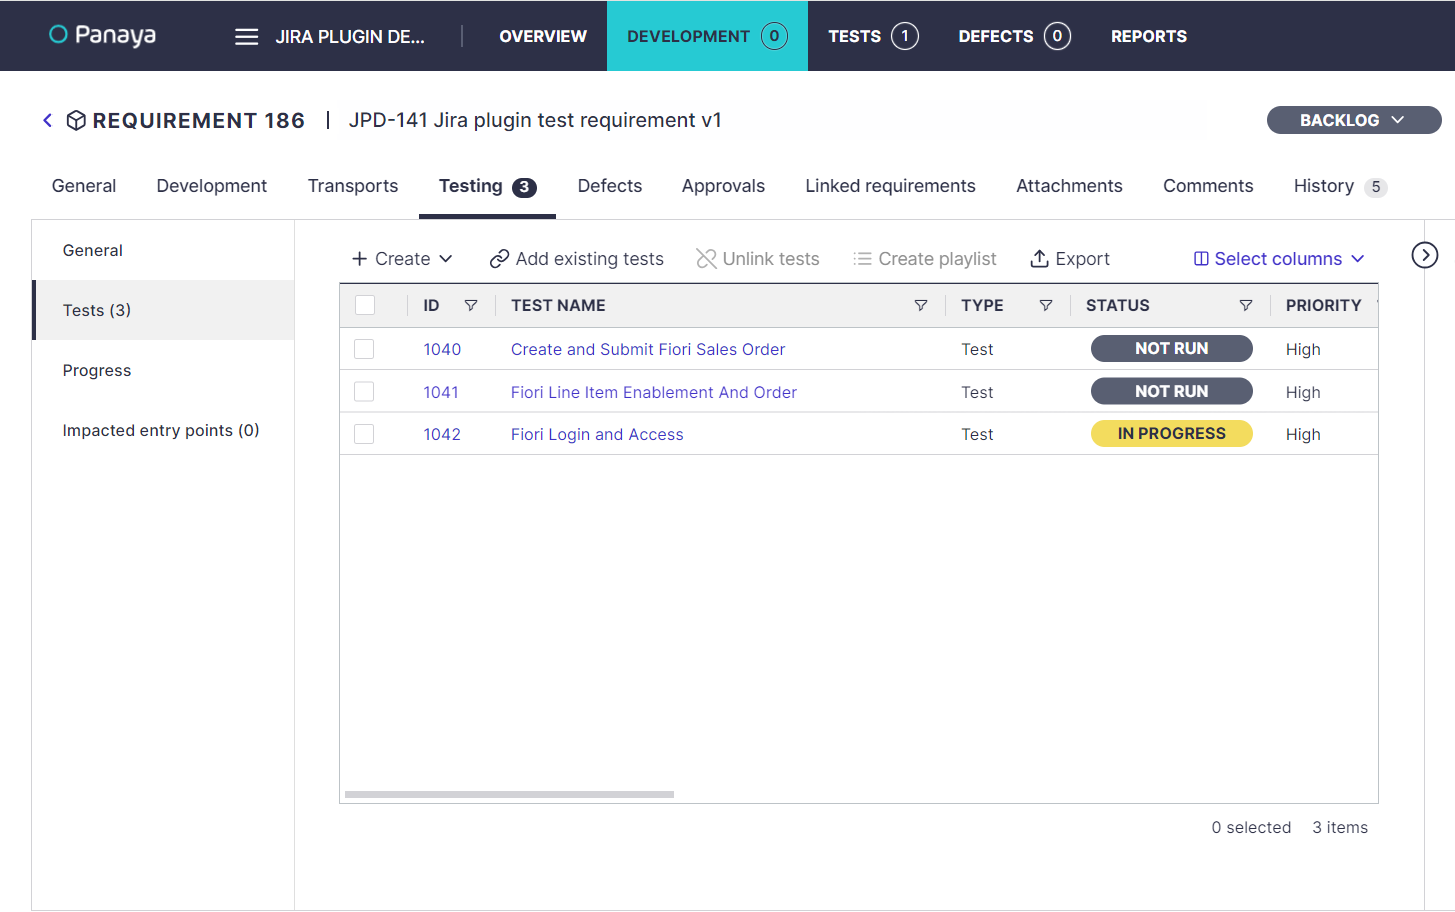
The linked tests will appear in the Testing tab in the Panaya Requirement.
Refresh the JIRA issue to see the linked tests which you added in Panaya, along with any defects which were linked to the tests.
Note
Once a Requirement is created in Panaya, no updates are sent back to it from Jira. If a Jira issue is closed, you must manually close the Requirement in Panaya.
Defects closed in Panaya will still be displayed in the Jira issue.