Windows dialogs such as “Save As” are inherently difficult to automate. These dialogs are operating system–level components, meaning they exist outside the application being tested and are not directly controlled by it. As a result, most automation tools have limited or no ability to reliably interact with them.
In addition, these dialogs can vary between environments (e.g., different Windows versions, system settings, or browser configurations), which can lead to inconsistent behavior and unstable test results.
Best Practices
To ensure more reliable automation, it is recommended to avoid interacting with OS-level dialogs altogether. Instead:
Configure automatic downloads to bypass the “Save As” prompt
Validate downloaded files through the file system (e.g., checking file existence or contents)
Use APIs or backend validation where available to confirm file generation
ScriptBuilder provides the ability to send keystrokes to Windows applications, enabling interaction with elements that may not be directly accessible through standard automation methods.
This functionality extends the same keystroke automation capabilities already available for web and SAP GUI environments to Windows-based applications.
Using keystroke automation, you can:
Navigate between input fields using keyboard controls
Handle login dialogs more effectively
Trigger internal functions via keyboard shortcuts
Perform search actions within applications
ScriptBuilder also includes dedicated Windows Application Commands to support scenarios where a test needs to briefly interact with a Windows-based application.
To enable this, the following instructions are available:
Click element on Windows application
Enter text in Windows application
These commands are designed for lightweight interaction with Windows desktop elements within a broader automation flow. They are particularly useful when a primarily web- or SAP-based test requires occasional input or actions in a Windows application.
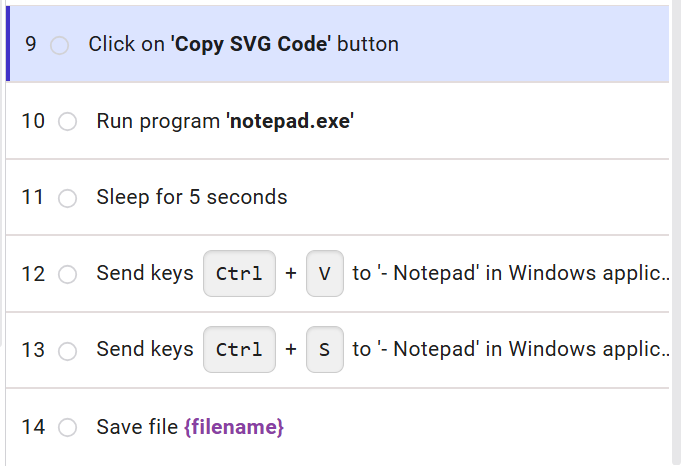
Example: Generating a QR code and copying the resulting svg file, pasting it into Notepad and saving it via the File > Save as dialog.
Detailed steps:
generate a QR code
click on the 'Copy SVG Code' button
run Notepad
Send keys 'CTRL+V' to paste the copied svg data
Send keys 'CTRL+S' to trigger the Save As dialog
Use "Set file for save as" to set a location
To run Notepad:
In Windows environments, it is possible to run notepad by simply calling notepad.exe, without referencing the whole path.
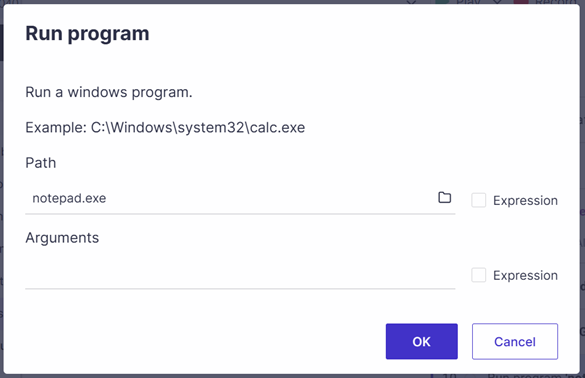
Note
Enter a filename into the ‘Arguments’ field and Notepad will open that particular file (needs to include the full path to an existing file, including the path, filename and file extension).
When automating interactions with Notepad, it is important to account for how the application’s window title changes during use.
By default, a new Notepad window is titled “Untitled - Notepad”
After content is added (such as pasting SVG data), the title updates to reflect the file name or content state
Because of this dynamic behavior, using the full window title in automation can cause the step to fail once the title changes.
Recommended Approach
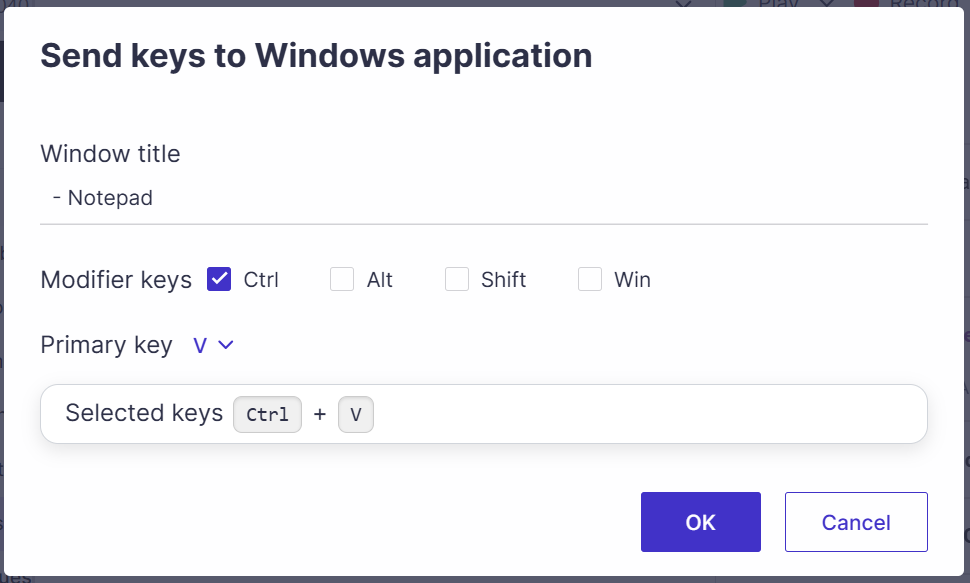
To ensure consistent identification of the Notepad window, configure the title using a stable partial value, such as:
“- Notepad”
This allows the automation to reliably match the window regardless of how the leading portion of the title changes.
In both Send keys steps, the Window title is ‘- Notepad’:
To save the file, use the Set file for save as instruction:
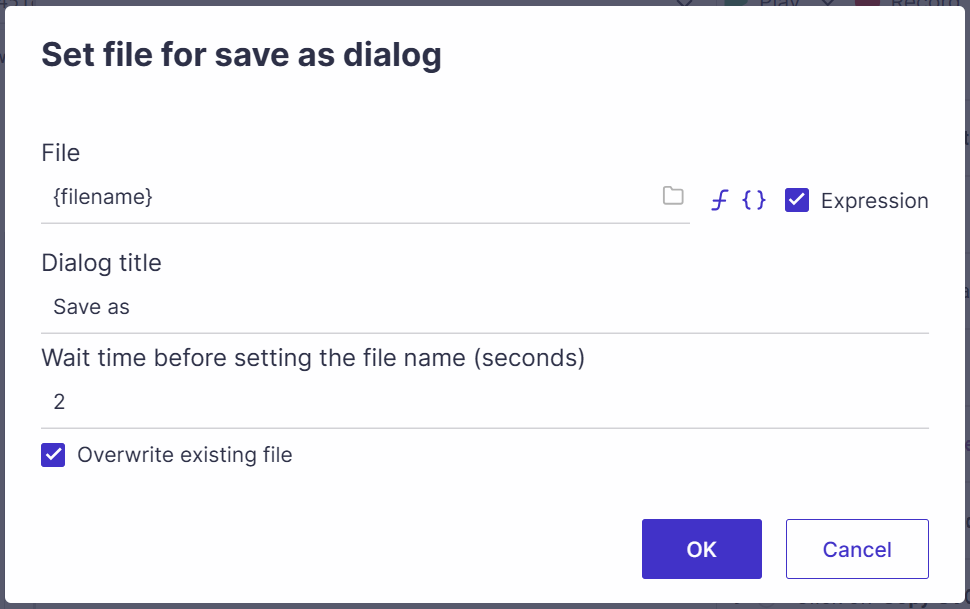
As an alternative, it is possible to save the data to an existing file. In this case, the filename of an existing file can be passed into the Arguments field of the Run program instruction when Notepad is opened.