The Video Recorder offers zero-setup video recording, integrated into the existing Run & Document flow. The recorder captures video evidence during test execution across supported browsers and environments, including Chrome, Edge, and Safari, as well as desktop applications.
The Browser Video Recorder improves the quality of test evidence, simplifies collaboration, and extends Panaya’s Recorder capabilities as the foundation for AI-driven execution insights and analytics.
No local installation
Recording is available directly in the browser, eliminating the need for IT setup or deployment.Full execution recording
Test execution is recorded in real time and saved as part of the execution evidence.
Having trouble recording or saving a video?
See Video Recording - Troubleshooting for recommended checks and solutions.
Enabling the Video Recorder for Users
Before users can use the video recorder, a Panaya administrator must set the recording mode for each user.
In the User Management Console, highlight the relevant user in the list.
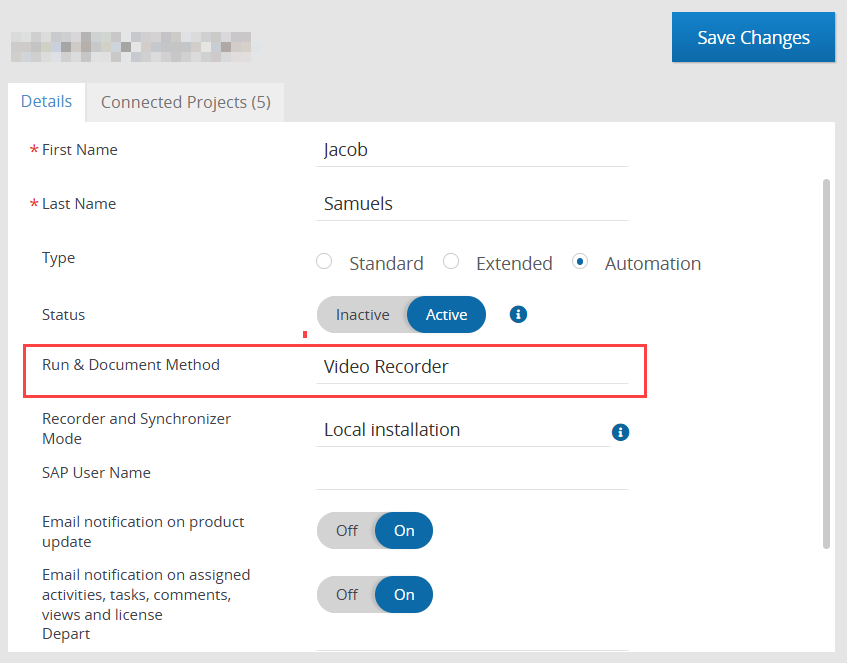
In the user details area, set the Run & Document Method to Video Recorder.
Launch the video recorder
To capture test evidence with the video recorder -
Open the relevant test and select the Steps tab.
Click on Run & Document for a particular step to launch the video recorder.
You will be prompted to select to record specific browser tabs, a window (application), or the entire screen. Make your selection and click Share.
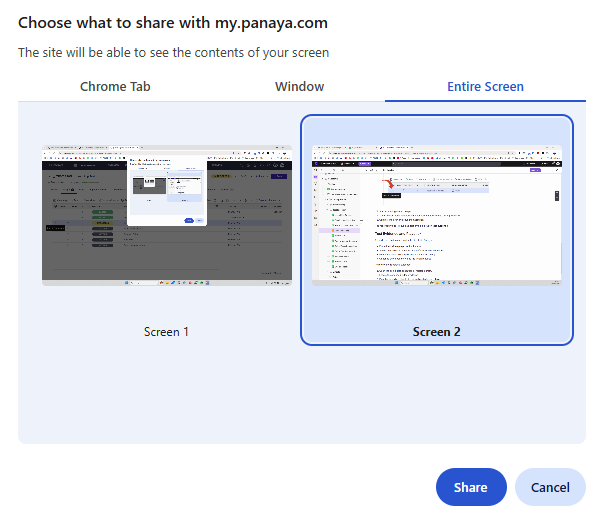
The video recorder will begin capturing. You can pause the recording at any point by clicking on the Pause button. Then click Resume to continue.
Perform the activity you wish to capture, then return to the Panaya browser tab and click Stop recording.
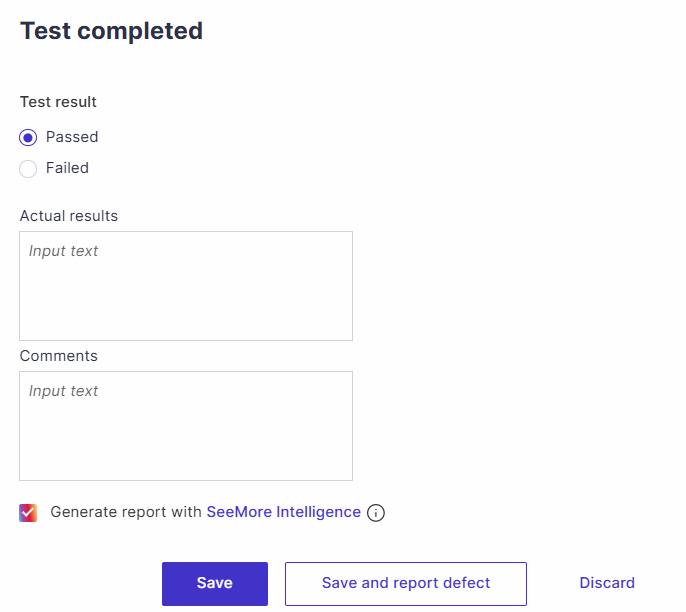
In the Test completed dialog box, you can set the test results as Passed or Failed, provide details about the actual results, and any additional comments.
We recommend checking the “Generate report with SeeMore Intelligence” to automatically generate the smart reports based on video evidence while saving the video recording.Alternatively, you can generate the report at a later time using the “Generate Smart Report” button in the video viewer.
Note
Before users can use the video recorder, a Panaya administrator must set the recording mode for each user.
Reporting a Defect with the Video Recorder
If you come across a defect while testing, you can report it directly from the video recorder. The defect is automatically linked to the test and step, and the video is attached as evidence.
To report a defect when you finish recording -
When you are done, return to the Panaya browser tab and click Stop recording.
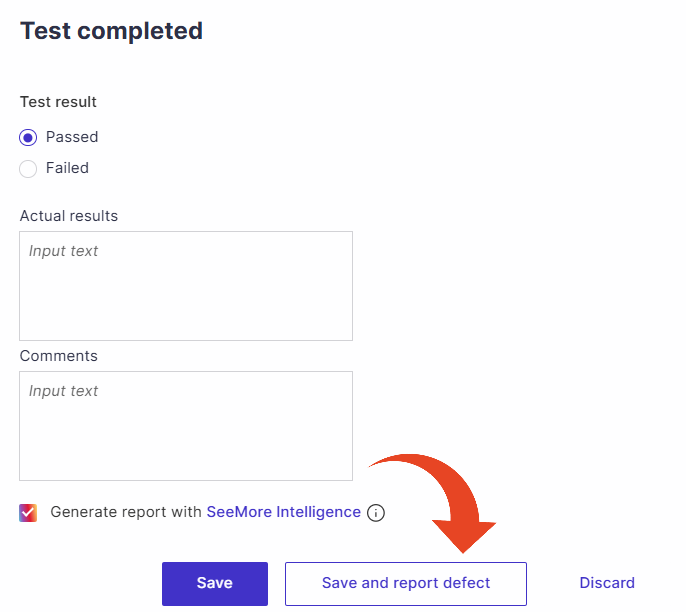
In the Test completed dialog box, select Failed and fill in the Actual results and any Comments.
Click Save and report defect.
The Create defect window opens with the details already filled in:
Subject – the step name.
Description – the test ID and name, step number, expected results, actual results, and comments.
Screenshot – captured from the recording. You can edit, replace, or delete it.
Creation – Detected by and Detected on are filled in automatically.
Detection – the cycle and test are linked automatically.
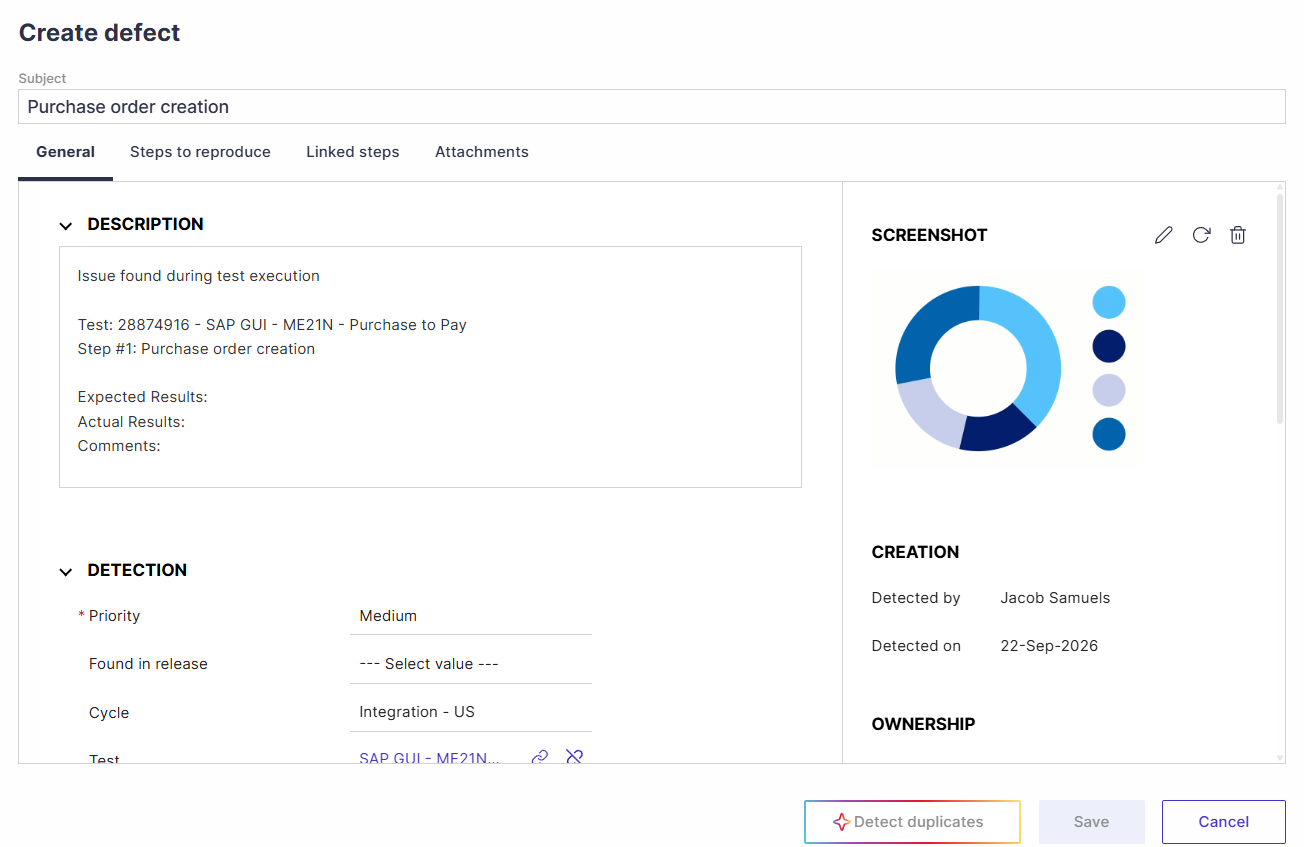
Review the details, set the Priority, and complete any other required fields.
Optionally, click Detect duplicates to check whether a similar defect was already reported.
Click Save.
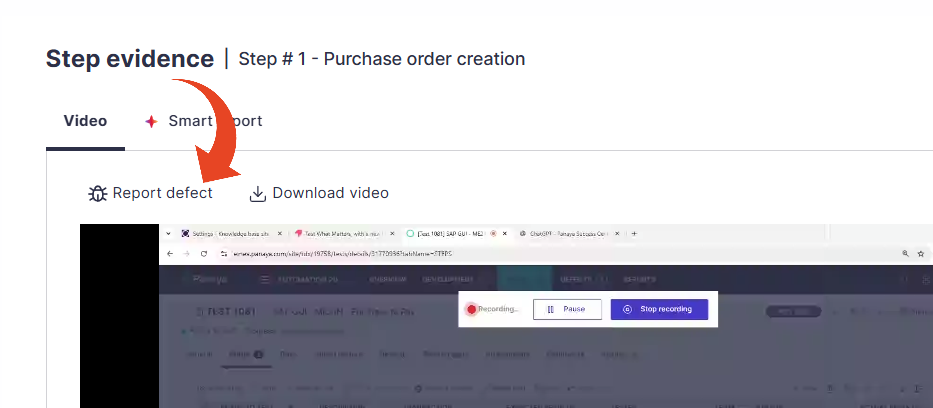
To report a defect later, from the recorded evidence -
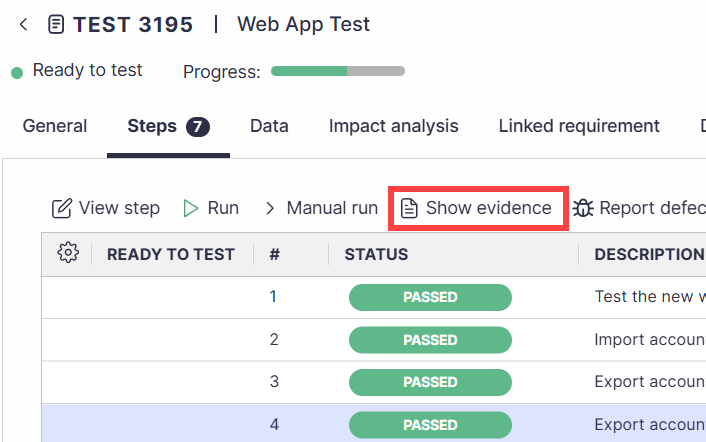
In the test's Steps tab, highlight the step and click Show evidence.
Click Report defect, then complete the defect details as described above and click Save.
Good to Know!
Fields such as Priority or Found in release can be filled automatically from the test. See Automatic Defect Fields Population from Tests.
Test Evidence and Playback
Recorded executions are available for viewing and downloading through an embedded video player on the Panaya site. The video is attached as test evidence for executions and defects, with execution details displayed alongside the recording.
Show Evidence
To view the recording -
Highlight a step, then click the Show evidence button.
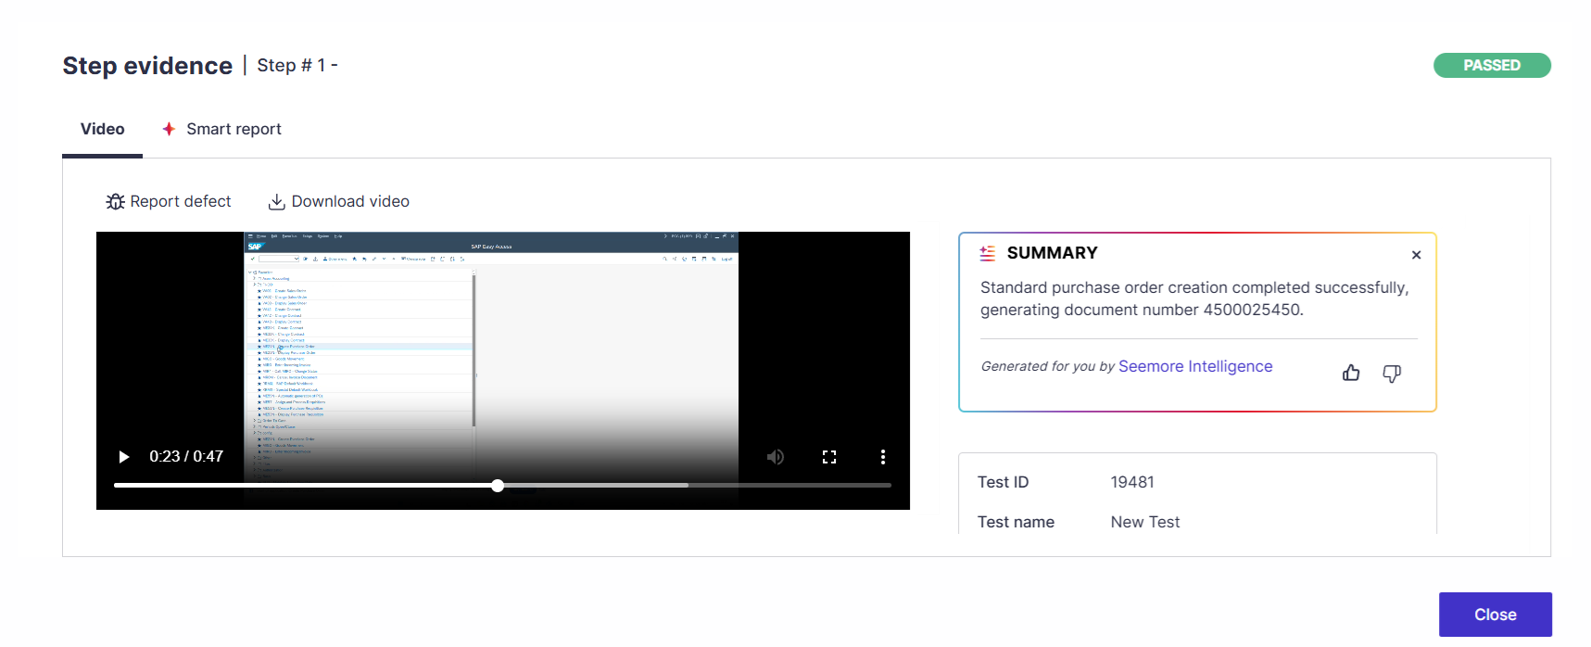
For steps captured on video, you can view the recording, download the video, report a defect, or generate a smart report.
AI Summary
Panaya automatically generates a concise summary highlighting the key steps and the overall outcome, so you can quickly understand what happened without watching the full recording.
Smart Report
Turn manual test run videos into compliance-ready documentation in seconds. Panaya can generate AI-generated test evidence directly from video evidence. On demand, AI analyzes the recording and produces a structured test evidence report that can be viewed in Panaya or exported to PDF, dramatically reducing documentation effort.
To generate, select Smart report and click on Generate Smart report.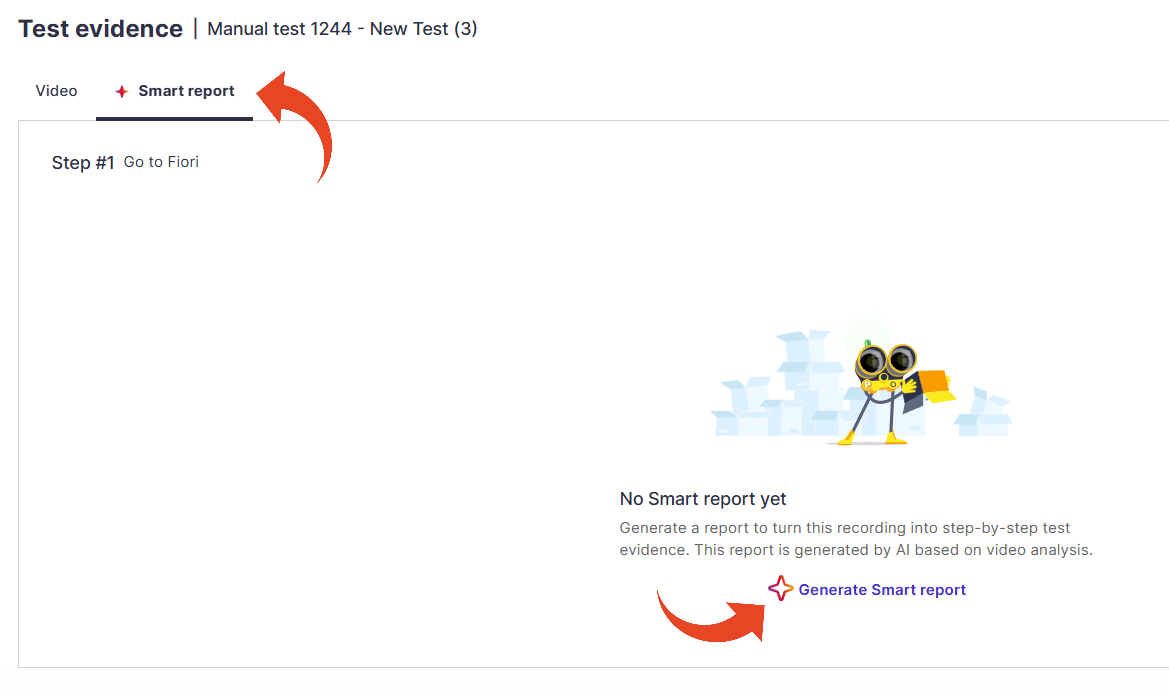
Regenerate Smart Report
If the report contains inaccuracies, you can regenerate it. The new report replaces the previous one.
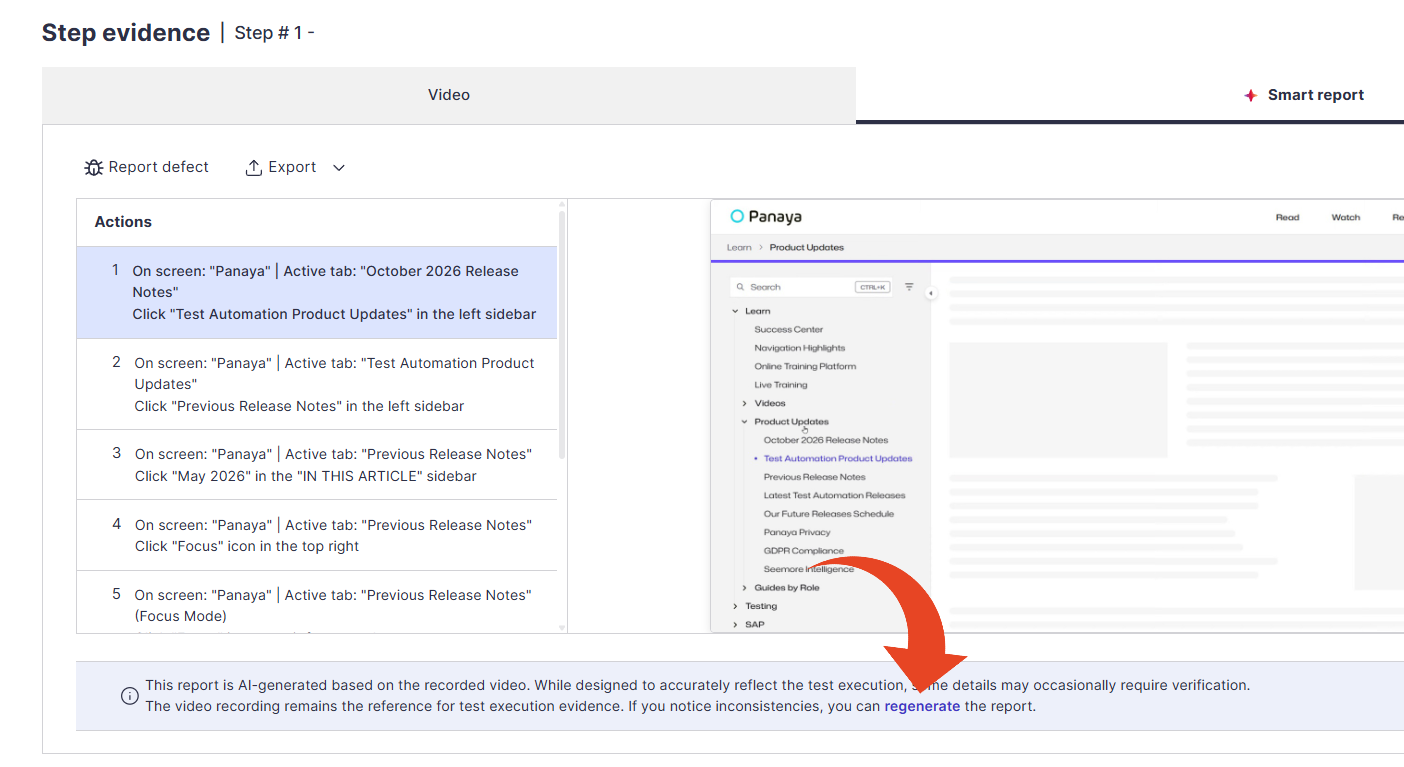
ⓘ ABOUT AI-GENERATED SMART REPORTS
Smart Reports use AI to analyze the recorded test execution and automatically generate step-by-step documentation, including relevant screenshots, user actions, and values captured from the application.
As with any AI-generated content, the Smart Report may occasionally contain inaccuracies. For example, a step or screenshot may be omitted, or text and values displayed or entered on screen may be interpreted incorrectly.
The original video recording captures the actual test execution and should therefore be considered the authoritative source of evidence for verification and audit purposes. When exact values or execution details are critical, we recommend referring to the video recording.
Panaya continuously works to improve the AI models and validation mechanisms used to generate Smart Reports, with the goal of increasing their accuracy and reliability over time.
Powered by Seemore Intelligence