Setting up HTTPS for your SAP server is relevant if you wish to enable automatic custom code extraction and upload to Panaya or integration with ChaRM.
Important!
This article provides guidelines for setting up HTTPS. Please consult with your Basis Consultant before you proceed.
Step 1 - Verify that SAPCRYPTOLIB is installed
The guidelines provided here are applicable to systems where SAPCRYPTOLIB is installed.
To verify SAPCRYPTOLIB installation -
Enter TCODE STRUST
Select the environment and then SSL Client Identities
If SAPCRYPTOLIB is not installed, you will be able to see the message at the bottom of the screen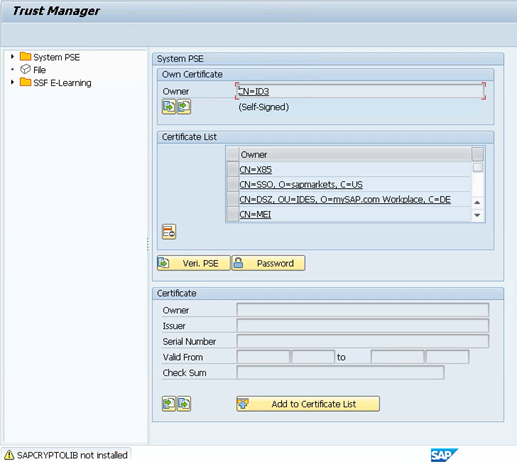
SAPCRYPTOLIB is not installed?
If SAPCRYPTOLIB is not installed, you can download and install 7.22 Kernel for SAP up to Netweaver 7.31 (ERP 6 EhP 6, CRM 7 EhP 2, SRM 7 EhP 2, SCM 7 EhP 2, and others). Then restart your system.
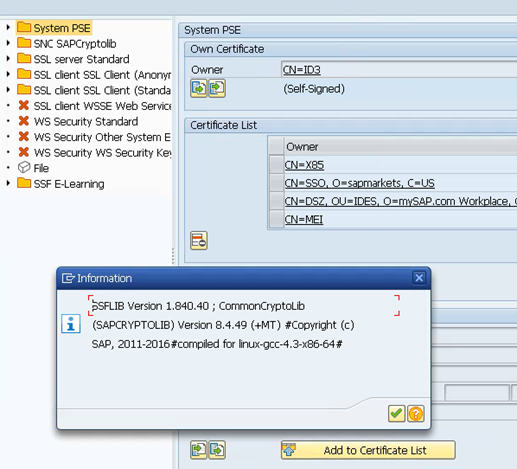
For systems where SAPCRYPTOLIB is installed, select the Environment and then Display SSF Version to view the version details.
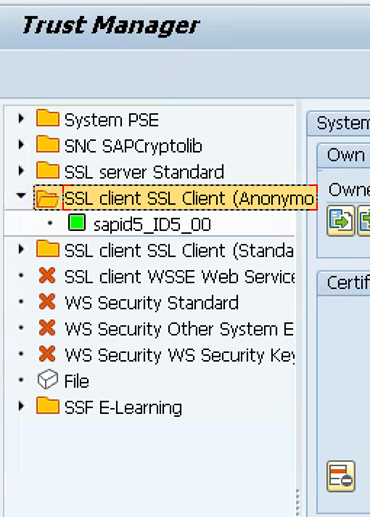
Step 2 - Create Anonymous SSL Client PSE
Create an Anonymous SSL Client
If the system appears in Green (as in the image below),
If the system appears with a red X, right-click on it and select Create
Step 3 - Import CA (CA Certificate Authority)
Important!
If you already have a Panaya certificate, please follow the instructions in this guide before proceeding to the next step.
Download the CA Certificate
Extract the file and import the certificate as described in the next steps
Double-click the name of the instance that shows under the SSL client identity (anonymous) folder to display the contents of this PSE. Select the left button.

Use the File Path field to select the certificate file to import, then select Base64 as the file format
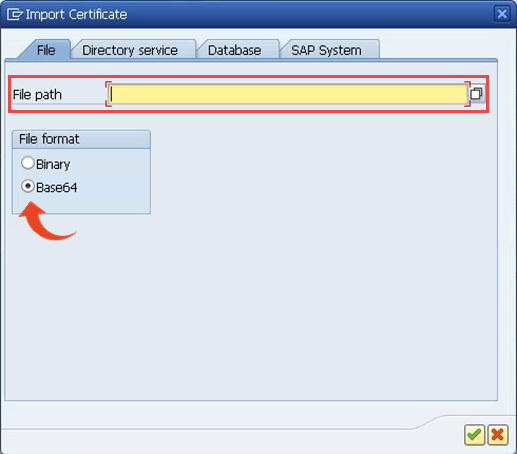
Click the V icon to submit.
The details of the certificate will be displayed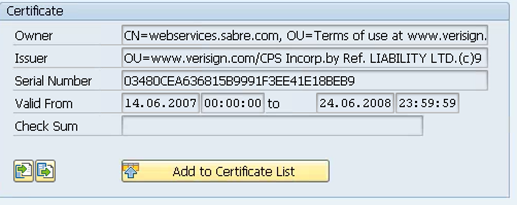
Click on the Add to Certificate List button
You should be able to view the name of the certificate added to the list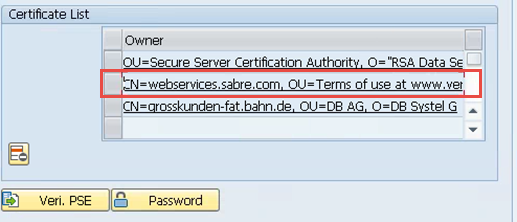
Click the Save button at the top of the screen
Older SAP version?
Older versions of SAP may prompt a notification that the ICM needs to be restarted in order for changes to take effect. In such cases, use TCOE SMICM as described below.
Step 4 - Set Server Parameters
Please set the system profile parameters as shown below:
icm/HTTPS/client_sni_enabled = TRUE
ssl/client_sni_enabled = TRUE
Important!
This activity stops the web server as well as the web client of the SAP system
Execute transaction SMICM
Select Administration > ICM > ExitSoft > Global from the menu options
After a few moments, click the Refresh button until you see the threads
Threads should appear as Available with Thread No.lower than 10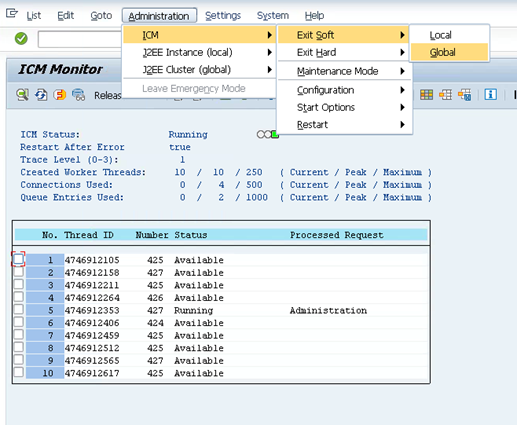
Additional certificates
If an intermediate certificate is required, download it here.
Note
We recommend that you install the latest SAPCRYPTOLIB library for succesfull certificate deployment.