Excel automation instructions allow automated tests to interact directly with Microsoft Excel files through the Microsoft Excel desktop application. These instructions enable tests to define a target Excel file and worksheet, read cell values, write cell values, and validate that the spreadsheet data matches the expected results. Using Excel as part of a test flow helps support data-driven testing and verification of values stored in external files.
A typical scenario includes opening the Excel file, defining the Excel context, retrieving cell values, using those values during the automation process, writing results to other cells, and validating that specific cells contain the expected data.
Run Excel and open the Excel file
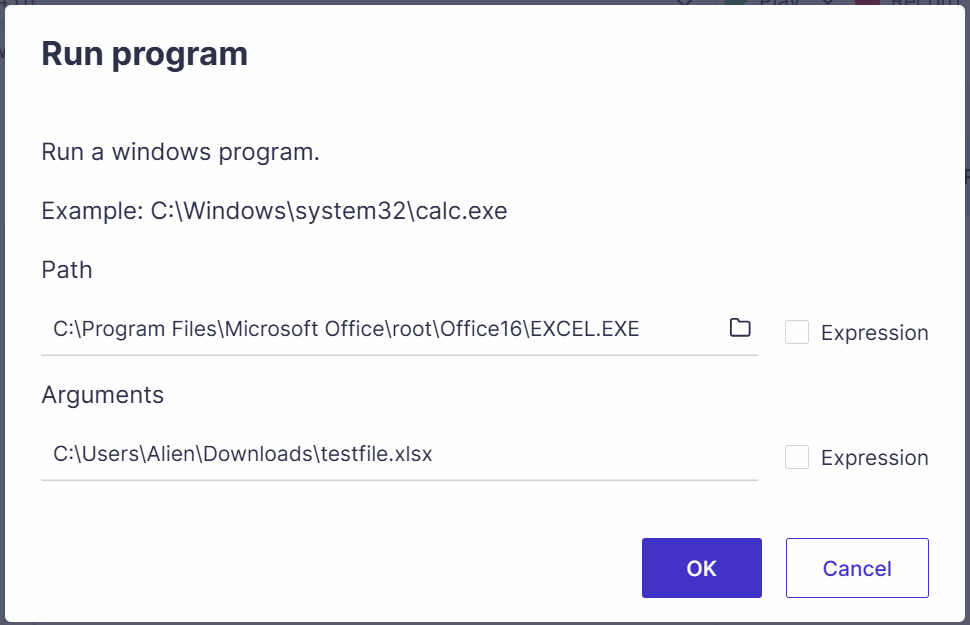
To run Excel and open the desired Excel file, use the ‘Run program’ instruction in ScriptBuilder.
For the Path, browse to the location of the Excel program (EXCEL.exe) and select it.
Into the Arguments field you can enter the location of the Excel file you wish to open, ensure to use a full path including the file extension. Both can be parameterized and maintained in a data set.
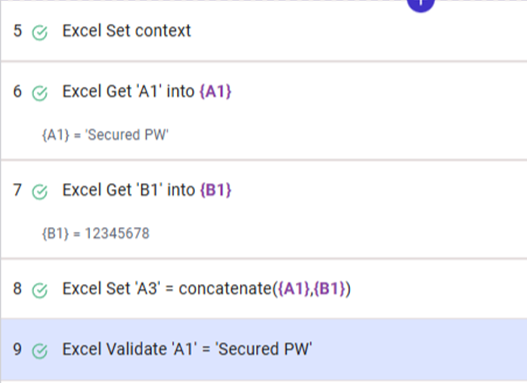
Set Excel context
The Set Excel context instruction defines the Excel file and worksheet that will be used by the following Excel instructions. Once the context is set, all Excel actions are performed within that defined file and worksheet.
Set Excel context
You must add a Set Excel context instruction to your script before using any of the Excel instructions below.
Set Excel cell
The Set Excel cell instruction writes a value into a specific Excel cell. The value can be entered directly or selected from a dropdown list if the Excel cell contains a predefined list.
Get Excel cell
The Get Excel cell instruction reads the value stored in a specified Excel cell and returns it to the automation flow. The retrieved value can then be used as a parameter or combined with other values during the test.
Validate Excel cell
The Validate Excel cell instruction checks that a specified Excel cell contains an expected value. This allows the automation to verify that the spreadsheet data matches the expected test result.
Populating multi-value parameters from Excel
You can define multi-value parameters and populate multiple values retrieved from Excel. These values can then be reused during the automation flow.