Automatic Custom Code Extraction & Upload
- 6 Minutes to read
- Print
- DarkLight
- PDF
Automatic Custom Code Extraction & Upload
- 6 Minutes to read
- Print
- DarkLight
- PDF
Article Summary
Share feedback
Thanks for sharing your feedback!
Panaya's solution requires an ABAP program installation on your SAP systems. This program performs the following high-level activities -
- Extraction of custom-developed ABAP code.
- Identification and extraction of used transactions - finding out which transactions are used in your production system.
- Extraction of defined systems in Solution Manager.
Prerequisites
Before starting the installation process, make sure you have the following privileges -
- Access to your SAP Development, QA, and Production system
- User with development permissions to -
- Display, create and execute ABAP programs
- Running jobs
We recommend selecting a user with SAP_ALL or a similar strong BASIS user authorizations
- A Panaya username and access token. Click here to learn how to create a Panaya Access Token.
- The defined user should be assigned with the Code Box - Upload ETL and API Execute permissions
- The defined user should be assigned to at least one active Panaya project at all times
- A Panaya supported browser
- Protocol HTTPS is enabled on the relevant SAP server with both Panaya Certificates | Learn more
- Internet connection to Panaya servers from the hosting server | Learn more
- .NET Framework, version 4.6.2 and above
- Panaya servers support TLS 1.2 only- your SAP system must have the below minimum versions -
- CommonCryptoLib 8.4 patch 38
- SAP kernel - 7.2 patch 88
- If migrating to HANA, please follow these instructions before you continue with this process
Step A - Download the ABAP Code
- Click on the Settings button
 , the Configuration view will appear
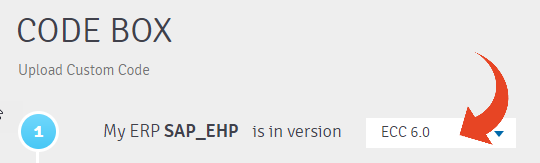
- Before you continue, check that the relevant System appears on the top left corner of the screen

- Panaya analysis is based on custom objects extracted from your system. In most cases, there are differences between objects in the development system and the production system. Because we are extracting the custom-developed objects only from one instance, please choose the system that best represents your needs for analysis.
Should you require assistance defining from which system in your landscape you should extract the custom code, please contact our support team, and they will be happy to answer any questions you may have.
- Select your current ERP version
- Download the ABAP code

 , the Configuration view will appear


If you are having trouble downloading the code, use the View option to copy and paste the code to your system.
If you are implementing the automatic code extract for the first time, be sure to use the latest code version available in Panaya Code Box. We recommend to download the latest code every 60 days to ensure you are using our latest improvements.
Step B - Create an Executable Program
This step explains how to install Panaya’s ABAP code extraction program on your SAP system. The ABAP extraction program reads the repository objects locally and extracts customer-developed objects from the system it runs on. The program also uses RFC connections to extract data from the production and other systems.
- Create an executable program named ZPANAYA_EXTRACT_PROG_LIB and import or paste the ABAP code.
- Save the program in a change request, should you need to execute it on other systems like QA or Production.
To learn how to install an ABAP program, click here
Step C - Define User Authorizations for RFC connections
Before you continue to the next step, please identify a user for the RFC.
It is critical that the RFC users have the required authorizations as described here.
Step D - Defining RFC Connections
In this step, you will define 3 RFC connections for Production, Solution Manager, and BW systems.
Follow these instructions on how to define RFC connections
Step E - Define the Extraction Program
- Log in to the relevant SAP system
- Start transaction SE38
- Type the program name ZPANAYA_EXTRACT_PROG_LIB and press the execute button (F8)
- The system will automatically perform a version validation check. If the automatic validation cannot be performed, a validate extraction button will appear. In this case, run the validation to avoid extraction failure.
- Under Execution mode, Full Extraction is selected by default.
Selecting Usage Only will result in extraction with usage information only.
To learn how to extract usage statistics only, click here.
Select Background and enter the Background Directory path (e.g. \tmp) on the SAP application server.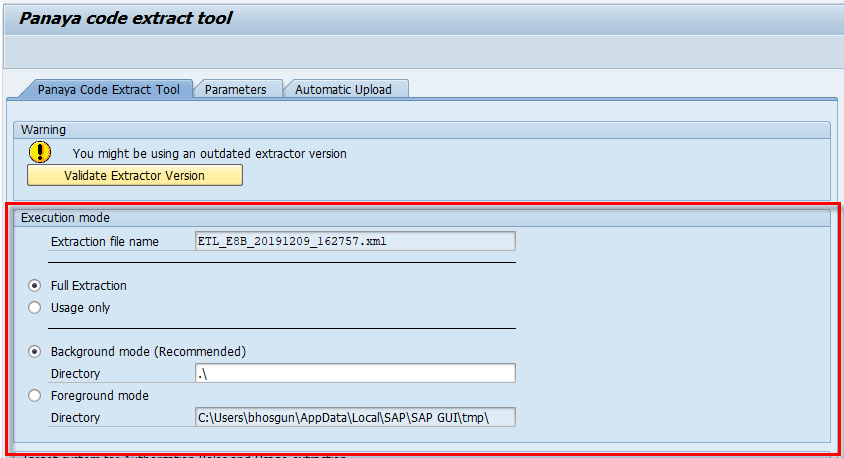
- For Target system for Roles and Usage extraction, under RFC destination, type - PANAYA_PRD
- If Systems' Roles in the Landscape section is available, follow the steps as described here.
- For Solution Manager target system for Systems extraction, under RFC destination, type - PANAYA_SM
- For BW target system for BW extraction, under RFC destination, type - PANAYA_BW
- If migrating to HANA 2.0, under HANA SAP Code Inspector execution mode select between options A, B, or C as described in this article.

Note
The program normally runs between 45 minutes to two hours, depending on the extent of custom objects developed in your system and usage information, although in some cases may take longer.
Step F - Set Automatic Custom Code Upload
In this step, you will define the direct upload settings -
- Select the Automatic Upload tab (will only appear if Step E was completed successfully)
- Check the Upload extraction to Panaya option
- Select the Login via token option
Click here to learn how to generate a Panaya token - Under Login Credentials, fill in your Panaya username (used to login to Panaya) and the Access Token that you generated.Note
The defined user should be assigned with the Code Box - Upload ETL and API Execute permission.
The username (email) generating the Access Token for automatic custom code upload is case sensitive, it must be entered exactly the same way that it is maintained in PanayaIs your system behind a Proxy?
If so, you should also provide the Proxy details in the Proxy Configuration section. These details should be provided by your IT administrator - Proxy Host, Port, User, and Password.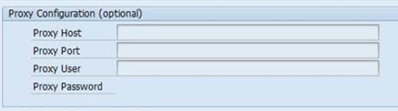
Click on Validate Compress Command to verify that the relevant SAP server is able to perform the compression process.
If the process is not completed successfully, refer to our Compression Utility Definition for Version ECC6.0
Enter TCODE SMICM and then, from the top menu, select Services (Shift+F1)
Verify that -
- Protocol HTTPS with Service Name/Port 443 appears under Active Services
- Host Name is similar to your SAP Host Name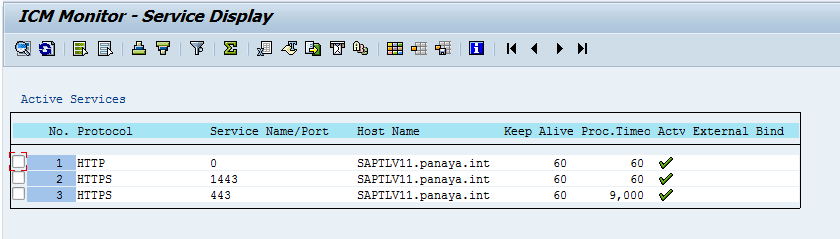 If you do not see this information displayed, contact your SAP Administrator to enable HTTPS protocol support
Click on Validate Login to Panaya to verify that the defined user is able to successfully log in to the Panaya cloud via the relevant SAP server


 If you do not see this information displayed, contact your SAP Administrator to enable HTTPS protocol support
All information uploaded to Panaya via the website is encrypted using SSL technology Read more.
Step G - Execute the Extraction Program
- Log in to the relevant SAP system
- Start transaction SE38
- Type the program name ZPANAYA_EXTRACT_PROG_LIB and press the execute button (F8)
- Configure the program parameters according to your usual configuration
- Make sure the program is selected to run in background
- Press CTRL+S in order to save a new run variant
- Name this variant API_AUTOMATION and provide a description (e.g. Panaya Running Variant)
- In the attribute, grid locate the Field name P_FILEN (top row) and check the box Save field without values
- Click Save
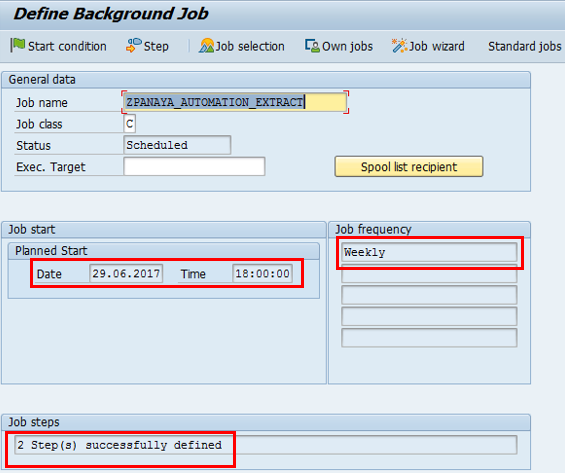
Step H - Generate a Scheduled Job
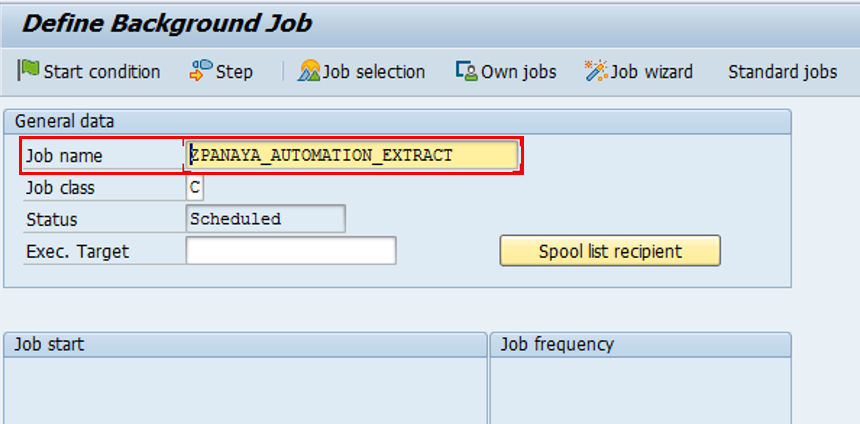
- Execute transaction SM36
- Fill in the job name - ZPANAYA_AUTOMATION_EXTRACT
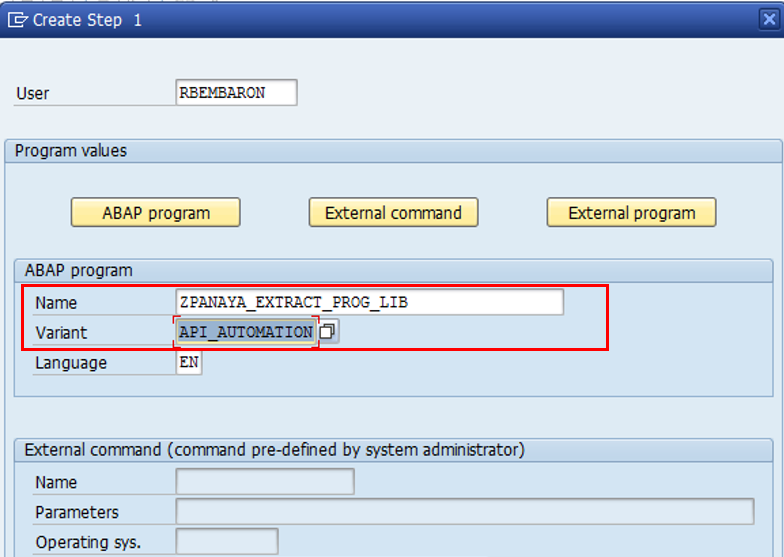
- Click on the Step button

- Under ABAP Program section, select ZPANAYA_EXTRACT_PROG_LIB and variant API_AUTOMATION
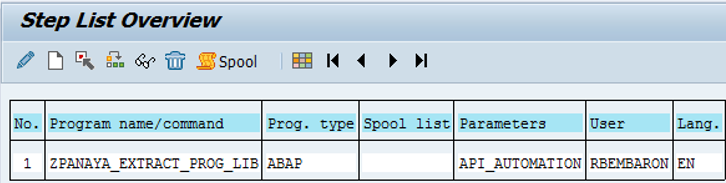
- Save your work. The following step should appear.
- Click on the Back button and then Start Condition
- Click on the Date/Time Button and define the date and time for the Panaya extractor to be executed.
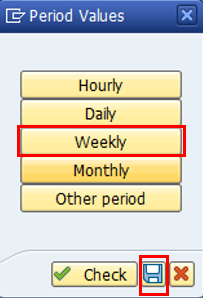
Check the Periodic Job option and then click on the Periodic values button.
- Select the Weekly option and Save
- Click Save again
- The following screen will appear


Good to Know!
By default, Automatic Custom Code Upload will update all active projects.
If you wish to update non-upgrade active projects only, you should manually upload your custom code, and select this option when uploading the ZIP file.
If you wish to update non-upgrade active projects only, you should manually upload your custom code, and select this option when uploading the ZIP file.
For Release Dynamix - The new extraction will update non-upgrade active projects by default.